Add a dash of holiday humor to your home with the Amigurumi Santa Toilet Paper Holder, a festive and functional crochet creation that’s sure to spark smiles! 🎅🧶 With his classic red suit, fluffy beard, and jolly expression, Santa transforms an everyday essential into a cheerful Christmas companion. Whether perched in the bathroom or gifted as a quirky stocking stuffer, this merry design brings a playful twist to seasonal décor.
Perfect for crocheters who love mixing whimsy with practicality, this pattern invites you to stitch up a holiday helper that’s both charming and useful. Customize Santa’s outfit with glittery yarn, add a tiny belt buckle, or pair him with other bathroom-themed holiday accents for a complete look. The Amigurumi Santa Toilet Paper Holder is a joyful way to stitch up laughter, warmth, and a sprinkle of handmade holiday magic—one loop at a time! 🧵🎄

🎅 Amigurumi Santa Toilet Paper Holder Crochet Pattern
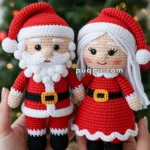
Bring some holiday cheer to your bathroom with this adorable seated Santa that cradles a real toilet paper roll! He wears a soft slouchy red hat trimmed with plush white yarn, has shiny black eyes, a round beige nose, rosy cheeks, a fluffy crescent beard, and a separate curled moustache. His red coat features a gold buckle belt, straight white trims, short red legs with thick white ankle bands, and perfectly rounded black boots. 🧻✨
🧶 Skill Level
Confident Beginner / Intermediate (spiral rounds, color changes, simple shaping, and light seaming).
📏 Finished Size
Seated height: approximately 24–26 cm (9.5–10.25″)
Width: approximately 12–13 cm
Wrist gap: approximately 7 cm (fits a standard roll)
🧵 Yarn Amounts (Approx.)
- Red (sport–DK, ~160–180 m/50 g): 130 g
- Black (same weight): 60–65 g
- White (same weight, for trims, eyebrows, and moustache): 75 g
- Skin tone / Beige (same weight): 45 g
- Plush / Chenille white (#5–6, for beard, hat brim, collar, pom-pom): 80 g
- Yellow (for buckle): 5 g
🧰 Notions & Tools
- Crochet hook 3.0 mm for regular yarns
- Crochet hook 5.0 mm for plush yarn
- Safety eyes 14 mm (1 pair)
- Fiberfill stuffing (~120 g)
- Plastic pellets in a small pouch (optional, for weight)
- Tapestry needle, pins, stitch markers, scissors
- Blush or pink yarn for cheeks
- (Optional) Clear elastic or nylon thread to join wrists
🔤 Abbreviations (US)
MR = magic ring
sc = single crochet
inc = 2 sc in 1 st (increase)
dec = invisible decrease
sl st = slip stitch
ch = chain
hdc = half double crochet
dc = double crochet
BLO = back loop only
FLO = front loop only
st(s) = stitch(es)
Work in a spiral unless stated. Stuff as you go. Stitch counts are shown at the end of each round.
🪄 HEAD (Skin Tone)
Hook: 3.0 mm
R1: MR 6 sc (6)
R2: inc x6 (12)
R3: (sc, inc) x6 (18)
R4: (2 sc, inc) x6 (24)
R5: (3 sc, inc) x6 (30)
R6: (4 sc, inc) x6 (36)
R7: (5 sc, inc) x6 (42)
R8: (6 sc, inc) x6 (48)
R9: (7 sc, inc) x6 (54)
R10: sc around (54)
R11: sc around (54)
R12: sc around (54) → insert 14 mm eyes between R12–R13, 9 sts apart
R13: sc around (54)
R14: sc around (54)
R15: sc around (54)
R16: (7 sc, dec) x6 (48)
R17: (6 sc, dec) x6 (42)
R18: (5 sc, dec) x6 (36)
R19: (4 sc, dec) x6 (30)
R20: (3 sc, dec) x6 (24)
R21: (2 sc, dec) x6 (18)
R22: (sc, dec) x6 (12)
R23: dec x6 (6) — FO and close.
Cheeks: Add blush under eyes.
👃 NOSE (Skin Tone)
R1: MR 6 sc (6)
R2: inc x6 (12)
R3: sc around (12)
R4: (sc, dec) x4 (8) — Stuff lightly, FO with a long tail. Sew below eyes.
🧔 BEARD (Plush White, 5.0 mm)
Row 1: Ch 24
Row 2: Sc in 2nd ch and across (23), ch 1, turn
Row 3: inc, sc 21, inc, ch 1, turn (25)
Row 4: inc, sc 23, inc, ch 1, turn (27)
Row 5: sc 9, skip 7 sts for mouth, sc 11, ch 1, turn (20 worked)
Row 6: inc, sc 8, inc, ch 7, inc, sc 8, inc, ch 1, turn
Row 7: sc evenly (28) without stitching into the ch-7 space
Row 8: sc across (28) — FO with long tail. Sew around cheeks leaving the mouth gap open.
🥸 MOUSTACHE – LEFT & RIGHT (White)
R1: MR 6 sc (6)
R2: (sc, inc) x3 (9)
R3: sc around (9)
R4: (sc, dec) x3 (6) — FO. Curve and sew above beard opening, tips outward.
👄 MOUTH (Red)
R1: MR 6 sc (6)
R2: (sc, inc) x3 (9)
R3: sc around (9) — FO. Sew inside beard opening. (Optional: add black felt behind for depth.)
🤍 EYEBROWS ×2 (White)
Row 1: Ch 8, sc in 2nd ch and across (7) — FO. Sew curved above eyes.
🎅 HAT (Red Cone, Plush White Brim & Pom-Pom)
Cone (Red, 3.0 mm):
R1: MR 6 sc (6)
R2: (sc, inc) x3 (9)
R3: sc around (9)
R4: (2 sc, inc) x3 (12)
R5: sc around (12)
R6: (3 sc, inc) x3 (15)
R7: sc around (15)
R8: (4 sc, inc) x3 (18)
R9: sc around (18)
R10: (5 sc, inc) x3 (21)
R11: sc around (21)
R12: (6 sc, inc) x3 (24)
R13: sc around (24)
R14: (7 sc, inc) x3 (27)
R15: sc around (27)
R16: (8 sc, inc) x3 (30)
R17: sc around (30)
R18: (9 sc, inc) x3 (33)
R19: sc around (33)
R20: (10 sc, inc) x3 (36)
R21: sc around (36) — FO red.
Brim (Plush White, 5.0 mm):
R22: Join in FLO of R21, sc around (36)
R23: sc around (36)
R24: sc around (36) — FO. Fold once, tack, and add a 4–4.5 cm pom-pom at the tip.
🧥 BODY / COAT (Red, Black Belt, White Trim)
Body (Red, 3.0 mm):
R1: MR 6 sc (6)
R2: inc x6 (12)
R3: (sc, inc) x6 (18)
R4: (2 sc, inc) x6 (24)
R5: (3 sc, inc) x6 (30)
R6: (4 sc, inc) x6 (36)
R7: (5 sc, inc) x6 (42)
R8: (6 sc, inc) x6 (48)
R9: (7 sc, inc) x6 (54)
R10–R15: sc around (54) — Insert pellets pouch and start stuffing.
R16–R17: Change to black (belt), sc around (54)
R18: Change to red, sc around (54)
R19: (7 sc, dec) x6 (48)
R20: (6 sc, dec) x6 (42)
R21: (5 sc, dec) x6 (36)
R22: (4 sc, dec) x6 (30)
R23: (3 sc, dec) x6 (24)
R24: sc around (24) — FO with long tail. Finish stuffing.
Bottom Trim (White):
Join to FLO of R10, sc around (54)
Next: sc around (54)
Final: crab stitch around — FO.
Collar (Plush White, 5.0 mm):
Join to FLO of R23, sc around (24)
Next: sc around (24) — FO.
Belt Buckle (Yellow):
Row 1: Ch 12, sl st to join.
Row 2: 16 sc evenly to square the ring — FO and sew over the belt front.
💪 ARMS ×2 (Skin, White, Red)
Hand (Skin, 3.0 mm):
R1: MR 6 sc (6)
R2: inc x6 (12)
R3–R4: sc around (12)
R5: (4 sc, dec) x2 (10)
R6–R7: sc around (10)
R8: sc 3, join Thumb with 2 sc, sc 5 (10)
Cuff (White):
R9: Change to white BLO, sc around (10)
R10: sc around (10) — FO white.
Sleeve (Red):
R11–R20: Join red BLO of R9, sc around (10) — FO.
Stuff hand and first 2–3 rounds of sleeve only.
Thumb (Make 2):
R1: MR 4 sc (4)
R2: inc, sc 3 (5)
R3: sc around (5) — FO. Attach at R8.
🥾 BOOTS / LEGS ×2 (Black, White, Red)
Boot (Black, 3.0 mm):
R1: MR 6 sc (6)
R2: inc x6 (12)
R3: (sc, inc) x6 (18)
R4: (2 sc, inc) x6 (24)
R5–R7: sc around (24)
R8: (2 sc, dec) x6 (18)
R9: (sc, dec) x6 (12) — Stuff firmly.
Ankle Band (White):
R11–R13: Change to white, sc around (12) — FO.
Upper Leg (Red):
R14–R17: Join red, sc around (12) — FO. Lightly stuff.
🧩 ASSEMBLY
- Sew head to top of body.
- Attach plush collar under beard.
- Sew beard around face with open mouth window.
- Add facial features: moustache, nose, eyebrows, mouth.
- Put on hat, bend tip to one side, and attach pom-pom.
- Sew arms angled forward; tack wrists together (~7 cm gap).
- Attach belt buckle at front center.
- Sew legs at front base, boots flat for sitting.
- Add blush if desired.
🧻 POSE WITH THE ROLL
Sit Santa on a flat surface. Place a standard toilet paper roll horizontally between his wrists. Secure lightly with clear elastic under the cuffs if needed.
🎁 Outro
That’s it—your merry little bathroom helper is complete! If you make this Santa, I’d love to see your version—share a pic or tag your post so others can be inspired too. Happy hooking and happy holidays! 🎅🧻✨