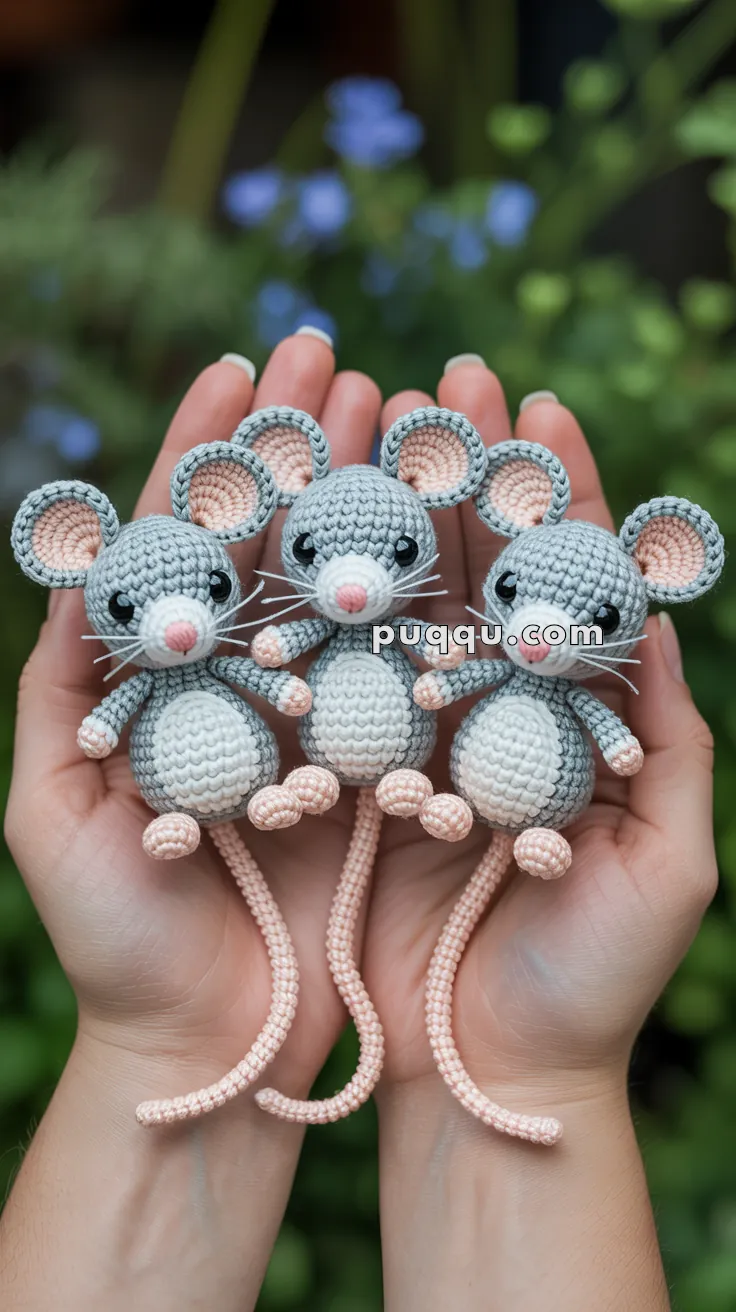
Say hello to the Adorable Amigurumi Mouse, a tiny bundle of cuteness that’s sure to scamper right into your heart! 🐭🧶 With its oversized ears, round cuddly body, long curly tail, and soft white belly patch, this little mouse is the perfect mix of playful and sweet. Whether perched on a shelf, tucked into a gift box, or added to a whimsical woodland scene, it brings charm and character to every stitch.
Perfect for crocheters who love expressive details and cozy textures, this pattern invites you to personalize your mouse with fun color combos, tiny accessories, or even a little cheese companion. Stitch up one as a pocket-sized friend or create a whole family of mice for extra delight. The Adorable Amigurumi Mouse is a joyful way to stitch up smiles, snuggles, and a sprinkle of handmade magic—one loop at a time! 🧵💛
🐭 Adorable Amigurumi Mouse Crochet Pattern
Looking for a quick yet charming crochet project? This little amigurumi mouse is the perfect choice! With its oversized ears, round body, long curly tail, and soft white belly patch, this mouse is both playful and sweet. It makes a wonderful handmade gift, a keepsake, or even a cute addition to your amigurumi collection.
✨ Skill Level
Beginner to Intermediate – You should be comfortable with working in the round, increasing and decreasing, and sewing small parts.
📏 Finished Size
- Height (without tail): 3–4 inches (7–10 cm)
- Total length with tail: 7–8 inches (18–20 cm)
🧶 Materials Needed
- Yarn (Light Worsted or DK weight):
- Grey – 25g (approx. 65 yards)
- Light peach/skin tone – 15g (approx. 40 yards)
- White – 10g (approx. 25 yards) for muzzle & belly
- Pink – small amount for nose
- Black – small amount (optional, for embroidered eyes)
- Crochet hook: 2.5 mm or 3 mm
- Safety eyes: 6 mm (1 pair per mouse)
- Stuffing: Polyester fiberfill
- Tapestry needle
- White embroidery thread or fishing line (for whiskers)
- Stitch markers (optional)
📝 Abbreviations (US Terms)
- MR = magic ring
- ch = chain
- sc = single crochet
- inc = increase (2 sc in one stitch)
- dec = decrease (single crochet 2 together)
- st(s) = stitch(es)
- rnd = round
Pattern Notes
- Work in continuous rounds unless otherwise specified.
- Use a stitch marker to keep track of your rounds.
- Stuff as you go for best shaping.
- Insert safety eyes between rounds 8–10 of the head before stuffing.
🪡 Pattern Instructions
Head & Body (One Piece)
With grey yarn:
- MR, 6 sc (6)
- inc around (12)
- (sc, inc) x 6 (18)
- (2 sc, inc) x 6 (24)
- (3 sc, inc) x 6 (30)
6–10. sc around (30) - (3 sc, dec) x 6 (24)
- sc around (24)
- (2 sc, dec) x 6 (18)
👉 Insert safety eyes between rnds 8–10, spaced 6–8 sts apart. - sc around (18)
- (2 sc, inc) x 6 (24)
16–18. sc around (24) - (2 sc, dec) x 6 (18)
- (sc, dec) x 6 (12)
Stuff firmly. - dec around (6)
FO, close hole, weave in.
Muzzle
With white yarn:
- MR, 6 sc (6)
- inc around (12)
- sc around (12)
FO, leaving long tail. Stuff lightly and sew to front of head, centered below eyes.
Embroider a small pink nose on top center.
Belly Patch (Oval)
With white yarn:
- ch 7, sc in 2nd ch from hook, sc 4, 3 sc in last ch. Continue on other side of chain: sc 4, 2 sc in last st (13)
- inc, sc 4, inc x 3, sc 4, inc x 2 (19)
- sc, inc, sc 4, (sc, inc) x 3, sc 4, (sc, inc) x 2 (25)
FO, flatten into oval. Sew vertically to the front center of body.
Ears (Make 2)
Outer ear (grey):
- MR, 6 sc (6)
- inc around (12)
- (sc, inc) x 6 (18)
- (2 sc, inc) x 6 (24)
FO, leave tail.
Inner ear (peach):
- MR, 6 sc (6)
- inc around (12)
- (sc, inc) x 6 (18)
FO, leave tail.
Assembly: Sew peach piece inside grey piece. Pinch slightly at base to cup. Sew to head between rnds 6–8.
Arms (Make 2)
Start with peach:
- MR, 5 sc (5)
2–3. sc around (5)
Switch to grey:
4–8. sc around (5)
FO, leave tail. Do not stuff. Flatten and sew to body sides.
Legs (Make 2)
Start with peach:
- MR, 6 sc (6)
- inc around (12)
- sc around (12)
Switch to grey:
4–5. sc around (12) - (sc, dec) x 4 (8)
- sc around (8)
FO, leave tail. Stuff lightly. Sew to body bottom.
Tail
With peach yarn:
- ch 40–45 (or longer for curl).
- sc across chain.
FO, leave tail, sew to back bottom of body.
Facial Details
- Nose: Embroider with pink yarn onto muzzle.
- Whiskers: Insert 3–4 strands of white embroidery thread or fishing line into each side of muzzle. Trim evenly.
🧵 Assembly Tips
- Sew muzzle first, then belly patch.
- Attach ears high on the head for a classic mouse look.
- Sew arms at shoulder line.
- Legs should angle forward so the mouse can “sit.”
- Attach tail to back center low point.
🎉Congratulations – your adorable amigurumi mouse is complete! 🐭
This little mouse looks sweet on its own, but even better as part of a family. Try different yarn colors for variety, or add tiny bows, scarves, or even a piece of “cheese” for extra character. Whether as a gift, an ornament, or just a fun companion, this mouse is sure to bring smiles.