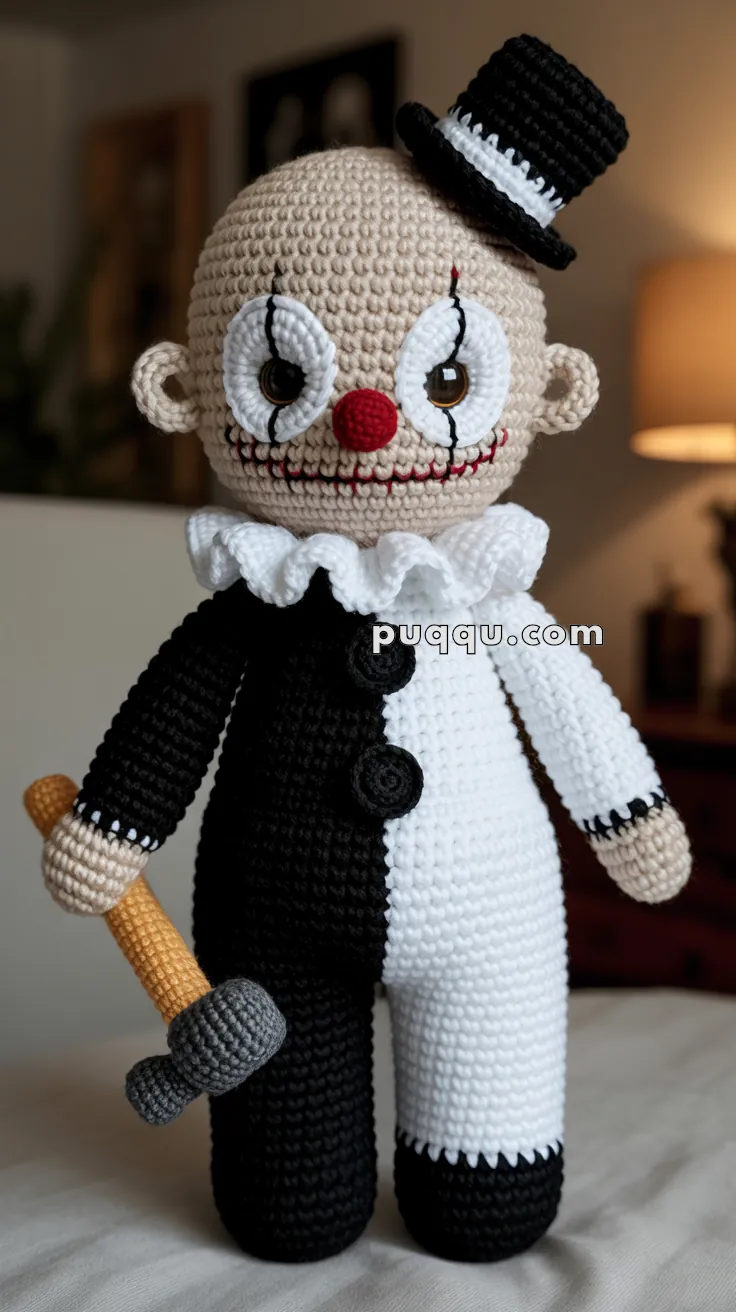
Step into the spooky side of stitching with the Amigurumi Art the Clown, a hauntingly detailed crochet creation that’s perfect for Halloween thrills! 🎪🧶 With his signature black-and-white split costume, stitched-on smile, ruffled collar, and eerie little top hat, this doll captures all the unsettling charm of the infamous character—minus the scares. Whether you’re crafting for a horror-themed display, a creepy gift, or just adding a touch of frightful fun to your handmade collection, Art is sure to make a spine-tingling statement.
Ideal for crocheters who love character-inspired designs and bold details, this pattern invites you to explore dramatic contrasts, expressive shaping, and a dash of theatrical flair. Add a tiny prop, pose him with other spooky figures, or place him center stage in your Halloween setup. The Amigurumi Art the Clown is a chillingly fun way to stitch up mischief, mystery, and a whole lot of handmade horror—one loop at a time! 🧵🕷️
🤡 Amigurumi Art the Clown Crochet Pattern
Bring some spooky fun to your crochet collection with this Amigurumi Art the Clown! Dressed in his black-and-white split costume, stitched smile, oversized ruffled collar, and tilted top hat, he’s the ultimate Halloween-inspired doll. Complete with his hammer, this creepy yet playful project is perfect for advanced beginners and intermediate crocheters who love making unique characters.
✨ Skill Level
Intermediate – color changes, embroidery, and assembling multiple parts.
📏 Finished Size
Approx. 11–12 in (28–30 cm) tall with DK yarn and a 3.0 mm hook.
🧶 Materials
- Beige yarn – 50 g (skin)
- Black yarn – 100 g (half costume, button, hat)
- White yarn – 100 g (half costume, collar, hat band)
- Red yarn – scrap (nose, mouth)
- Yellow yarn – 20 g (hammer handle)
- Gray yarn – 30 g (hammer head)
- 12–14 mm black safety eyes
- Black embroidery thread (eye streaks, mouth details)
- Fiberfill stuffing (~80–100 g)
- Crochet hook: 3.0 mm
- Tapestry & embroidery needles, scissors, stitch markers
🪡 Abbreviations (US Terms)
MR – Magic Ring
sc – single crochet
inc – increase (2 sc in same st)
dec – decrease (sc2tog)
ch – chain
sl st – slip stitch
FO – fasten off
🧵 Pattern Instructions
Head (Beige)
- MR, 6 sc (6)
- inc around (12)
- (sc, inc) x6 (18)
- (2 sc, inc) x6 (24)
- (3 sc, inc) x6 (30)
- (4 sc, inc) x6 (36)
- (5 sc, inc) x6 (42)
8–18. sc around (42) - (5 sc, dec) x6 (36)
- (4 sc, dec) x6 (30)
- (3 sc, dec) x6 (24)
- (2 sc, dec) x6 (18) – stuff firmly
- (sc, dec) x6 (12)
- dec around (6). FO.
- Eye patches (white, make 2): MR 6, inc to 12, (sc, inc) x6 (18). FO. Sew to face, insert safety eyes through.
- Nose (red): MR 6, inc to 12, 2 rounds sc. Stuff lightly, sew centered.
- Mouth: Embroider wide red smile. Add black vertical stitch lines across.
- Eye streaks: Embroider vertical black lines above and below eyes.
- Ears (x2, beige): MR 6, sc around (6). FO, flatten and sew to sides.
Body (Black/White Split)
- MR, 6 sc (6)
- inc around (12)
- (sc, inc) x6 (18)
- (2 sc, inc) x6 (24)
- (3 sc, inc) x6 (30)
6–20. sc around (30), working 15 sts black, 15 sts white each round. - (3 sc, dec) x6 (24)
- (2 sc, dec) x6 (18)
Stuff firmly. FO.
- Buttons (black, make 2): MR 6, sc around (6). FO. Sew down the black half of torso.
Legs (Make 2)
- One in black, one in white.
- MR, 6 sc (6)
- inc around (12)
- (sc, inc) x6 (18)
4–18. sc around (18).
FO, stuff firmly, sew to bottom of body.
👉 Add 2 rounds of opposite color at ankle for flat cuff trim.
Arms (Make 2)
- One in black, one in white.
Start with beige:
- MR, 6 sc (6)
- inc around (12)
3–5. sc around (12) (hand)
Switch to sleeve color:
6–14. sc around (12).
FO, stuff lightly, sew to sides.
👉 Add 2 rounds of opposite color at wrist for cuff trim.
Collar (White)
Ch 65.
Row 1: sc across.
Row 2: (dc, dc-inc) in each st across → full ruffles.
FO. Sew snugly around neckline.
Hat (Black with White Band + Brim)
Brim: MR, 6 sc, inc evenly to 30 sts. Work 2 rounds flat. FO.
Hat Body:
- MR, 6 sc (6)
- inc around (12)
- (sc, inc) x6 (18)
- (2 sc, inc) x6 (24)
5–10. sc around (24) in black
11–12. sc around in white (band)
13–15. sc around in black
FO, stuff lightly.
Sew hat body onto brim. Attach tilted to head.
Hammer
Handle (Yellow)
- MR, 6 sc (6)
- (sc, inc) x3 (9)
3–12. sc around (9). FO, stuff firmly.
Head (Gray)
- MR, 6 sc (6)
- inc around (12)
- (sc, inc) x6 (18)
- (2 sc, inc) x6 (24)
5–11. sc around (24) → thick barrel shape - (2 sc, dec) x6 (18)
- (sc, dec) x6 (12)
- dec around (6). FO, stuff very firmly.
Sew head to handle.
Assembly
- Sew legs to bottom of body (black left, white right).
- Attach arms with wrist trims visible.
- Sew head onto body securely.
- Add collar around neckline.
- Attach black buttons down torso.
- Sew tilted hat onto head.
- Place hammer in one hand, secure with stitches.
Finishing Touches
✔ Shape collar evenly for volume.
✔ Adjust stitched smile for creepiness.
✔ Position hammer for best display.
✔ Add blush or shading under eyes for eerie detail.
Outro
Your Amigurumi Art the Clown is complete! With his stitched smile, half-and-half costume, big ruffled collar, tilted hat, and hammer, he’s a spine-chilling star for Halloween or a collector’s shelf. Handmade with yarn and creativity, this unique amigurumi brings a mix of creepy charm and crochet fun to your projects.