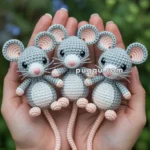
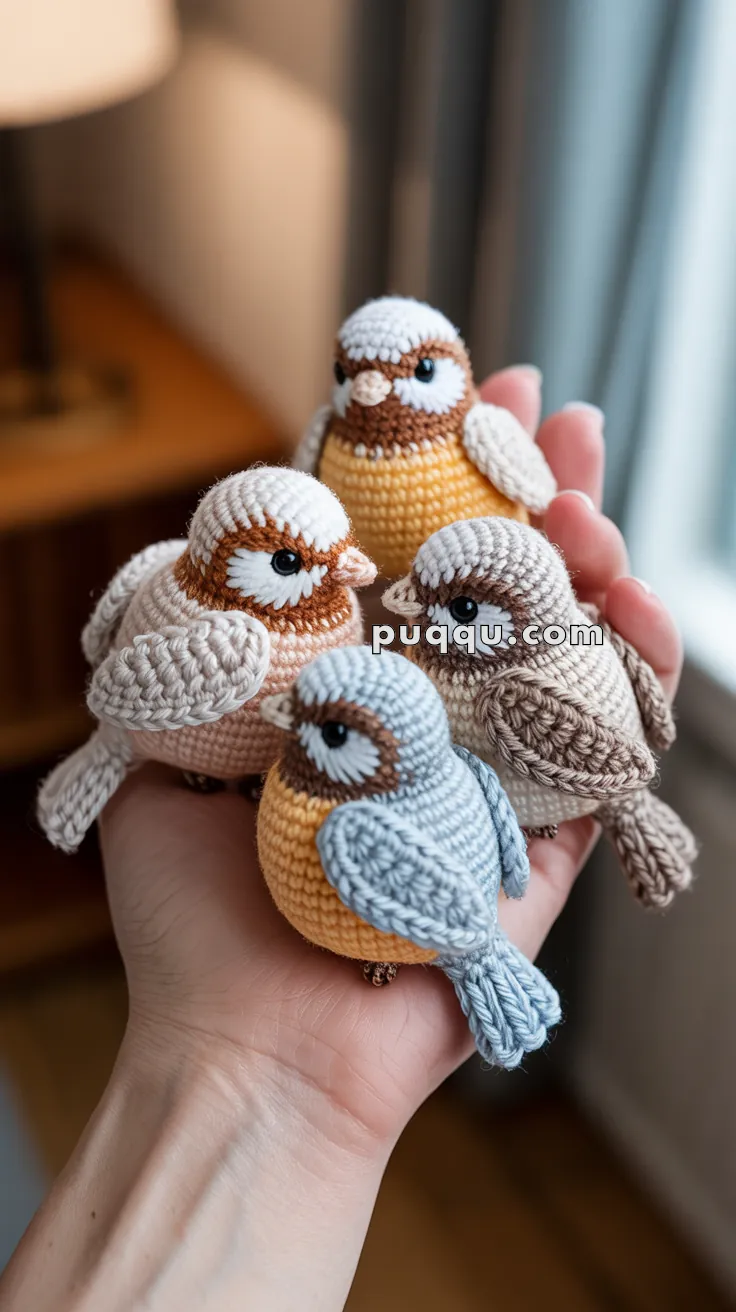
Brighten your day with the Amigurumi Little Birds, a delightful flock of four feathered friends ready to chirp their way into your heart! 🐦🧶 These tiny crocheted birds are bursting with charm, each one featuring its own sweet personality and colorful plumage. Whether perched on a windowsill, nestled into a springtime wreath, or gifted as cheerful companions, they’re the perfect way to add a touch of handmade joy to any space.
Perfect for crocheters who love quick, playful projects, this pattern invites you to mix and match colors, experiment with wing styles, and customize each bird with tiny details. Stitch up a rainbow of birds for a vibrant display or create a matching set for a themed décor piece. The Amigurumi Little Birds are a joyful way to stitch up whimsy, warmth, and a whole lot of tweet-worthy charm—one loop at a time! 🧵🌸
🐦 Amigurumi Little Birds Crochet Pattern
Bring the charm of nature into your hands with these adorable crochet birds! Their rounded bodies, tiny wings, and expressive eyes make them the perfect gift, toy, or home décor accent. You can customize the colors to match real-life sparrows, bluebirds, or even make a rainbow flock.
Skill Level: Intermediate
Time to Complete: 1-2 hours per bird
Finished Size: Approximately 2.5-3 inches tall
What You’ll Need
Yarn
- Sport weight or DK weight yarn in various colors:
- Main body colors (beige, tan, dusty blue, mustard yellow)
- White or cream for face/head
- Brown for eye mask stripe
- Peachy-pink for beak
Tools & Notions
- 2.5mm or 3.0mm crochet hook
- Black safety eyes (4-6mm) OR black embroidery thread
- Polyester fiberfill stuffing
- Yarn needle for sewing
- Stitch markers (optional)
- Scissors
Abbreviations & Stitches
- ch = chain
- sc = single crochet
- inc = increase (2 sc in one stitch)
- dec = invisible decrease
- sl st = slip stitch
- MR = magic ring
- hdc = half double crochet
Before You Begin: Pattern Notes
- The body and head are worked as ONE PIECE – not separately
- Work in continuous spiral rounds unless otherwise specified
- Change colors as indicated for the color-blocked effect
- All birds have a white/cream head, brown eye stripe, and colored body
- Use a stitch marker to track the beginning of rounds
- Stuff as you go for best results
The Pattern
Body & Head (One Piece)
Starting with main body color (bottom section):
Round 1: 6 sc in magic ring (6)
Round 2: inc in each st around (12)
Round 3: sc 1, inc repeat 6 times (18)
Round 4: sc 2, inc repeat 6 times (24)
Rounds 5-6: sc in each st around (24) – 2 rounds
Change to chest/middle color (mustard yellow, beige, or peachy tone):
Rounds 7-9: sc in each st around (24) – 3 rounds
Change to white/cream for head:
Rounds 10-11: sc in each st around (24) – 2 rounds
Round 12: sc 2, dec repeat 6 times (18)
Begin stuffing the body firmly now.
Rounds 13-14: sc in each st around (18) – 2 rounds
Round 15: sc 1, dec repeat 6 times (12)
Stuff head firmly.
Round 16: dec 6 times (6)
Fasten off, thread through remaining stitches and pull tight to close.
Wings (Make 2)
Wings are small, rounded ovals that are sewn flat against the body.
Round 1: 6 sc in magic ring (6)
Round 2: inc in each st around (12)
Round 3: sc in each st around (12)
Fasten off, leaving a long tail for sewing.
Flatten the wing into an oval shape. Do not stuff.
Tail Feathers
The tail appears to have 2-3 small pointed feathers.
Option 1 – Individual Feather Method:
Ch 5, starting in 2nd ch from hook: sl st, sc, hdc, sc. Fasten off.
Make 2-3 of these and sew together at base, then attach to body.
Option 2 – Connected Feathers:
Ch 6
Feather 1: In 2nd ch from hook: sc, hdc, sc, sl st
Ch 4
Feather 2: In 2nd ch from hook: sc, hdc, sc, sl st
Fasten off, leave tail for sewing.
Beak
With peachy-pink yarn:
Round 1: 3 sc in magic ring (3)
Round 2: sc 3 (3)
Fasten off, leaving long tail. This creates a tiny cone shape.
Brown Eye Stripe
Option 1 – Crocheted Stripe:
With brown yarn, ch 12-15 (adjust length to fit around head)
Fasten off, leaving tails on both ends for sewing.
Option 2 – Embroidered:
Embroider a brown stripe directly onto the white head using duplicate stitch or chain stitch embroidery.
Putting It All Together
Assembly Instructions
Step 1: Create the Brown Eye Band
Position the brown stripe horizontally across the face in the upper-middle area of the white head section (approximately rounds 11-12). The stripe should go completely around the head, connecting on both sides. Sew or embroider in place.
Step 2: Add the Eyes
Position black safety eyes or embroider black dots in the CENTER of the brown stripe area, one on each side of the head. The eyes sit within the brown band, creating the characteristic masked appearance.
Step 3: Attach the Beak
Position the tiny beak at the front center of the face, just below the brown eye stripe. Sew securely with the point facing outward and slightly downward.
Step 4: Attach the Wings
Flatten each wing into an oval shape. Position wings on either side of the body at approximately where the chest color meets the white head (around rounds 9-10). Sew the wings completely flat against the body, with the rounded edge facing slightly backward and downward. The wings should be positioned fairly high on the body and lie close to the sides.
Step 5: Attach the Tail
Position the tail feathers at the back of the body at the bottom (rounds 2-4 area). Sew securely, allowing feathers to point outward and slightly upward.
Color Inspiration
Here are the color combinations shown in the featured birds:
Bird 1 (Front Left – Peachy/Cream Bird):
- Bottom: Cream/beige
- Chest: Peachy-pink/light coral
- Head: White
- Eye stripe: Brown
- Wings: Cream/beige
Bird 2 (Back – Yellow Bird):
- Bottom: Light tan/beige
- Chest: Mustard yellow
- Head: White
- Eye stripe: Brown
- Wings: White/cream
Bird 3 (Front Right – Tan Bird):
- Bottom: Medium tan
- Chest: Light tan/beige
- Head: White with brown tones
- Eye stripe: Brown
- Wings: Medium tan
Bird 4 (Bottom – Blue Bird):
- Bottom: Dusty blue-grey
- Chest: Mustard yellow
- Head: White
- Eye stripe: Brown
- Wings: Dusty blue-grey
Tips for Success
- Keep the body very plump and rounded – don’t overstuff the top
- The brown eye stripe should be prominent and clearly visible
- Position eyes symmetrically within the brown band
- Wings should lay completely flat against the body – they are decorative, not dimensional
- The color transitions should be clean – change colors at the end of a round
- Use a smaller hook for tighter stitches and better definition
- Keep your stitches tight and even for a neat appearance
- Stuff firmly but don’t overstuff, which can distort the shape
- Position eyes with pins before embroidering to ensure symmetry
- Flatten wings completely before attaching for the proper look
Finishing Touches
Weave in all remaining ends securely. You can add a small jump ring to the top of the head if you’d like to turn these into ornaments or keychains.
These little birds make wonderful gifts, ornaments, or decorative additions to any space. Make a whole flock in different colors and share your creations!
Happy crocheting! 🐦