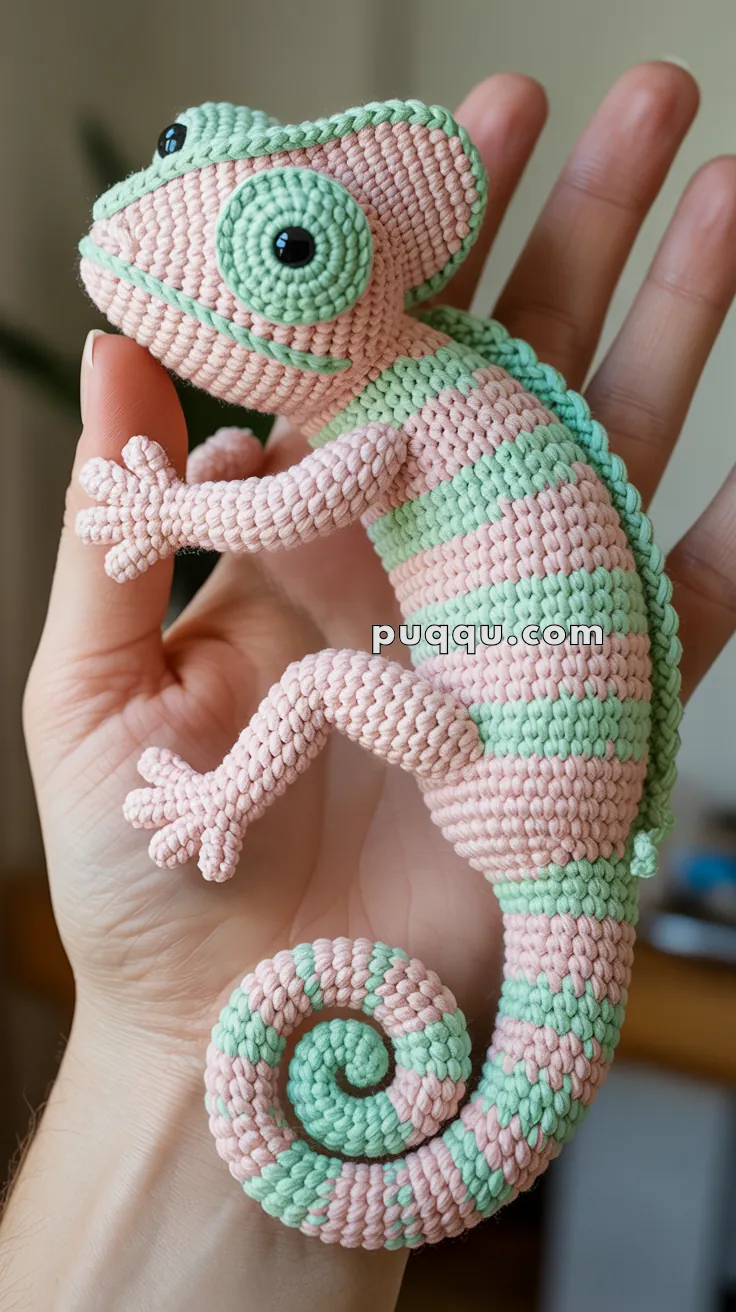
Meet the Amigurumi Pastel Striped Chameleon, a delightful little creature that’s bursting with charm and soft color! 🦎🧶 With alternating mint and blush pink stripes, big mint-ringed eyes, and a sweet spiral tail, this crochet cutie is the perfect blend of whimsy and personality. Whether perched on a shelf, tucked into a gift basket, or added to a jungle-themed collection, it’s sure to bring smiles wherever it goes.
Perfect for crocheters who love playful shapes and gentle hues, this pattern invites you to stitch up a friend that’s as unique as it is adorable. Customize the colors, add tiny accessories, or make a whole family of pastel pals. The Amigurumi Pastel Striped Chameleon is a joyful way to stitch up creativity, sweetness, and a sprinkle of handmade magic—one loop at a time! 🧵🌸✨
🦎 Amigurumi Pastel Striped Chameleon Crochet Pattern
Bring some color and character to your amigurumi collection with this soft and whimsical pastel-striped chameleon! Featuring alternating mint and blush pink stripes, big mint-ringed eyes, and a sweet spiral tail, this pattern creates an irresistibly charming handmade friend that’s perfect for spring or nursery décor. 🌸💚
✨ Skill Level
Intermediate – requires color changes, shaping, and crocheting small parts separately.
📏 Finished Size
Approximately 22–25 cm (8.5–10 in) long when using DK yarn and a 2.5–3.0 mm hook.
🧶 Materials
- DK weight cotton or acrylic yarn in:
- Mint Green – 60 g (body stripes, eyes, ridge)
- Pastel Pink – 60 g (body stripes, head, limbs)
- White – small amount (eye details)
- Black – embroidery thread (mouth)
- 2.5 mm crochet hook
- Polyester fiberfill
- Two 6 mm safety eyes
- Tapestry needle
- Scissors
- Stitch markers
🔤 Abbreviations (US Terms)
MR – Magic Ring
sc – Single Crochet
inc – Increase (2 sc in same st)
dec – Decrease (sc2tog)
sl st – Slip Stitch
ch – Chain
st – Stitch
FO – Fasten Off
🐍 Head
With pastel pink yarn:
R1: MR, 6 sc [6]
R2: inc ×6 [12]
R3: (sc, inc) ×6 [18]
R4: (2 sc, inc) ×6 [24]
R5: (3 sc, inc) ×6 [30]
R6–12: sc around [30]
R13: (3 sc, dec) ×6 [24]
R14: (2 sc, dec) ×6 [18]
R15: (sc, dec) ×6 [12]
FO and stuff firmly.
Shape: Slightly elongated and tapered toward the nose.
👁 Eyes (Make 2)
Outer Rim (Mint):
R1: MR, 6 sc [6]
R2: inc ×6 [12]
R3: (sc, inc) ×6 [18]
FO, leaving long tail.
Insert Safety Eyes
Attach safety eyes through the center of the mint circle. Sew each eye to the head between rounds 6–8, spaced 4–5 stitches apart.
Optional highlight: Embroider a small white stitch at the top right of each eye for a lifelike shine.
🦎 Body
Start with mint green yarn and alternate colors every 4 rounds for thick, bold stripes:
R1: MR, 6 sc [6]
R2: inc ×6 [12]
R3: (sc, inc) ×6 [18]
R4: (2 sc, inc) ×6 [24]
R5: (3 sc, inc) ×6 [30]
R6–10: sc around [30] (Mint)
R11–14: sc around [30] (Pink)
R15–18: sc around [30] (Mint)
R19–22: sc around [30] (Pink)
R23–25: (3 sc, dec) ×6 [24]
R26–28: (2 sc, dec) ×6 [18]
R29–30: sc around [18]
FO, stuff firmly, leaving tail for sewing.
🦵 Legs (Make 4 – striped like body)
Start with pink yarn:
R1: MR, 6 sc [6]
R2: inc ×6 [12]
R3–6: sc around [12]
Switch to mint:
R7–10: sc around [12]
Stuff lightly.
Flatten openings and sew two legs on each side of the body.
🌀 Tail
Start with mint yarn:
R1: MR, 6 sc [6]
R2: inc ×6 [12]
R3–6: sc around [12]
Switch to pink:
R7–16: sc around [12]
Switch to mint again:
R17–28: sc around [12]
Stuff lightly while working.
Curl the tail tightly as you finish — you can use a little wire inside for perfect coiling.
FO and sew to the back of the body.
🧵 Dorsal Ridge
With mint yarn, ch 26.
Work across: (sc, hdc, dc, hdc, sc, sl st) × repeat until end.
FO and sew along the top of the back, from the head to halfway down the tail.
Stuff lightly underneath as you sew for raised texture.
😄 Face Details
Using black thread, embroider a small, curved smile below the eyes.
Add two short eyebrow stitches with mint yarn if desired for a playful look.
💫 Assembly
- Sew the head to the front of the body, blending the color transition smoothly.
- Attach all four legs evenly spaced along the sides.
- Sew the curled tail to the back.
- Add the dorsal ridge.
- Adjust body stuffing for a firm yet flexible shape.
🌿 Finishing Touches
Add optional embroidered pastel dots along the sides for extra texture.
For display, curl the tail tightly and position the head slightly turned as in the photo — this gives the classic chameleon stance.
🎀 Final Look
Your Pastel Striped Chameleon is complete!
With its soft alternating stripes, charming mint-rimmed eyes, and spiraling tail, this little reptile brings a touch of tropical sweetness to your handmade collection.
Perfect as a nursery toy, spring décor, or a gift for crochet animal lovers. 🦎💗💚