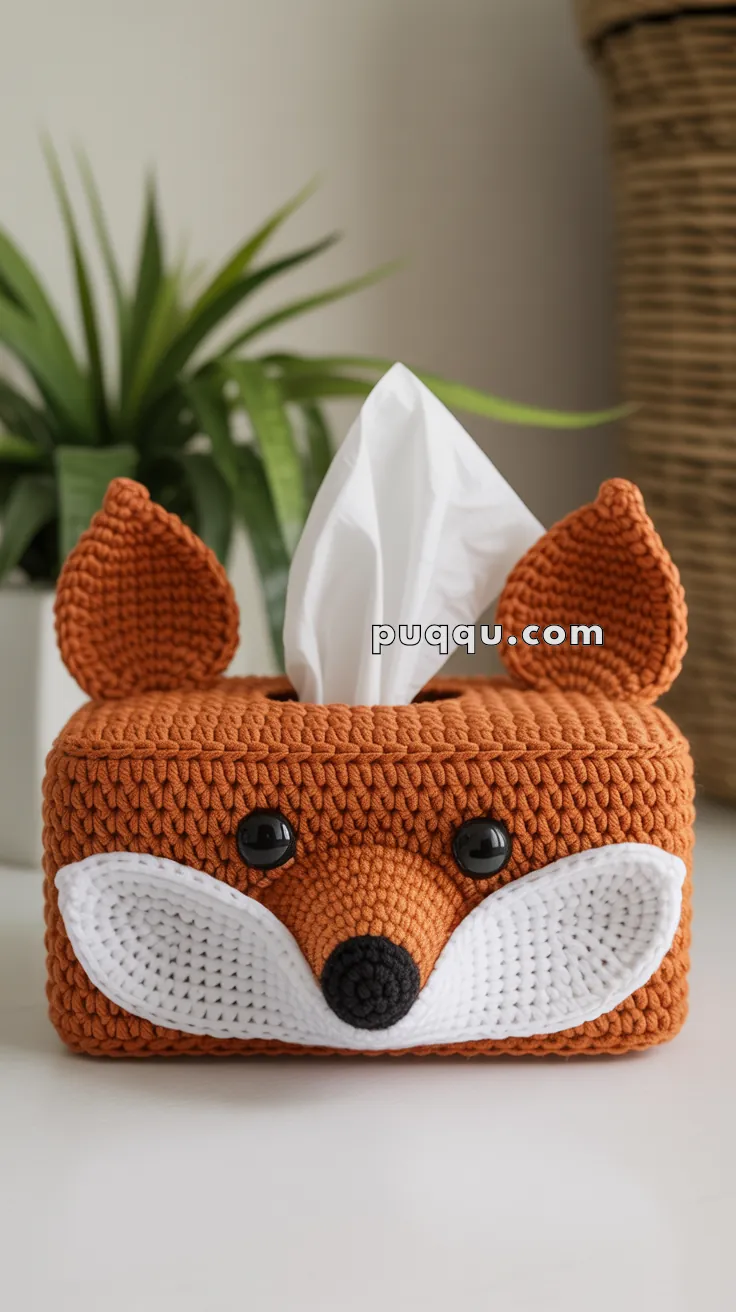
Turn everyday essentials into woodland whimsy with the Crochet Fox Tissue Box Cover, a project that’s as practical as it is adorable! 🦊🧶 Designed to transform an ordinary tissue box into a charming fox friend, this pattern features a warm fox-orange body, rounded ears, wide white cheeks, glossy safety eyes, and a cute black snout. The perfectly rectangular shape ensures a snug fit over standard tissue boxes, keeping everything neat and cozy without stretching or sagging.
With its playful details and cheerful design, this cover is sure to brighten up any room—whether perched on a desk, nightstand, or bathroom counter. It’s a fun way to add personality to your home décor while showcasing your crochet skills. The Crochet Fox Tissue Box Cover is a joyful way to stitch together practicality, charm, and a sprinkle of handmade magic—one loop at a time! 🧵✨🌿
🦊 Crochet Fox Tissue Box Cover Pattern
Bring a touch of woodland charm to your home with this irresistibly cute fox tissue box cover. Designed to fit a standard rectangular tissue box, this project combines dense, knit-like texture with expressive facial features, long sweeping cheeks, a shallow snout, glossy eyes, and wide curved ears—exactly like the sample photo. It’s both decorative and practical, making ordinary tissues feel like a cozy forest friend sitting on your shelf.
🧶 Materials
Yarn (Bulky weight, cotton or cotton-blend recommended):
• 180 g 🧡 fox orange
• 50 g 🤍 white
• 10 g ⚫ black
Hook
• 5.0 mm crochet hook
Notions
• Two 20 mm shiny black safety eyes
• Yarn needle
• Scissors
• Stitch markers
• One standard rectangular tissue box (for shaping)
✂️ Abbreviations (US Terms)
sc – single crochet
inc – increase
dec – decrease
sl st – slip stitch
ch – chain
MR – magic ring
WST – waistcoat stitch (center single crochet)
st(s) – stitch(es)
⭐ Skill Level
Confident Beginner to Intermediate — easy construction overall, with simple shaping and a few appliqué pieces.
📏 Finished Size
Fits a standard tissue box approximately 23 × 12 × 10 cm.
Cheeks approx. 14 cm long each; ears approx. 8–9 cm tall.
🧡 Body Cover (Seamless, in Waistcoat Stitch)
To match the exact texture in the photo, work all visible orange parts in waistcoat stitch (WST), which creates the tight, knit-like look.
Bottom Panel (worked flat)
Ch 32
Row 1: Sc in 2nd ch and across (31). Ch 1, turn.
Rows 2–18: Sc across (31). Ch 1 at each turn.
Do not fasten off.
Side Walls (worked in the round)
Round 1: Begin WST evenly around all edges of the rectangle.
Approx. 31 sts per long side and 18 sts per short side (around 98 sts total).
Join with sl st at end.
Rounds 2–22: WST around.
This creates a tall rectangular sleeve.
Top With Built-In Tissue Opening
Round 23: WST around.
Round 24: WST 12, ch 10, skip 10 sts, WST to end.
Round 25: WST into each st and each ch (closing the edges of the opening).
Rounds 26–29: WST around to finish smoothing the top height.
Fasten off and weave in ends.
🤍 White Cheeks (make 2)
These are long, almond-shaped cheeks with slightly upward curves.
Round 1: MR, 6 sc.
Round 2: Inc around (12).
Round 3: Sc, inc around (18).
Round 4: Work only in 12 sts: 2 sc, inc four times (16).
Round 5: Work around entire cheek: 24 sc.
Round 6: Sc 24.
Round 7: Sc 24, sl st. Leave long tail for sewing.
Shape into smooth upward-curved ovals.
🧡 Snout (shallow, wide)
Round 1: MR, 6 sc.
Round 2: Inc around (12).
Round 3: Sc, inc around (18).
Round 4: 2 sc, inc around (24).
Flatten the piece into a wide oval—this should be low-profile, not stuffed.
⚫ Nose
Round 1: MR, 6 sc.
Round 2: Sc, inc around (9).
Round 3: Sc around.
Flatten slightly and sew to the bottom point of the snout.
🦊 Ears (make 2)
These ears are broad, slightly curved triangles that tilt outward.
Round 1: MR, 5 sc.
Round 2: Sc, inc twice, sc (7).
Round 3: Sc 7.
Round 4: 2 sc, inc twice, sc (9).
Round 5: Sc 9.
Round 6: 3 sc, inc twice, sc (11).
Round 7: Sc 11.
Round 8: Sc 11, sl st to finish.
Flatten and gently curve the tops inward.
👀 Eyes
Use two 20 mm glossy black safety eyes.
Position them slightly above the snout, spaced 8–9 cm apart.
The wide spacing gives the fox its cute, friendly look.
🧵 Assembly
- Place the cover on your tissue box to determine the exact front panel.
- Sew the orange snout onto the lower half of the front panel.
- Attach the black nose at the bottom center of the snout.
- Insert safety eyes above the snout curve.
- Sew the white cheeks on each side of the snout.
• Inner edges almost touch.
• Outer edges curve gently upward like a smile. - Sew the ears to the top corners, tilting them slightly outward.
- Fit the cover over your tissue box and pull a tissue through the opening.
✨ Finishing Tips
A light steam block helps cheeks flatten and ears hold their curved shape. If the cover feels too loose, you can tack the inner corners with a few hidden stitches. Cotton or cotton-blend yarn gives the best stitch definition, matching the crisp look in the photo.