Make a splash with the Amigurumi Dolphin, a cheerful crochet project that brings ocean vibes and playful charm to your handmade collection! 🐬🧶 With its sleek body, curved fin, and friendly smile, this adorable dolphin is ready to leap into your heart and brighten any space. Whether you’re crafting for a sea-themed nursery, gifting to a marine animal lover, or simply adding to your amigurumi pod, this little swimmer is sure to delight.
Perfect for crocheters who love smooth shaping and expressive details, this pattern invites you to explore gentle curves, soft textures, and a splash of creativity. Customize your dolphin in shades of blue, gray, or even pastel for a whimsical twist, and pair it with other ocean friends for a full underwater adventure. The Amigurumi Dolphin is a joyful way to stitch up serenity, fun, and a wave of handmade magic—one loop at a time! 🌊🧵
🐬 Amigurumi Dolphin Crochet Pattern
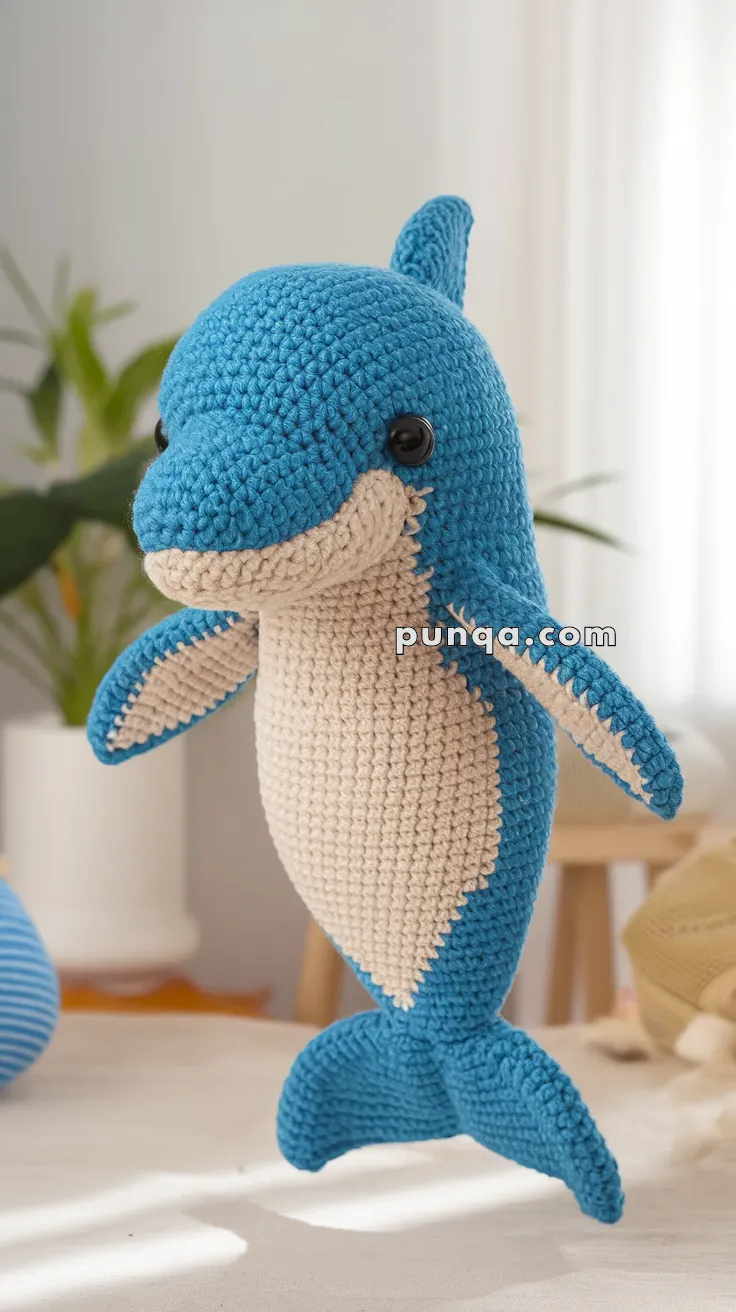
Create a sweet standing-style dolphin with a rounded head, clear projecting snout, smooth upright body, cream belly panel, curved fins, dorsal fin, and fluked tail 🐬💙 This design is shaped to avoid a plain tube body and instead gives the dolphin a balanced plush silhouette with a proper face and tapered lower body.
✨ Skill Level
Intermediate – includes shaping, structured increases/decreases, color transitions, and precise placement.
📏 Finished Size
Approx. 25–30 cm tall using worsted weight yarn and a 3.0 mm hook.
🧶 Materials & Yarn Amount
- Blue yarn: 85–95 g (head, back, fins, tail, dorsal fin)
- Cream yarn: 35–45 g (snout underside and belly panel)
- Black safety eyes: 8–10 mm
- Fiberfill stuffing: approx. 180–220 g
- 3.0 mm crochet hook
- Yarn needle
- Stitch marker
🔤 Abbreviations
MR – magic ring
sc – single crochet
inc – increase
dec – invisible decrease
ch – chain
sl st – slip stitch
FO – fasten off
🐬 Head, Snout & Body (One Piece)
Worked continuously from snout to tail. The shaping below ensures a defined snout, rounded head, wider chest, and tapered lower body.
🐽 Snout (Cream)
R1: MR, 6 sc (6)
R2: inc ×6 (12)
R3: (1 sc, inc) ×6 (18)
R4: sc around (18)
R5: (2 sc, inc) ×6 (24)
R6–11: sc around (24)
➡️ Stuff firmly as you go to create a rounded projecting snout.
🧠 Head Expansion
Begin blending into blue while keeping cream underneath.
R12: 12 cream sc, 12 blue sc (24)
R13: cream: (1 sc, inc) ×6, blue: (1 sc, inc) ×6 (36)
R14: 18 cream sc, 18 blue sc (36)
R15: cream: (2 sc, inc) ×6, blue: (2 sc, inc) ×6 (48)
R16–19: 24 cream sc, 24 blue sc (48)
👁️ Insert eyes between R16–17 on the blue section, slightly above the color line.
🐋 Upper Body (Rounded Chest)
R20–25: 22 cream sc, 26 blue sc (48)
➡️ This creates a fuller chest and avoids a straight tube.
🔻 Body Taper
R26: (6 sc, dec) ×6 (42)
R27–29: sc around (42)
R30: (5 sc, dec) ×6 (36)
R31–33: sc around (36)
R34: (4 sc, dec) ×6 (30)
R35–36: sc around (30)
R37: (3 sc, dec) ×6 (24)
R38: sc around (24)
R39: (2 sc, dec) ×6 (18)
R40: sc around (18)
R41: (1 sc, dec) ×6 (12)
R42: dec ×6 (6)
FO and close.
➡️ Stuff progressively: firm at head, medium in body, slightly firmer again near tail.
🤍 Belly Panel Shape
The cream section runs from the snout underside down the front.
- Widest at chest (approx. half the stitches)
- Gradually narrows toward the tail
This creates the soft teardrop belly instead of a straight stripe.
🏊 Side Fins (Make 2)
With blue:
R1: MR, 6 sc (6)
R2: (1 sc, inc) ×3 (9)
R3: (2 sc, inc) ×3 (12)
R4: (3 sc, inc) ×3 (15)
R5–6: sc around (15)
R7: (3 sc, dec) ×3 (12)
R8: (2 sc, dec) ×3 (9)
R9: (1 sc, dec) ×3 (6)
FO. Flatten and slightly curve.
Sew to sides around mid-body, angled gently downward and slightly backward.
🦈 Dorsal Fin
With blue:
R1: MR, 4 sc (4)
R2: (1 sc, inc) ×2 (6)
R3: sc around (6)
R4: (2 sc, inc) ×2 (8)
R5: sc around (8)
R6: (3 sc, inc) ×2 (10)
R7–8: sc around (10)
R9: (4 sc, inc) ×2 (12)
R10–11: sc around (12)
FO, flatten lightly.
Sew centered on the upper back behind the head, slightly curved backward.
🐟 Tail Flukes (Make 2)
With blue:
R1: MR, 6 sc (6)
R2: inc ×6 (12)
R3: (1 sc, inc) ×6 (18)
R4: (2 sc, inc) ×6 (24)
R5–6: sc around (24)
R7: (2 sc, dec) ×6 (18)
R8: sc around (18)
Flatten each piece.
Sew together at the inner edge, leaving a center notch.
Attach horizontally to tail.
🙂 Face Details
Embroider a soft curved smile along the lower edge of the snout.
Keep expression minimal and gentle.
🪡 Assembly
- Attach dorsal fin centered on the back
- Sew side fins symmetrically
- Attach tail flukes horizontally
- Shape snout forward and round head with fingers
✨ Final Shaping Tips
- Keep snout firmly stuffed for structure
- Ensure head is round and wider than neck
- Gently pinch body sides to emphasize taper
- Angle fins slightly backward for a natural look
- Flatten tail slightly for balance
💙 Final Result
This dolphin features a defined snout, rounded head, full chest, and tapered lower body for a balanced, realistic silhouette 🐬✨ The smooth color transitions and soft shaping give it a clean, polished finish perfect for display or gifting.
Happy crocheting 🧶💙