🧵 Skill Level
Intermediate – requires continuous shaping, posture control, and precise minimal detailing.
📏 Finished Size (Photo-Accurate)
Approx. 30–34 cm (12–13.5 inches) tall (sitting upright)
➡️ Taller than typical amigurumi due to elongated neck and torso
🧶 Materials & Yarn Amount
- Light beige / sand yarn (main body): 140–170 g
- Dark brown yarn (eye patches, ears, tail stripes): 25–35 g
- Black yarn/thread (nose, claws, embroidery): 5 g
Other:
- 8–10 mm safety eyes
- Polyester stuffing (~400–500 g)
- 2.5–3.0 mm crochet hook
- Yarn needle
- Stitch marker
Optional:
- Pipe cleaner or wire (tail support)
✂️ Abbreviations (US Terms)
MR – magic ring
sc – single crochet
inc – increase
dec – invisible decrease
FO – fasten off
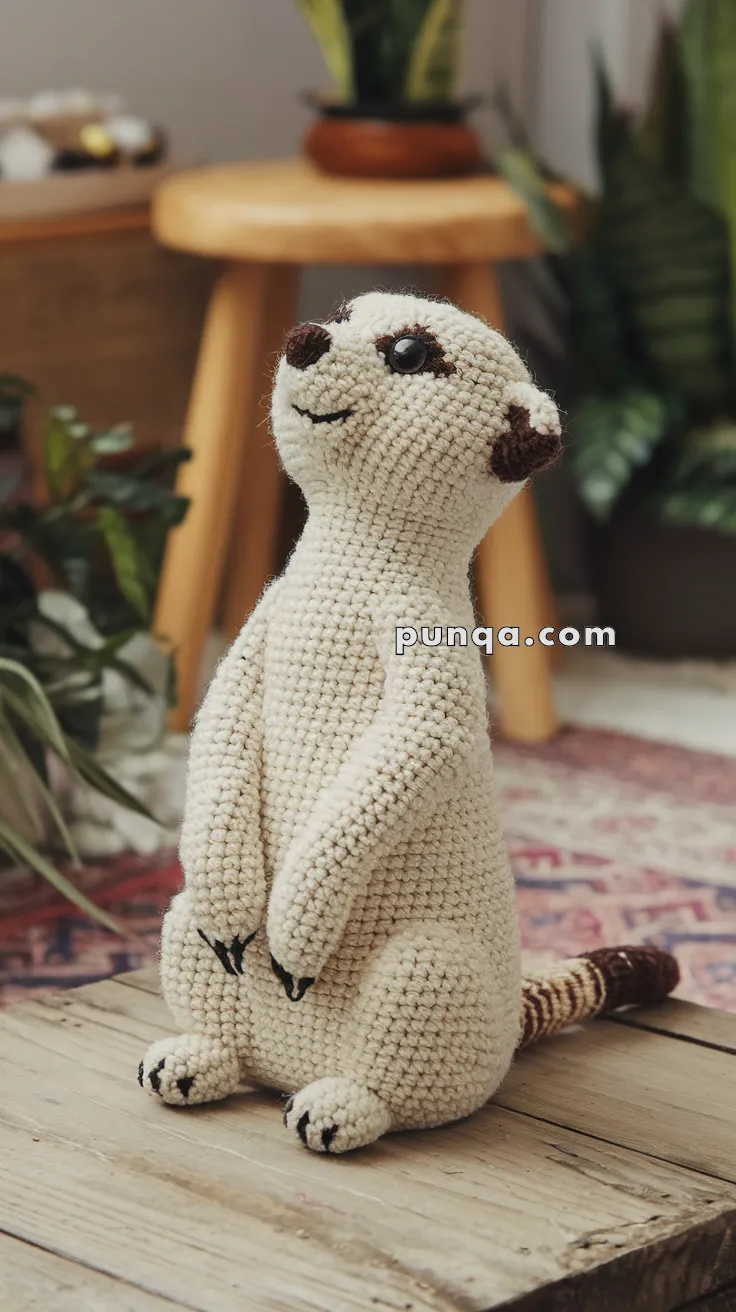
🐾 Head → Neck → Body (ONE PIECE, FULL LENGTH)
This meerkat is built as a single continuous piece, forming a smooth vertical silhouette without a separate body join.
Head (rounded but slightly oval)
With beige yarn:
Round 1: MR, 6 sc (6)
Round 2: inc ×6 (12)
Round 3: (1 sc, inc) ×6 (18)
Round 4: (2 sc, inc) ×6 (24)
Round 5: (3 sc, inc) ×6 (30)
Rounds 6–10: sc around (30)
➡️ Head is slightly smaller and narrower than typical plush styles
Insert eyes between Rounds 8–9, spaced 6 stitches apart
Subtle face taper (under eyes)
Round 11: (3 sc, dec) ×6 (24)
➡️ Creates gentle narrowing toward neck
Neck (long, straight, slim)
Rounds 12–22: sc around (24)
➡️ This section forms the distinct upright meerkat posture
Upper torso (slight widening)
Round 23: (3 sc, inc) ×6 (30)
Round 24: (4 sc, inc) ×6 (36)
Rounds 25–30: sc around (36)
Lower body (rounded sitting base)
Round 31: (5 sc, inc) ×6 (42)
Rounds 32–36: sc around (42)
➡️ Shape carefully:
- Rounded belly
- Slight forward fullness
- Flat base for sitting
Base closure
Round 37: (5 sc, dec) ×6 (36)
Round 38: (4 sc, dec) ×6 (30)
Round 39: (3 sc, dec) ×6 (24)
Round 40: (2 sc, dec) ×6 (18)
Round 41: (1 sc, dec) ×6 (12)
Round 42: dec ×6 (6)
FO.
👁 Eye Patches (Small & Tight – Make 2)
With dark brown yarn:
Round 1: MR, 5 sc
Round 2: sc around (5)
FO.
➡️ Sew close to eyes in a slightly oval shape
➡️ Keep patches small and subtle
👂 Ears (Tiny & Rounded – Make 2)
With dark brown yarn:
Round 1: MR, 5 sc
Round 2: sc around (5)
FO.
➡️ Flatten lightly
➡️ Attach high and slightly backward
😊 Face Details
With black yarn:
- Tiny triangular nose
- Short soft curved smile
- Optional tiny brow stitch
➡️ Expression should remain minimal and gentle
💪 Arms (Long, Very Slim – Make 2)
With beige yarn:
Round 1: MR, 6 sc (6)
Round 2: (1 sc, inc) ×3 (9)
Rounds 3–16: sc around (9)
➡️ Do NOT overstuff
➡️ Keep arms thin and slightly flat
FO.
Embroider 2–3 small claw stitches
Attach vertically so arms:
- Touch each other
- Rest along belly
🦵 Legs (Short, Rounded Base – Make 2)
With beige yarn:
Round 1: MR, 6 sc (6)
Round 2: inc ×6 (12)
Rounds 3–5: sc around (12)
Round 6: (2 sc, dec) ×3 (9)
Rounds 7–8: sc around (9)
➡️ Light stuffing
➡️ Flatten slightly
FO.
Attach at front bottom for stability.
🦘 Tail (Thin, Long, Ground-Supporting)
With beige yarn:
Round 1: MR, 6 sc (6)
Rounds 2–6: sc around
Switch to brown:
Rounds 7–8: sc around
Alternate colors every 2 rounds
until length reaches 15–17 cm
➡️ Tail must be:
- Thin
- Flexible
- Slightly curved
Light stuffing only.
Optional: insert pipe cleaner.
Attach low at back so it rests on surface for balance
🧵 Assembly
- Attach eye patches before final eye positioning
- Sew ears high and slightly back
- Attach arms close together along chest
- Attach legs at front base
- Sew tail low and angled backward
✨ Final Shaping Tips
- Slightly lean body backward for balance
- Keep neck straight and vertical
- Ensure tail touches surface
- Keep arms tight and close together
💡 Pro Tips
- The long neck defines the silhouette
- Minimal face details create realism
- Avoid overstuffing upper body
- Keep stitches tight for smooth finish
This upright meerkat amigurumi captures a calm, alert presence with refined proportions and subtle detailing. Its tall posture, delicate features, and balanced stance make it a beautifully realistic and elegant handmade piece 🦡✨