Cast a spell of creativity with the Amigurumi Witch Doll, a magical crochet project that’s full of charm, character, and just the right amount of mischief! 🧙♀️🧶 With her pointy hat, flowing dress, and enchanting details, this little witch is ready to fly straight into your heart (no broom required). Whether you’re crafting for Halloween, a fantasy-themed gift, or simply adding a whimsical touch to your amigurumi lineup, she’s sure to bring a sprinkle of magic to your stitches.
This pattern is perfect for crocheters who love expressive characters and playful accessories. You can customize her outfit with sparkly yarn, add a tiny potion bottle or spellbook, or even stitch up a coven of colorful witches for a festive display. Whether you’re brewing up spooky décor or gifting a handmade enchantress, the Amigurumi Witch Doll is a bewitching way to stitch up joy—one magical loop at a time! ✨🧵
🧙♀️ Amigurumi Witch Doll – Free Crochet Pattern
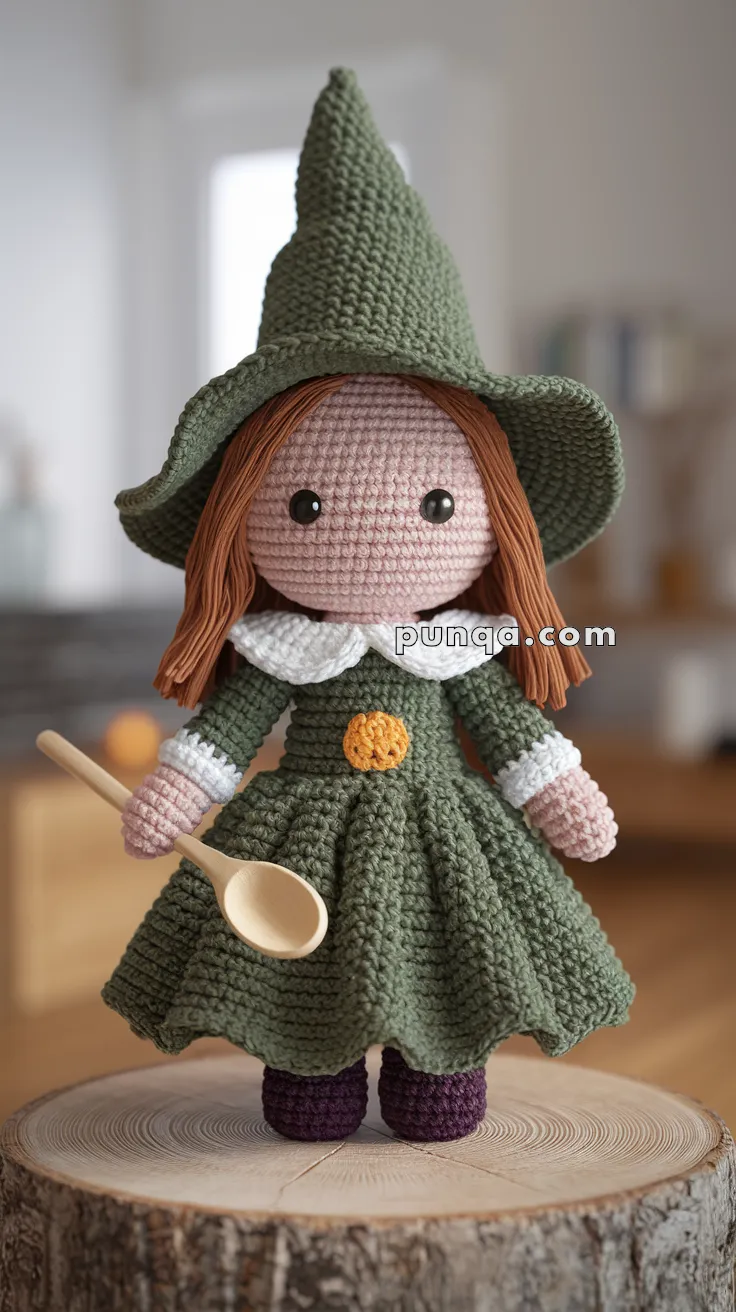
This charming Witch Doll is the perfect mix of cozy and magical! With her wide-brimmed hat, green dress, purple shoes, and pumpkin button, she’s ready to cast some autumn spells. Whether for Halloween décor, storytelling, or as a gift, this doll is a delightful make.
✨ Skill Level
Intermediate – basic amigurumi knowledge required (working in rounds, increases, decreases, sewing parts).
📏 Finished Size
Approx. 28–30 cm (11–12″) tall when using DK cotton yarn and a 2.5 mm hook.
🧶 Materials
- DK cotton yarn:
- Light peach (skin)
- Reddish brown (hair)
- Green (dress, sleeves, hat)
- White (collar, cuffs)
- Purple (shoes)
- Orange (pumpkin button)
- 2.5 mm crochet hook
- 10 mm black safety eyes
- Tapestry needle & scissors
- Fiberfill stuffing
- Wooden spoon or broomstick (toy accessory)
🔤 Abbreviations (US Terms)
- MR = Magic Ring
- sc = single crochet
- inc = increase (2 sc in same st)
- dec = decrease (sc2tog)
- ch = chain
- sl st = slip stitch
- FLO = front loop only
- BLO = back loop only
🪄 Pattern Instructions
Head
With skin color:
- MR, 6 sc (6)
- inc around (12)
- (sc, inc) x6 (18)
- (2 sc, inc) x6 (24)
- (3 sc, inc) x6 (30)
- (4 sc, inc) x6 (36)
7–12. sc around (36)
👉 Insert 10 mm safety eyes between R9–10, ~7 sts apart. - (4 sc, dec) x6 (30)
- (3 sc, dec) x6 (24)
- (2 sc, dec) x6 (18)
- (sc, dec) x6 (12)
- dec around (6). FO. Stuff firmly.
Hair Cap
With reddish-brown:
- MR, 6 sc (6)
- inc around (12)
- (sc, inc) x6 (18)
- (2 sc, inc) x6 (24)
- (3 sc, inc) x6 (30)
- (4 sc, inc) x6 (36)
7–10. sc around (36). FO.
Hair strands:
Cut ~35 strands, 14–16 cm long. Attach evenly around hair cap using lark’s head knot. Brush lightly with fingers.
Body
With green:
- MR, 6 sc (6)
- inc around (12)
- (sc, inc) x6 (18)
- (2 sc, inc) x6 (24)
- (3 sc, inc) x6 (30)
6–14. sc around (30) - (3 sc, dec) x6 (24)
- sc around (24)
- (2 sc, dec) x6 (18)
Stuff and FO.
Skirt (worked onto body)
Join green yarn around waist.
- FLO, sc around (24)
- (3 sc, inc) x6 (30)
- (4 sc, inc) x6 (36)
- (5 sc, inc) x6 (42)
- (6 sc, inc) x6 (48)
- (7 sc, inc) x6 (54)
7–20. sc around (54) → skirt length with gentle drape folds. FO.
Arms (x2)
With skin:
- MR, 6 sc (6)
- inc around (12)
3–7. sc around (12)
Switch to green (sleeve):
8–13. sc around (12)
Switch to white (cuff):
14–16. sc around (12)
👉 R16 in FLO for cuff flare. FO. Stuff lightly.
Legs & Shoes (x2)
With purple:
- MR, 6 sc (6)
- inc around (12)
- (sc, inc) x6 (18)
4–5. sc around (18) - (sc, dec) x6 (12)
Switch to skin:
7–14. sc around (12). FO, stuff.
Collar
With white:
Ch 30.
Row 1: sc across.
Row 2: (sc, hdc, dc, hdc, sc) in same st, skip 1 → repeat across to form pointed scallops. FO. Sew around neckline.
Pumpkin Button
With orange:
- MR, 6 sc (6)
- inc around (12)
- sc around (12)
- dec around (6). Stuff lightly, FO.
👉 Embroider 3–4 vertical lines for pumpkin ridges.
Hat
With green:
- MR, 6 sc (6)
- inc around (12)
- (sc, inc) x6 (18)
- (2 sc, inc) x6 (24)
- (3 sc, inc) x6 (30)
- (4 sc, inc) x6 (36)
- (5 sc, inc) x6 (42)
8–22. sc around (42) → creates tall slim cone. - FLO, (6 sc, inc) x6 (48)
- (7 sc, inc) x6 (54)
- (8 sc, inc) x6 (60)
- (9 sc, inc) x6 (66)
👉 Brim flares naturally, like in photo. FO.
Assembly
- Sew head to body.
- Attach arms at sides.
- Sew legs under body.
- Place collar around neckline, secure with pumpkin button.
- Place hat over head (stuff tip lightly to keep pointy).
- Accessory: place wooden spoon or mini broom in hand.
🎃 Finishing Touches
- Embroider a small smile in black thread.
- Adjust hair strands so they frame the face.
- Flare cuffs and brim outward with your fingers.
🌟 Final Look
Your witch doll should now match the photo exactly:
- Tall pointed green hat with wide brim
- Long reddish hair
- Green dress with draping skirt and pointed white collar
- White cuffs and purple shoes
- Cute pumpkin button at waist
- Holding a little spoon like in the photo
Your Witch Doll is ready! With her pointy hat, autumnal green dress, purple boots, and pumpkin button, she’s a cozy companion for fall and Halloween. Display her with pumpkins, cauldrons, or use her as a magical storytelling doll.