✨ Skill Level
Intermediate
Includes shaping, color transitions, wing layering, and structured assembly.
📏 Finished Size
Approx. 18–20 cm (7–8 inches) tall
Using DK yarn and a 2.5–3.0 mm hook
🧶 Yarn Amount
- White: 75–95 g
- Light gray: 25–35 g
- Dark brown/black: 8–12 g
- Yellow/orange: 15–20 g
- Polyester stuffing: 150–200 g
🧵 Materials
- 2.5–3.0 mm crochet hook
- 8–10 mm safety eyes
- Yarn needle
- Stitch marker
- Scissors
🔤 Abbreviations (US Terms)
MR – magic ring
sc – single crochet
inc – increase
dec – invisible decrease
ch – chain
sl st – slip stitch
FO – fasten off
🧠 Head & Body (One Piece)
With white yarn:
Head
R1: MR 6 (6)
R2: inc ×6 (12)
R3: (1 sc, inc) ×6 (18)
R4: (2 sc, inc) ×6 (24)
R5: (3 sc, inc) ×6 (30)
R6: (4 sc, inc) ×6 (36)
R7–10: sc around (36)
Insert eyes between R8–9, spaced about 7 stitches apart.
Neck Shaping (Soft Taper)
R11: (4 sc, dec) ×6 (30)
R12: (3 sc, dec) ×6 (24)
R13: sc around (24)
👉 This creates a gentle, slightly narrower neck
Body (Rounded with Full Belly)
R14: (3 sc, inc) ×6 (30)
R15: (4 sc, inc) ×6 (36)
R16: (5 sc, inc) ×6 (42)
R17–23: sc around (42)
Stuff firmly, shaping a full rounded belly.
R24: (5 sc, dec) ×6 (36)
R25: (4 sc, dec) ×6 (30)
R26: (3 sc, dec) ×6 (24)
Continue stuffing.
R27: (2 sc, dec) ×6 (18)
R28: (1 sc, dec) ×6 (12)
R29: dec ×6 (6)
FO and close.
🧡 Beak (Short, Thick & Straight)
With yellow/orange yarn:
R1: MR 6 (6)
R2: (1 sc, inc) ×3 (9)
R3: (2 sc, inc) ×3 (12)
R4–6: sc around (12)
R7: (2 sc, dec) ×3 (9)
Lightly stuff only at the base.
FO and sew centered slightly below eye line, pointing straight forward.
🪽 Wings (Layered, Curved & Folded – Make 2)
Base Wing (Light Gray)
R1: MR 6 (6)
R2: inc ×6 (12)
R3: (1 sc, inc) ×6 (18)
R4: (2 sc, inc) ×6 (24)
R5: (3 sc, inc) ×6 (30)
R6–8: sc around (30)
FO.
Outer Edge & Tip
Join white yarn:
Work 1 round sc evenly around entire wing.
Switch to dark brown/black for the outer tip edge (approx. last 8–10 stitches along one side only), then switch back to white to finish.
FO.
Wing Shaping
- Do not stuff
- Flatten lightly
- Curve downward slightly
- Fold the lower edge inward just a bit before sewing
👉 This creates the smooth layered, slightly angled wing shape
Sew wings high on the sides, slightly toward the back.
🦵 Legs (Perching Style)
With yellow/orange yarn:
R1: MR 6 (6)
R2–9: sc around (6)
Do not stuff.
FO.
Attach close together underneath the front body so they hang naturally.
🪶 Tail (Small & Neat)
With white yarn:
R1: MR 6 (6)
R2: (1 sc, inc) ×3 (9)
R3–4: sc around (9)
Flatten gently.
FO and sew low on the back, slightly angled upward.
🪡 Assembly
- Sew beak centered and straight
- Attach wings snug against body, angled downward
- Sew legs close together under body
- Attach tail at back
- Shape body so it leans slightly forward
✨ Finishing Touches
- Smooth and shape the belly for a soft rounded look 🤍
- Adjust wings so they sit close and slightly angled
- Ensure beak sits straight and centered
- Position legs evenly for a natural perched appearance
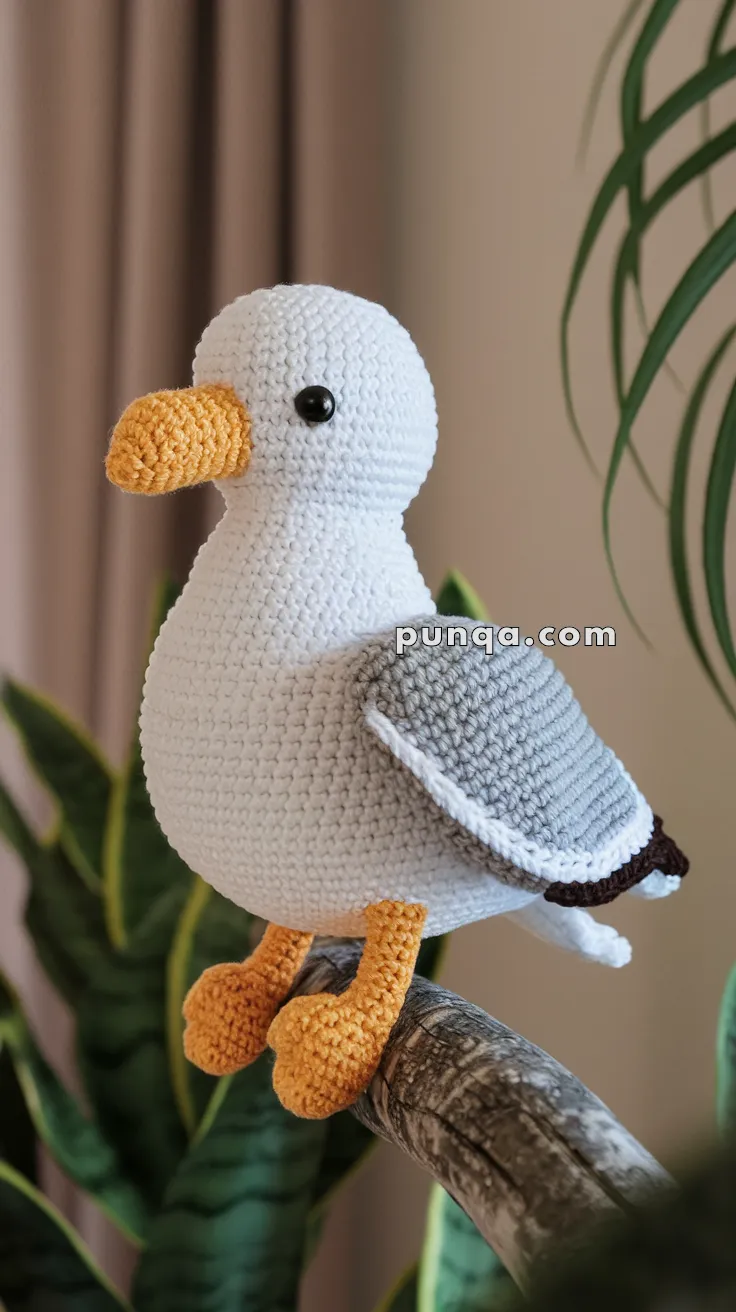
🐦 Final Result
A clean, balanced seagull with a smooth rounded body, gentle neck taper, compact beak, and neatly folded layered wings. The proportions and shaping create a calm perched stance, giving the piece a refined and lifelike finish 🌿✨
Happy crocheting! 🧶🌊