Embrace the beauty of the Arctic with this Amigurumi Arctic Fox crochet pattern! Inspired by the elegant and resilient creatures of the frozen tundra, this adorable amigurumi fox brings a touch of winter magic to your handmade collection. With its fluffy white fur, perky ears, and charming expression, this crochet Arctic Fox captures the essence of these majestic animals in every stitch. Whether you’re crafting for wildlife lovers, adding a cozy accent to your decor, or simply enjoy making unique amigurumi designs, this pattern lets you create a delightful little fox bursting with personality! ❄️🦊✨
Designed for customization, this pattern allows you to experiment with different shades of white and gray, embroidered details, or even tiny accessories like a miniature scarf or snowflake for extra charm. Craft a classic Arctic Fox with its signature snowy look, create a pastel version for a whimsical aesthetic, or even stitch up a full set of winter-inspired amigurumi for a magical display! Whether gifted as a cherished keepsake, displayed as a cozy accent, or made simply for the joy of crafting, this Amigurumi Arctic Fox is a fun and creative project—perfect for bringing a touch of handmade winter wonder to every stitch! 🧶💖
🦊 Arctic Fox Amigurumi Crochet Pattern
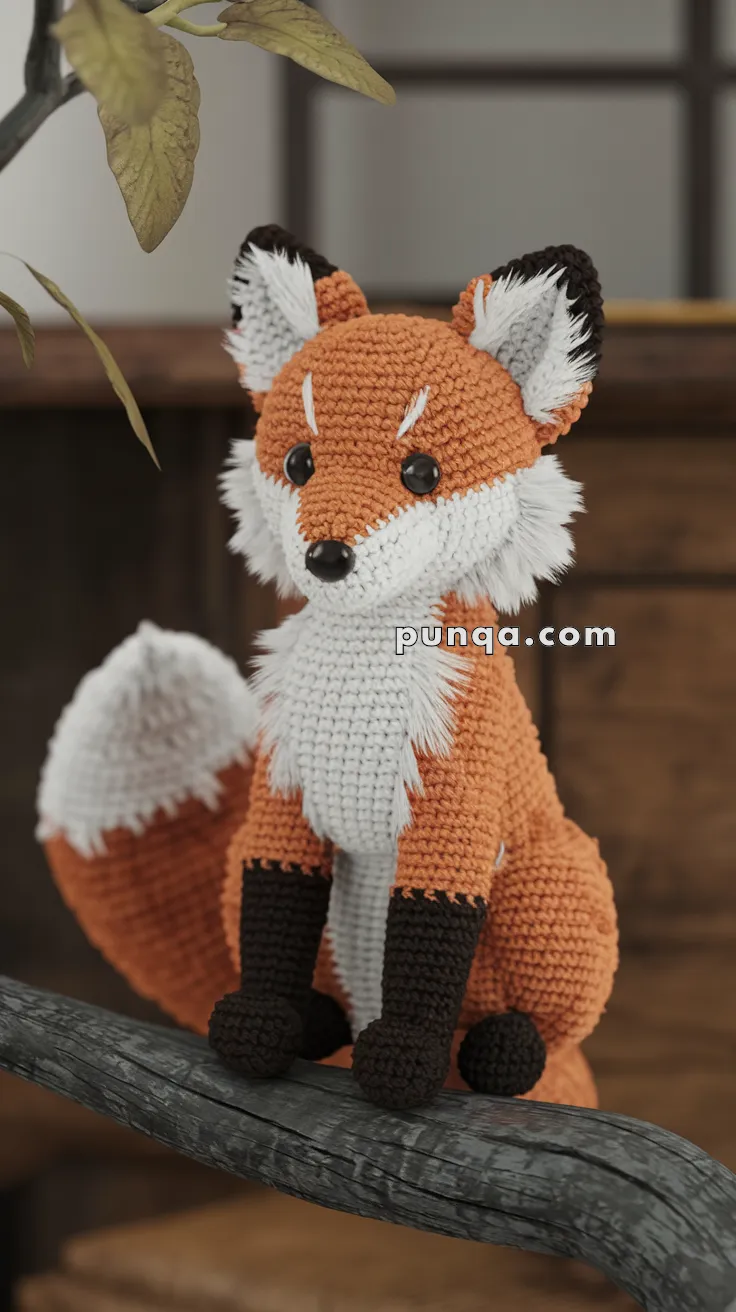
This elegant fox has a strikingly realistic look thanks to its sharp color transitions and sculpted muzzle. The fluffy white fur around the neck and tail gives it an arctic charm.
✨ Skill Level
Intermediate to Advanced – includes color changes, shaping, and layered fur techniques.
📏 Finished Size
Approx. 11–12 inches (28–30 cm) tall when made with DK yarn and a 2.5–3.0 mm hook.
🧶 Materials & Yarn Requirements (DK or Light Worsted)
Rust Orange – 150–170 g (head top, body, outer ears, tail base)
White – 110–130 g (muzzle, cheeks, chest, belly panel, tail tip, inner ears)
Black – 70–90 g (legs, paws, ear tips, nose)
14 mm black safety eyes
12 mm black safety nose
Polyester stuffing
3.0 mm crochet hook
Tapestry needle
Stitch markers
Optional: slicker brush for fluffing white yarn
🧵 Abbreviations (US Terms)
MR – magic ring
sc – single crochet
inc – increase
dec – decrease
sl st – slip stitch
ch – chain
FO – fasten off
🦊 Head (One-Piece with Shaped Face Mask)
Start with white.
R1 MR 6 (6)
R2 inc ×6 (12)
R3 (1 sc, inc) ×6 (18)
R4 (2 sc, inc) ×6 (24)
R5 (3 sc, inc) ×6 (30)
R6 (4 sc, inc) ×6 (36)
R7–8 sc around (36)
Gradual Rust Mask Transition
R9 16 sc white, 20 sc rust
R10 12 sc white, 24 sc rust
R11 8 sc white, 28 sc rust
R12 4 sc white, 32 sc rust
R13–18 sc around in rust (36)
Insert eyes between R10–11, approximately 8 stitches apart.
R19 (4 sc, dec) ×6 (30)
R20 (3 sc, dec) ×6 (24)
Stuff firmly.
R21 (2 sc, dec) ×6 (18)
R22 (1 sc, dec) ×6 (12)
R23 dec ×6 (6) FO and close.
🐽 Snout (Rounded and Slightly Projecting)
With white:
R1 MR 6
R2 inc ×6 (12)
R3 (1 sc, inc) ×6 (18)
R4 (2 sc, inc) ×6 (24)
R5–8 sc around (24)
Lightly stuff for a smooth rounded shape.
Attach safety nose centered slightly above middle of snout.
Sew securely to lower front of head so it protrudes gently.
❄️ Fluffy Cheek Panels (Make 2)
With white:
Ch 7
Row 1 sc across (6)
Rows 2–8 sc across
FO leaving long tail.
Attach one panel on each side of snout, slightly angled upward.
Add short strands of white yarn along outer edge and gently brush for soft, fluffy cheek tufts.
🐾 Body (Tall Seated Shape with White Belly Panel)
Start with white.
R1 MR 6
R2 inc ×6 (12)
R3 (1 sc, inc) ×6 (18)
R4 (2 sc, inc) ×6 (24)
R5 (3 sc, inc) ×6 (30)
R6–10 sc around (30)
Switch to rust.
R11–22 sc around (30)
R23 (3 sc, dec) ×6 (24)
R24 (2 sc, dec) ×6 (18)
Stuff very firmly for upright stability.
R25 (1 sc, dec) ×6 (12)
FO and close.
🤍 Belly & Chest Fur Panel
With white:
Ch 9
Row 1 sc across (8)
Rows 2–14 sc across
On final 3 rows, dec 1 stitch at beginning and end to create a tapered top.
Sew centered from neck down to mid-belly.
Add small fringe strands along edges and lightly brush to blend into body.
🐾 Front Legs (Make 2 – Slim and Long)
Start with black.
R1 MR 6
R2 inc ×6 (12)
R3–11 sc around (12)
Switch to rust.
R12–20 sc around (12)
Lightly stuff lower portion; keep upper section softer.
FO and sew slightly forward so fox sits upright.
🐾 Back Legs (Make 2 – Supporting Seated Pose)
Start with black.
R1 MR 6
R2 inc ×6 (12)
R3–8 sc around (12)
Switch to rust.
R9–16 sc around (12)
Stuff firmly.
Attach lower and slightly to back sides to support seated position.
👂 Ears (Tall, Pointed, Black-Tipped – Make 2)
Start with white.
R1 MR 6
R2 (1 sc, inc) ×3 (9)
R3 (2 sc, inc) ×3 (12)
R4 (3 sc, inc) ×3 (15)
R5 sc white
Switch to rust R6 sc
Switch to black R7–8 sc
FO.
Flatten base slightly and sew upright, angled outward.
Add a few white strands inside ear and lightly brush for inner ear texture.
🦊 Tail (Full and Curved with White Tip)
Start with rust.
R1 MR 6
R2 inc ×6 (12)
R3 (1 sc, inc) ×6 (18)
R4 (2 sc, inc) ×6 (24)
R5–15 sc around (24)
Switch to white.
R16–24 sc around (24)
Stuff gradually while shaping a gentle curve.
Attach low at back so tail sweeps slightly to one side.
Lightly brush white tip for fluffy effect.
🪡 Assembly
Sew snout securely to head.
Attach cheek panels and brush gently.
Sew head to body with slight forward tilt.
Attach front legs straight and close together.
Attach back legs for stable seated posture.
Position ears high and slightly angled outward.
Sew tail low and curve naturally.
🌟 Final Touch
This tall woodland fox combines sculpted shaping with layered texture for a natural, elegant appearance. The slim black legs, pointed ears, fluffy cheeks, and sweeping tail create a refined silhouette that feels both realistic and softly charming.
A graceful forest companion ready to perch proudly in your handmade collection. 🦊✨