Hop into the world of whimsical amigurumi! 🐰💕 Today, I’m delighted to share my FREE crochet pattern for Amigurumi Arnold the Bunny—an irresistibly sweet and floppy-eared companion full of charm! Whether you love crafting cuddly animals, need a springtime project, or simply can’t resist adorable bunny designs, this pattern will guide you in creating your own huggable Arnold with his signature floppy ears and sweet expression.
This design celebrates all things soft and bunny-like with oversized ears, a round little belly, and tiny stitched details that bring Arnold to life. The pattern includes easy-to-follow instructions for his floppy pose, embroidered nose, and even optional accessories like a tiny carrot or scarf for extra personality. Perfect for Easter baskets, nursery decor, or simply spreading bunny love all year round!
So grab your pastel yarns, fluff up your fiberfill, and let’s crochet a bunny friend who’s always ready for snuggles! 🌸✂️
🐰 Amigurumi Arnold the Bunny Crochet Pattern
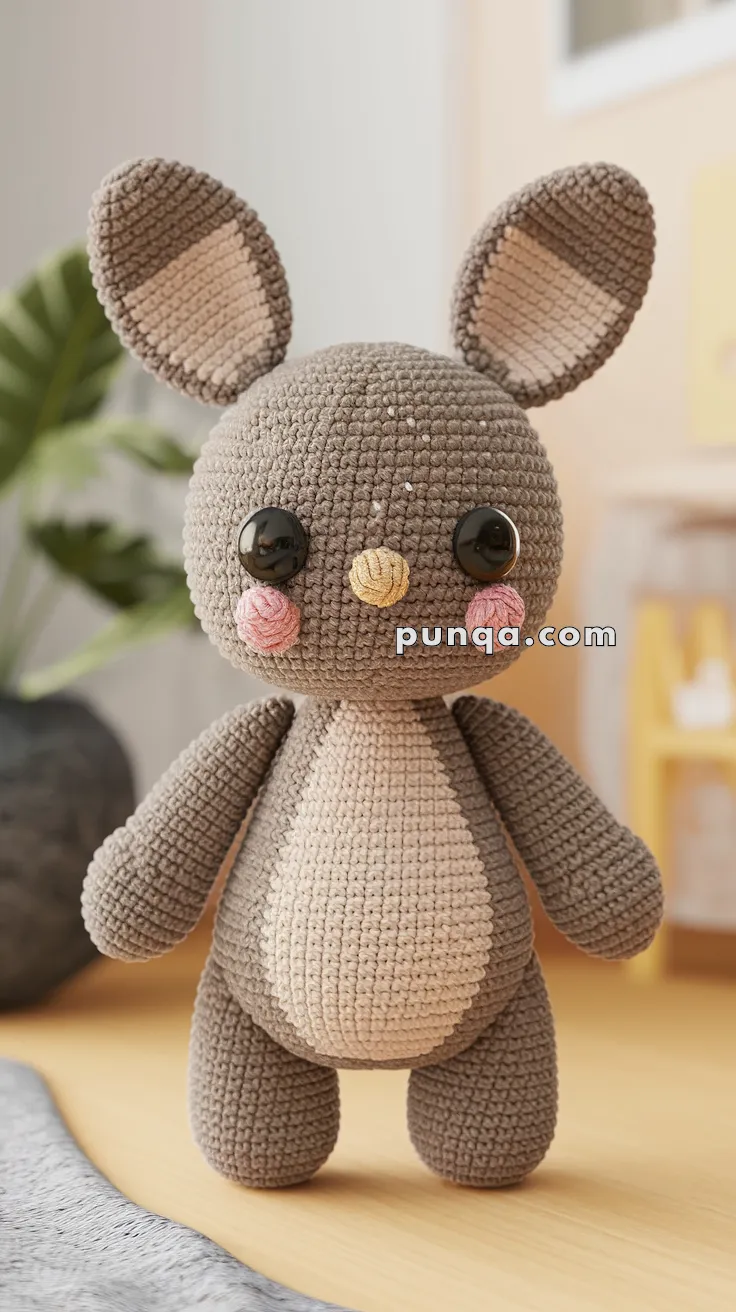
Arnold the Bunny is a soft and gentle amigurumi friend with oversized ears, rosy cheeks, and a rounded body. His calm expression and warm neutral colors make him perfect for nursery décor, gifts, or a sweet handmade keepsake. This pattern creates a standing bunny with balanced proportions and a smooth, plush finish.
✨ Skill Level
Beginner to Intermediate
(Basic shaping, color changes, and assembly)
📏 Finished Size
Approximately 23 cm (9 inches) tall using DK or worsted yarn and a 3–3.5 mm hook.
🧶 Materials
Yarn (DK or worsted weight):
-
Taupe / light brown – head, body, arms, legs, outer ears
-
Beige / cream – belly patch and inner ears
-
Pale pink – cheeks
-
Mustard yellow – nose
Notions:
-
10 mm safety eyes
-
Crochet hook 3.0–3.5 mm
-
Fiberfill stuffing
-
Yarn needle
-
Stitch marker
-
Scissors
🧵 Abbreviations (US Terms)
MR – Magic Ring
sc – Single crochet
inc – Increase (2 sc in same stitch)
dec – Decrease (sc2tog)
sl st – Slip stitch
FO – Fasten off
st(s) – Stitch(es)
🐰 Head (Taupe)
R1: MR, 6 sc (6)
R2: inc ×6 (12)
R3: (sc, inc) ×6 (18)
R4: (2 sc, inc) ×6 (24)
R5: (3 sc, inc) ×6 (30)
R6: (4 sc, inc) ×6 (36)
R7–12: sc around (36)
Insert safety eyes between R8–9, spaced about 7–8 sts apart.
R13: (4 sc, dec) ×6 (30)
R14: (3 sc, dec) ×6 (24)
R15: (2 sc, dec) ×6 (18)
Stuff firmly.
R16: (sc, dec) ×6 (12)
R17: dec ×6 (6)
FO and close.
👃 Nose (Mustard Yellow)
R1: MR, 6 sc (6)
R2: sc around (6)
FO. Lightly stuff and sew centered between the eyes.
🌸 Cheeks (Make 2 – Pink)
R1: MR, 6 sc (6)
R2: inc ×6 (12)
FO. Flatten slightly and sew under each eye.
🐰 Body (Taupe + Beige Belly)
Start with taupe:
R1: MR, 6 sc (6)
R2: inc ×6 (12)
R3: (sc, inc) ×6 (18)
R4: (2 sc, inc) ×6 (24)
R5: (3 sc, inc) ×6 (30)
R6–8: sc around (30)
Switch to beige:
R9–13: sc around (30)
Switch back to taupe:
R14: (3 sc, dec) ×6 (24)
R15: (2 sc, dec) ×6 (18)
Stuff firmly.
R16: (sc, dec) ×6 (12)
R17: dec ×6 (6)
FO and close.
✋ Arms (Make 2 – Taupe)
R1: MR, 6 sc (6)
R2: inc ×6 (12)
R3–7: sc around (12)
R8: (2 sc, dec) ×3 (9)
R9–12: sc around (9)
Stuff lightly, flatten top, FO and sew to sides of body just below head.
👣 Legs (Make 2 – Taupe)
R1: MR, 6 sc (6)
R2: inc ×6 (12)
R3–7: sc around (12)
Stuff firmly.
Flatten slightly and sew to bottom front of body so bunny stands upright.
👂 Ears (Make 2 Outer + 2 Inner)
Outer Ear (Taupe)
R1: MR, 6 sc (6)
R2: inc ×6 (12)
R3: (sc, inc) ×6 (18)
R4–8: sc around (18)
FO and flatten.
Inner Ear (Beige)
Repeat same pattern as outer ear.
Place inner ear on outer ear and stitch around edges.
Leave long tail for sewing.
Sew ears upright and slightly angled outward on top of head.
🪡 Assembly
-
Sew head to body
-
Attach arms to sides
-
Attach legs to bottom
-
Sew ears on top of head
-
Sew nose and cheeks
-
Check balance so bunny stands upright
(No mouth embroidery – the bunny has a neutral expression.)
✨ Finishing Touches
-
Shape cheeks slightly outward
-
Keep ears upright
-
Center belly patch
-
Lightly brush yarn fibers for softness
🌟 Final Thoughts
Arnold the Bunny is a timeless and gentle amigurumi design with oversized ears, soft cheeks, and simple features. His rounded shape and calm expression make him ideal for gifting, decorating a nursery, or adding to a handmade animal collection.
This pattern creates a balanced standing bunny with proportions and details that match the design shown — from the upright ears and oval belly to the tiny yellow nose and blush cheeks.
Happy crocheting! 🧶🐰