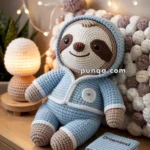
Brew up some handmade charm with this Amigurumi Barista & Café Set crochet pattern! Featuring a cheerful barista doll, a classic moka pot, tiny coffee cups, and a cozy café counter, this delightful scene is perfect for coffee lovers and storytelling enthusiasts alike. Whether you’re crafting a whimsical display, a gift for your favorite caffeine connoisseur, or just want to stitch up something full of personality, this set brings the warmth of your favorite café straight to your yarn stash. 🧶☕🧑🍳
Designed for detail and playfulness, this pattern invites you to mix rich yarn tones, expressive features, and fun extras like pastries, menus, or even a tiny tip jar. Customize your barista’s outfit, add latte art to the cups, or decorate the counter with seasonal flair. Whether perched on a shelf, nestled in a gift basket, or starring in a cozy corner of your craft room, this Barista & Café Amigurumi Set is a joyful and satisfying project—perfect for stitching up a little handmade hospitality, one loop at a time! 💖✨🍩
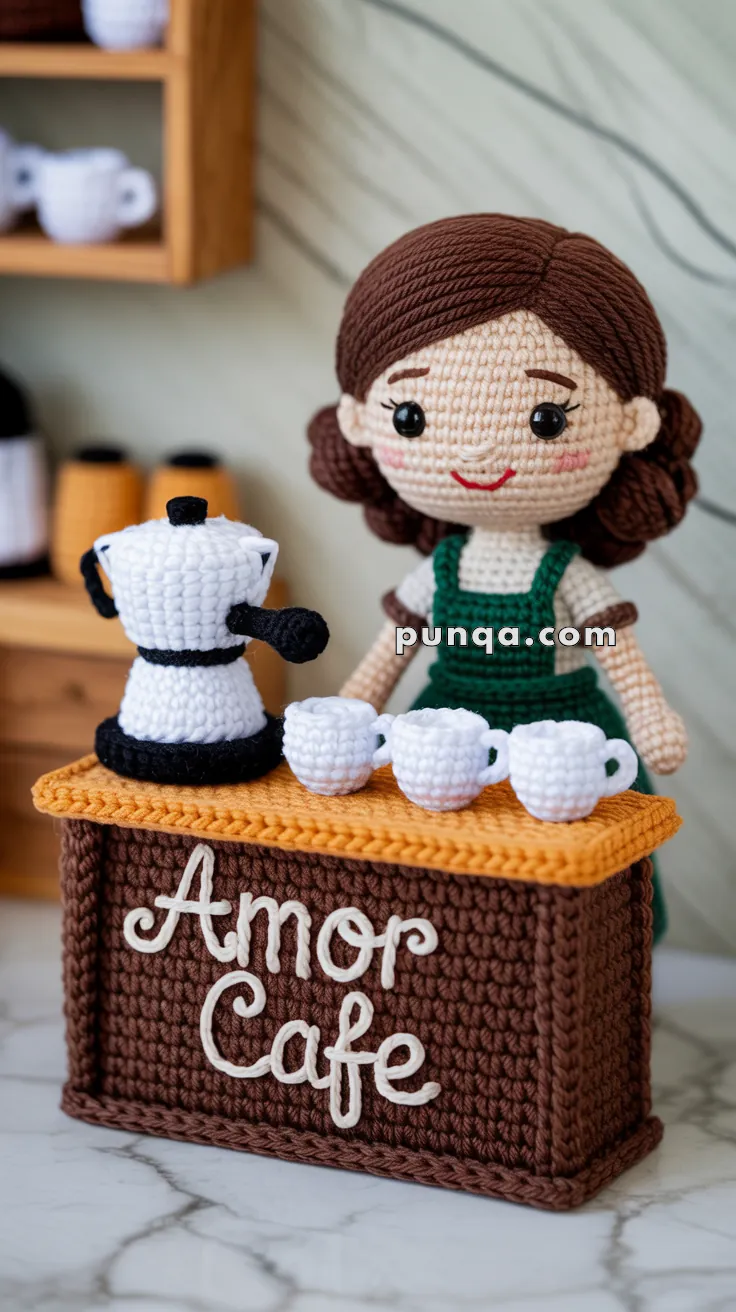
☕ Amigurumi Barista & Amor Café Set Crochet Pattern
Bring the warmth of your favorite coffee shop home with this adorable crochet café scene!
Create your own charming little café corner with this complete crochet set featuring a sweet barista doll, a detailed café counter with raised lettering, a classic moka pot, and tiny coffee cups. Every detail has been carefully designed to capture the cozy atmosphere of a boutique coffee shop.
This pattern includes full instructions for sculpted hair, structured counter assembly, and step-by-step lettering guidance to help you recreate the “Amor Café” sign with confidence.
✨ Skill Level
Intermediate to Advanced – This project includes shaping, color changes, hair sculpting, structured construction, surface crochet, and decorative lettering.
📏 Finished Sizes
- Barista Doll: ~20 cm (8 inches) tall
- Café Counter: ~14–15 cm tall × 15–16 cm wide
- Moka Pot: ~8–9 cm tall
- Coffee Cups: ~3 cm tall each
🧶 Materials
Yarn (Sport or DK Weight, ~50g balls)
- Beige/Peach (skin tone) – 25g
- Dark Brown (hair, counter body) – 50g
- Forest Green (apron) – 15g
- White (shirt, moka pot body, cups, lettering) – 40g
- Black (moka pot trim, handle, spout) – 20g
- Light Orange/Tan (countertop) – 30g
- Red (embroidered smile) – small amount
- Pink (cheek blush) – embroidery thread or fabric paint
Other Supplies
- Safety eyes: 6–8mm (1 pair)
- Crochet hook: 2.5mm
- Tapestry needle
- Scissors
- Stitch markers
- Polyfill stuffing
- Foam block or cardboard (for counter structure)
- Pins (for lettering placement)
- Optional: Wire (for poseable arms)
🧵 Abbreviations (US Terms)
- MR = magic ring
- ch = chain
- sc = single crochet
- inc = increase (2 sc in same stitch)
- dec = decrease (sc2tog)
- sl st = slip stitch
- FLO = front loop only
- BLO = back loop only
- FO = fasten off
- R = round
🧍♀️ Part 1: Barista Doll
Head (Beige)
R1: MR, 6 sc (6)
R2: inc × 6 (12)
R3: (1 sc, inc) × 6 (18)
R4: (2 sc, inc) × 6 (24)
R5–12: sc around (24) – 8 rounds
R13: (2 sc, dec) × 6 (18)
R14: (1 sc, dec) × 6 (12)
R15: dec × 6 (6)
FO, leaving long tail for sewing.
👁️ Eye Placement: Insert safety eyes between rounds 7–8, centered on face, spaced 7 stitches apart.
😊 Face Details:
- Embroider a gentle curved smile with red yarn between rounds 9–10
- Add pink blush to cheeks using embroidery or fabric paint
Stuff head firmly before closing.
Hair (Dark Brown) – Sculpted Style
Hair Cap Base
Work the head pattern through R4 to create a 24-stitch cap.
R5–7: sc around (24) – 3 rounds
FO, leaving long tail.
Side Part & Bangs
Using dark brown yarn and tapestry needle:
- Create the part: Surface crochet a diagonal line from center front toward the left side (your left when facing the doll)
- Swept bangs: Make 3–4 diagonal surface crochet lines from the part line sweeping across the forehead to create the side-swept bang effect
Layered Back Hair (Optional Texture)
Choose one method:
Method A – Loop Stitch Texture:
- Attach yarn at back of cap
- Work 2–3 rows of loop stitches around the back and sides for textured hair
- Keep loops ~1cm long
Method B – Strand Application:
- Cut 40–50 strands of brown yarn, each 8–10cm long
- Using latch hook or crochet hook, attach strands in rows around back of cap
- Trim and style once all strands are attached
Hair Buns (Make 2)
R1: MR, 6 sc (6)
R2: inc × 6 (12)
R3: sc around (12)
FO, leaving long tail.
Stuff lightly. Sew buns low on each side of the head, positioned just behind and slightly below the ears.
Sew completed hair cap to head, ensuring side part is properly positioned.
Body (White shirt with Green apron)
R1: MR, 6 sc (6)
R2: inc × 6 (12)
R3: (1 sc, inc) × 6 (18)
R4–6: sc around (18) – 3 rounds in white
R7: Switch to green, sc around (18)
R8–13: sc around (18) – 6 rounds in green
R14: (1 sc, dec) × 6 (12)
R15: dec × 6 (6)
FO, leaving long tail.
Stuff body firmly. The green section represents the apron covering the white shirt.
Arms (Make 2)
R1: MR, 5 sc in beige (5)
R2–3: sc around (5) – 2 rounds in beige
R4–6: Switch to white, sc around (5) – 3 rounds
R7: Switch to brown, sc around (5) – 1 round (represents sleeve cuff)
FO, leaving long tail.
Stuff lightly (arms should be soft and poseable).
Optional: Insert a short piece of wire before stuffing for poseable arms.
Doll Assembly
- Sew head securely to body
- Attach arms to sides of body at shoulder level (around R4–5 of body)
- Position arms slightly angled forward, as if holding something
- Weave in all ends
🏪 Part 2: Amor Café Counter
Counter Panels (Dark Brown – Make 4)
Ch 28
Row 1: sc in 2nd ch from hook and across (27 sc)
Rows 2–28: ch 1, turn, sc across (27 sc)
FO after row 28.
You now have 4 identical rectangular panels, each 27 stitches wide × 28 rows tall.
Counter Assembly
Step 1: Create the Box Structure
- Lay out panels: 2 for front/back, 2 for sides
- Front panel: This is where lettering will go – set aside
- Using tapestry needle and brown yarn, whip stitch panels together:
- Attach side panels to back panel
- Attach front panel last
- Reinforce corners with extra stitches
Step 2: Insert Structural Support
- Cut foam block or cardboard to fit snugly inside counter (approximately 13 cm × 7 cm × 13 cm)
- Insert support to keep counter rigid and standing upright
- Tack support to bottom with a few stitches if needed
Countertop (Light Orange with Overhang)
Ch 32
Row 1: sc in 2nd ch from hook and across (31 sc)
Rows 2–6: ch 1, turn, sc across (31 sc)
FO, leaving long tail.
The countertop is intentionally wider than the counter body to create an overhang on all sides.
Attach countertop:
- Center the countertop on the counter opening
- Whip stitch around all four sides
- The overhang should extend ~2 stitches beyond each edge
✍️ Part 3: “Amor Café” Lettering
This is the signature element of your counter! Take your time with this section.
Materials for Lettering
- White yarn
- Tapestry needle
- Pins
- The photo reference for letter styling
Creating the Lettering Chain
Ch 160 in white yarn. Do not cut yarn yet.
This long chain will be shaped into the cursive letters: “Amor Café”
Letter-by-Letter Shaping Guide
Use pins to position the chain on your counter front panel before sewing. Follow this guide:
Letter A (Capital, Cursive)
- Start at bottom left
- Curve chain upward and slightly right (ascending stroke)
- Create peaked top
- Bring chain down to the right (descending stroke)
- Cross with a small loop at mid-height for crossbar
- Use approximately 15–18 chain stitches
Letter m (Lowercase, Cursive)
- Start where A ends, flowing to the right
- Create first small hump upward then down
- Create second hump (middle)
- Create third hump
- Use approximately 12–15 chain stitches
Letter o (Lowercase, Cursive)
- Flow from m into circular shape
- Create complete oval/circle
- Keep size consistent with m height
- Use approximately 8–10 chain stitches
Letter r (Lowercase, Cursive)
- Connect from o with upward stroke
- Small curve at top
- Short downward stroke
- Use approximately 6–8 chain stitches
Space
Allow 3–4 chain stitches to create visible space between words
Letter C (Capital, Cursive)
- Start with upward curved stroke
- Create open C-shape (opening to the right)
- Slightly larger than lowercase letters
- Use approximately 12–14 chain stitches
Letter a (Lowercase, Cursive)
- Create small circular/oval shape
- Add small tail/connecting stroke
- Use approximately 8–10 chain stitches
Letter f (Lowercase, Cursive)
- Tall ascending stroke (taller than other lowercase)
- Loop or curve at top
- Descending stroke with crossbar
- Use approximately 10–12 chain stitches
Letter é (Lowercase with Accent)
- Similar to o, create oval shape
- Add acute accent above (small diagonal chain or embroidered line)
- Use approximately 8–10 chain stitches for e, plus 2–3 for accent
Lettering Application Steps
- Pin placement: Using the stitch guide above, carefully pin your 160-chain into the cursive letters on the front panel. Step back frequently to check letter proportions and spacing.
- Adjust as needed: If letters are too tight or loose, adjust by adding or removing a few chains. The total may vary between 150–170 chains depending on your letter sizing.
- Sew down: Once satisfied with placement, use white yarn and tapestry needle to stitch down the chain at key points:
- Letter peaks and valleys
- Curves and loops
- Every 3–4 stitches along straight sections
- Create raised effect (Optional): For extra dimension, you can:
- Use i-cord instead of chain (crochet a 2-stitch tube)
- Sew chain loosely so it stands slightly away from surface
- Apply a second chain layer on top of the first
- Secure ends: Weave starting and ending tails into the back of the panel securely.
Alternative Lettering Methods
If cursive chain lettering feels too challenging:
- Option A: Use white felt, cut letters, and glue/stitch to panel
- Option B: Embroider letters using backstitch or chain stitch
- Option C: Use fabric paint or dimensional paint to write directly on panel
☕ Part 4: Moka Pot (Coffee Maker)
Base (Black)
R1: MR, 6 sc (6)
R2: inc × 6 (12)
R3: (1 sc, inc) × 6 (18)
R4: sc around (18)
Switch to white. Do not cut black.
Body (White)
R5–9: sc around (18) – 5 rounds
R10: (2 sc, dec) × 4, 2 sc (14) – tapering begins
R11–12: sc around (14) – 2 rounds
FO, leaving long tail.
Black trim bands: Using black yarn and tapestry needle, embroider or surface crochet a band around:
- Junction between base and body (between R4–5)
- Just below where lid will attach (around R12)
Stuff moka pot firmly to maintain shape.
Lid (White)
R1: MR, 6 sc (6)
R2: inc × 6 (12)
R3: sc around (12)
R4: dec × 6 (6)
FO, leaving long tail.
Stuff lightly and sew to top of moka pot body.
Handle (Black)
Ch 6
Row 1: sc in 2nd ch from hook and across (5 sc)
FO, leaving long tails.
Sew handle vertically to side of moka pot body, creating a C-shape or ear-like loop.
Spout (Black)
Ch 5
Row 1: sc in 2nd ch from hook and across (4 sc)
FO, leaving long tails.
Fold in half lengthwise and sew to opposite side of moka pot from handle, angled slightly upward and outward.
☕ Part 5: Mini Coffee Cups (Make 3)
R1: MR, 6 sc (6)
R2: (1 sc, inc) × 3 (9)
R3: (2 sc, inc) × 3 (12) – flared base
R4–5: sc around (12) – 2 rounds
R6: sl st around rim (12) – creates finished edge
FO, leaving long tail.
Stuff very lightly (cups should hold shape but not be overly firm).
Cup Handle (for each cup)
Ch 4
Turn, sl st back along chain (3 sl st)
FO, leaving tails.
Sew handle to side of cup in a small loop.
🎨 Final Assembly
Step 1: Position Barista
- Place barista doll behind counter
- Sew bottom of body to back inside edge of counter OR
- Allow doll to rest freely for repositioning
Step 2: Arrange Coffee Elements
- Position moka pot on countertop (slightly off-center or center)
- Arrange 3 coffee cups on countertop
- Sew down moka pot and cups with matching yarn to secure them permanently
Step 3: Final Touches
- Check that all yarn ends are woven in securely
- Ensure lettering is firmly attached with no loose sections
- Add any additional embellishments (optional tiny spoon, napkins, etc.)
- Fluff and shape barista’s hair
- Position arms in a welcoming gesture
🌟 Styling & Display Tips
- Photography: This set looks beautiful on a marble or wooden surface with natural lighting
- Gifting: Perfect for coffee lovers, baristas, café owners, or as unique kitchen décor
- Variations: Change apron color to match a favorite café’s branding
- Scale up: Use worsted weight yarn and larger hook for a bigger display piece
- Add details: Tiny crocheted pastries, menu board, or café chair make lovely additions
📸 Pattern Notes
Gauge: Not critical, but consistent tension will ensure all pieces are proportional to each other
Yarn substitutions: Any sport or DK weight yarn works. Cotton yarn gives a crisper, more structured finish; acrylic is softer and more forgiving.
Lettering troubleshooting: If you find the 160-chain too long or short, adjust as needed. Every crocheter’s tension varies slightly.
Time estimate: 12–16 hours total (varies with experience level)
❤️ About This Pattern
This pattern was designed to capture the warmth and charm of neighborhood coffee shops where baristas know your order and every cup is made with love. The name “Amor Café” (Love Café) reflects that special feeling.
Whether you’re making this for yourself or as a gift, I hope it brings a little cozy café magic into your space.
Happy crocheting! ☕✨