🦆 Amigurumi Donald Duck Crochet Pattern
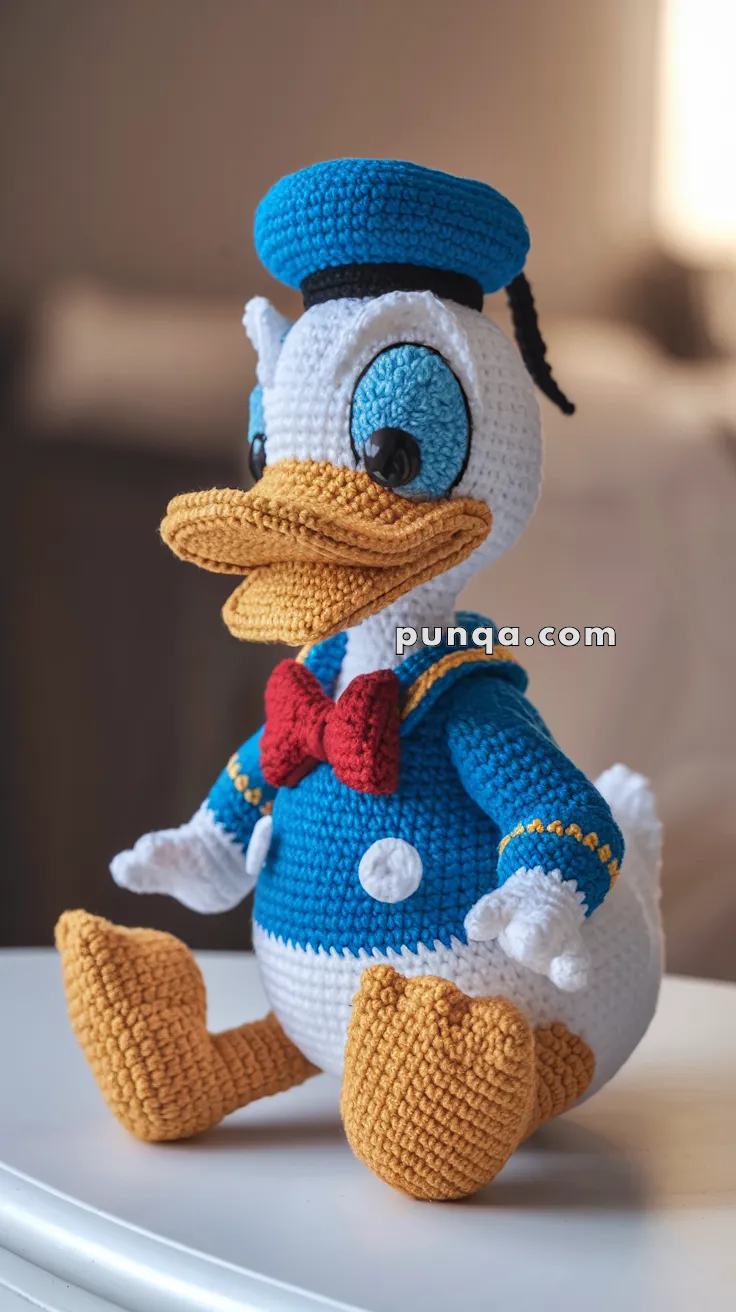
Bring a splash of cheerful character into your crochet collection with this charming Donald Duck amigurumi! With his rounded sailor hat, classic blue outfit, red bow tie, expressive beak, and soft webbed feet, this design captures his playful personality in a smooth, clean silhouette. Perfect as a display doll or a special handmade gift for Disney fans.
🧵 Skill Level
Advanced – includes layered facial construction, shaping, colorwork, and detailed assembly.
📏 Finished Size
Approx. 28–31 cm (11–12 inches) tall (sitting)
🧶 Materials & Yarn Amount
- White yarn: 170–190 g (head, body, hands, tail)
- Blue yarn: 120–140 g (shirt, hat, eye panels)
- Yellow yarn: 130–150 g (beak, legs, feet)
- Red yarn: 25 g (bow tie)
- Black yarn/thread: 10 g (hat band, ribbon, eye outline)
Other:
- 12–14 mm safety eyes
- Polyester stuffing (~450–550 g)
- 3.0–3.5 mm crochet hook
- Yarn needle
- Stitch markers
✂️ Abbreviations (US Terms)
MR – magic ring
sc – single crochet
inc – increase
dec – invisible decrease
ch – chain
sl st – slip stitch
FO – fasten off
🧠 Head (Large, Smooth & Slightly Forward-Full)
With white yarn:
Round 1: MR, 6 sc (6)
Round 2: inc ×6 (12)
Round 3: (1 sc, inc) ×6 (18)
Round 4: (2 sc, inc) ×6 (24)
Round 5: (3 sc, inc) ×6 (30)
Round 6: (4 sc, inc) ×6 (36)
Round 7: (5 sc, inc) ×6 (42)
Round 8: (6 sc, inc) ×6 (48)
Rounds 9–17: sc around (48)
➡️ Keep head very round with slight fullness at the front
Insert eyes between Rounds 12–13, spaced 5 stitches apart
Round 18: (6 sc, dec) ×6 (42)
Round 19: (5 sc, dec) ×6 (36)
Round 20: (4 sc, dec) ×6 (30)
Stuff firmly.
Round 21: (3 sc, dec) ×6 (24)
Round 22: (2 sc, dec) ×6 (18)
Round 23: (1 sc, dec) ×6 (12)
Round 24: dec ×6 (6)
FO.
👀 Eyes (Very Large Oval Panels)
White Eye Panels (Make 2)
Ch 11
R1: sc 9, 3 sc in last, turn, sc 9, 2 sc (23)
R2: (inc, sc 9, inc ×3, sc 9, inc ×2) (29)
R3–R5: sc around
➡️ Panels should be large and slightly vertical oval
Blue Eye Area (Make 2)
MR 6
R2: inc ×6 (12)
R3: (sc, inc) ×6 (18)
R4: (2 sc, inc) ×6 (24)
FO.
Assembly
- Insert safety eyes through blue pieces
- Sew blue pieces onto white panels
- Attach entire eye unit to head
➡️ Eyes should be:
- Very large
- Close together
- Slightly angled inward
Add:
- Thin black embroidered outline
- Small white highlight
🟡 Beak (Wide, Flat & Layered)
The beak is a defining feature: broad, flat, and slightly curved downward
Lower Beak
Ch 13
R1: sc 11, 3 sc in last, turn, sc 11, 2 sc (27)
R2: (inc, sc 11, inc ×2, sc 11, inc) (31)
R3–R5: sc around
➡️ Light stuffing, keep flat
Upper Beak
Ch 15
R1: sc 13, 3 sc in last, turn, sc 13, 2 sc (31)
R2: (inc, sc 13, inc ×2, sc 13, inc) (35)
R3–R6: sc around
➡️ Slight downward curve
Assembly
- Sew lower beak first
- Attach upper beak overlapping slightly
- Add subtle black mouth line
➡️ Keep beak wide, flat, and layered—not tubular
🩵 Body (Rounded Sitting Shape)
With white yarn:
Round 1: MR, 6
Round 2: inc ×6 (12)
Round 3: (1 sc, inc) ×6 (18)
Round 4: (2 sc, inc) ×6 (24)
Round 5: (3 sc, inc) ×6 (30)
Round 6: (4 sc, inc) ×6 (36)
Round 7: (5 sc, inc) ×6 (42)
Rounds 8–13: sc around (42)
Switch to blue:
Rounds 14–19: sc around (42)
➡️ Body is round and slightly bottom-heavy
Round 20: (5 sc, dec) ×6 (36)
Round 21: (4 sc, dec) ×6 (30)
Stuff firmly.
FO.
🤍 Shirt Details
- Add 2 large white buttons (MR 8–10 sc)
- Add yellow decorative stitch line across chest
✋ Arms (Short with Rounded Hands)
Make 2:
Hand (White)
R1: MR 6
R2: inc ×6 (12)
R3–R5: sc around
Sleeve (Blue)
R6–R12: sc around
Add yellow trim with surface stitching.
➡️ Arms are short and slightly forward
🦶 Legs & Feet (Short, Wide & Flat)
Feet
R1: MR 6
R2: inc ×6 (12)
R3: (sc, inc) ×6 (18)
R4–R7: sc around (18)
➡️ Flatten slightly
Add 2–3 stitched toe divisions.
Legs
R8–R12: sc around
➡️ Keep short for sitting pose
🐥 Tail
MR 6
R2: (sc, inc) ×3 (9)
R3–R4: sc
Lightly stuff and attach at back.
🎩 Sailor Hat (Rounded Top with Narrow Band)
With blue yarn:
Round 1: MR 6
Increase evenly to 48 sts
Rounds 8–11: sc around
Brim
Work in FLO:
(7 sc, inc) ×6
2 rounds sc
Band & Ribbon
- Black band around base
- Add 2 short ribbon tails at back
🎀 Bow Tie (Compact & Centered)
Ch 16, join
Work 4–5 rounds sc
Pinch center and wrap yarn
Attach directly under beak
🧵 Assembly
- Attach eyes first, then beak
- Sew head to body
- Attach arms slightly forward
- Attach legs wide for seated balance
- Add tail
- Place hat centered with slight tilt
✨ Final Shaping Tips
- Keep eyes dominant and close
- Flatten beak slightly
- Ensure stable sitting base
- Adjust hat angle for character
💡 Pro Tips
- Eye size defines the character look
- Beak must stay flat and wide
- Tight stitches give clean finish
- Keep proportions compact
Your Donald Duck amigurumi is now complete—full of personality, charm, and classic sailor style. A delightful project for collectors and Disney lovers alike. 🦆💙✨
Happy crocheting!