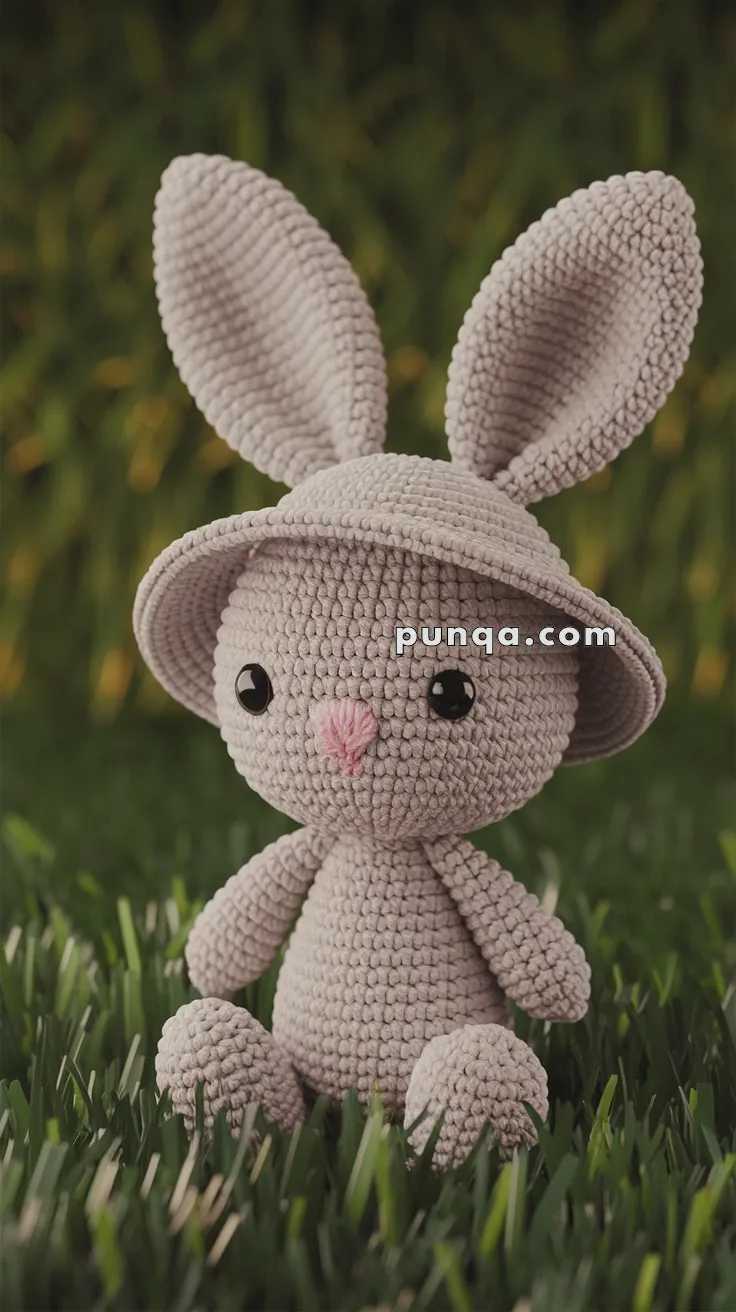
🐰 Amigurumi Bunny with Easter Bonnet Crochet Pattern
Celebrate springtime with this soft and charming Amigurumi Bunny wearing a sweet Easter bonnet! With floppy ears, a rosy nose, and a wide-brimmed hat, this cuddly friend is perfect for gifting, decorating, or adding to your handmade toy collection.
✨ Skill Level
Beginner–Intermediate
Includes shaping, sewing, and a soft hat with brim.
📏 Finished Size
Approx. 22–25 cm (8.5–10 inches) tall including ears
Using DK or light worsted yarn with a 3.0–3.5 mm hook
🧶 Materials
Yarn (DK / light worsted):
-
Light beige / warm grey – body, head, arms, legs, ears, hat
-
Soft pink – nose embroidery
Other supplies:
🧵 Abbreviations (US Terms)
🧠 Head
With beige yarn:
R1: MR 6 sc (6)
R2: inc ×6 (12)
R3: (1 sc, inc) ×6 (18)
R4: (2 sc, inc) ×6 (24)
R5: (3 sc, inc) ×6 (30)
R6: (4 sc, inc) ×6 (36)
R7–13: sc around (36)
Insert safety eyes between R9–10, spaced 7–8 stitches apart.
R14: (4 sc, dec) ×6 (30)
R15: (3 sc, dec) ×6 (24)
R16: (2 sc, dec) ×6 (18)
Stuff firmly.
R17: (1 sc, dec) ×6 (12)
R18: dec ×6 (6)
FO and close.
🌸 Nose (Embroidered)
Using pink yarn:
No muzzle piece — the face is flat and soft like the photo.
🧸 Body
With beige yarn:
R1: MR 6 sc (6)
R2: inc ×6 (12)
R3: (1 sc, inc) ×6 (18)
R4: (2 sc, inc) ×6 (24)
R5: (3 sc, inc) ×6 (30)
R6–11: sc around (30)
R12: (3 sc, dec) ×6 (24)
R13: (2 sc, dec) ×6 (18)
Stuff firmly.
R14: (1 sc, dec) ×6 (12)
R15: dec ×6 (6)
FO and close.
The body should be rounded and slightly pear-shaped.
🐾 Arms (Make 2)
R1: MR 6 sc (6)
R2: inc ×6 (12)
R3–6: sc around (12)
R7: (2 sc, dec) ×3 (9)
R8–12: sc around (9)
Stuff only the lower half so arms stay floppy.
FO, leave long tail for sewing.
🦶 Legs (Make 2)
R1: MR 6 sc (6)
R2: inc ×6 (12)
R3: (1 sc, inc) ×6 (18)
R4–7: sc around (18)
R8: (1 sc, dec) ×6 (12)
Stuff firmly for chunky feet.
FO, leave long tail.
👂 Ears (Make 2)
Tall upright ears with soft curve.
R1: MR 6 sc (6)
R2: (1 sc, inc) ×3 (9)
R3: (2 sc, inc) ×3 (12)
R4: (3 sc, inc) ×3 (15)
R5–12: sc around (15)
R13: (3 sc, dec) ×3 (12)
R14–15: sc around (12)
R16: (2 sc, dec) ×3 (9)
R17–18: sc around (9)
Lightly flatten, do not stuff.
FO and leave tail.
👒 Wide-Brim Bunny Hat
The hat is soft, floppy, and sits low on the head.
Hat Crown
R1: MR 6 sc (6)
R2: inc ×6 (12)
R3: (1 sc, inc) ×6 (18)
R4: (2 sc, inc) ×6 (24)
R5: (3 sc, inc) ×6 (30)
R6: (4 sc, inc) ×6 (36)
R7: (5 sc, inc) ×6 (42)
Hat Sides
R8–12: sc around (42)
Creates the soft bucket-hat shape.
Hat Brim
R13: (6 sc, inc) ×6 (48)
R14: (7 sc, inc) ×6 (54)
R15: (8 sc, inc) ×6 (60)
R16: sc around (60)
Sl st loosely around edge for a soft brim finish.
FO and weave in ends.
🪡 Assembly
-
Sew head to body, slightly tilted forward
-
Attach legs to front bottom of body so bunny sits naturally
-
Attach arms low on sides so they rest beside body
-
Sew ears high on head, slightly angled outward
-
Place hat gently over ears and stitch invisibly at back
✨ Finishing Touches
-
Shape cheeks gently with fingers
-
Curve ears slightly forward
-
Let hat sit low over eyes for cozy look
Your sweet bunny with an Easter bonnet is now ready for spring picnics, egg hunts, or to be gifted with love. 🐇💐 Try it in different pastel colors for a whole garden of cuddly bunnies!