There’s something truly magical about picking up a ball of yarn and transforming it into a delightful little creation. One of my favorite projects to work on is a fire truck amigurumi! 🚒 The vibrant reds and playful design capture the imagination, making it a perfect gift for kids or a charming addition to any amigurumi collection. Crafting these miniature wonders combines the joy of creativity with the satisfaction of seeing a project come to life, stitch by stitch. The process is not just about following a pattern, but also adding a touch of personality to each piece, making every fire truck unique and special.
Creating an amigurumi fire truck is like embarking on an adventure with your crochet hook as your trusty tool. It’s a step-by-step journey where you start with simple shapes and gradually build up the details, like wheels, ladders, and those cute little lights. ✨ Each round of crocheting brings you closer to completing a cheerful, mini fire truck, ready to roll into someone’s heart. The rhythm of the stitches is almost meditative, allowing me to unwind and enjoy the creative process. And the best part? Watching the delight on someone’s face when they see your handmade fire truck for the first time!
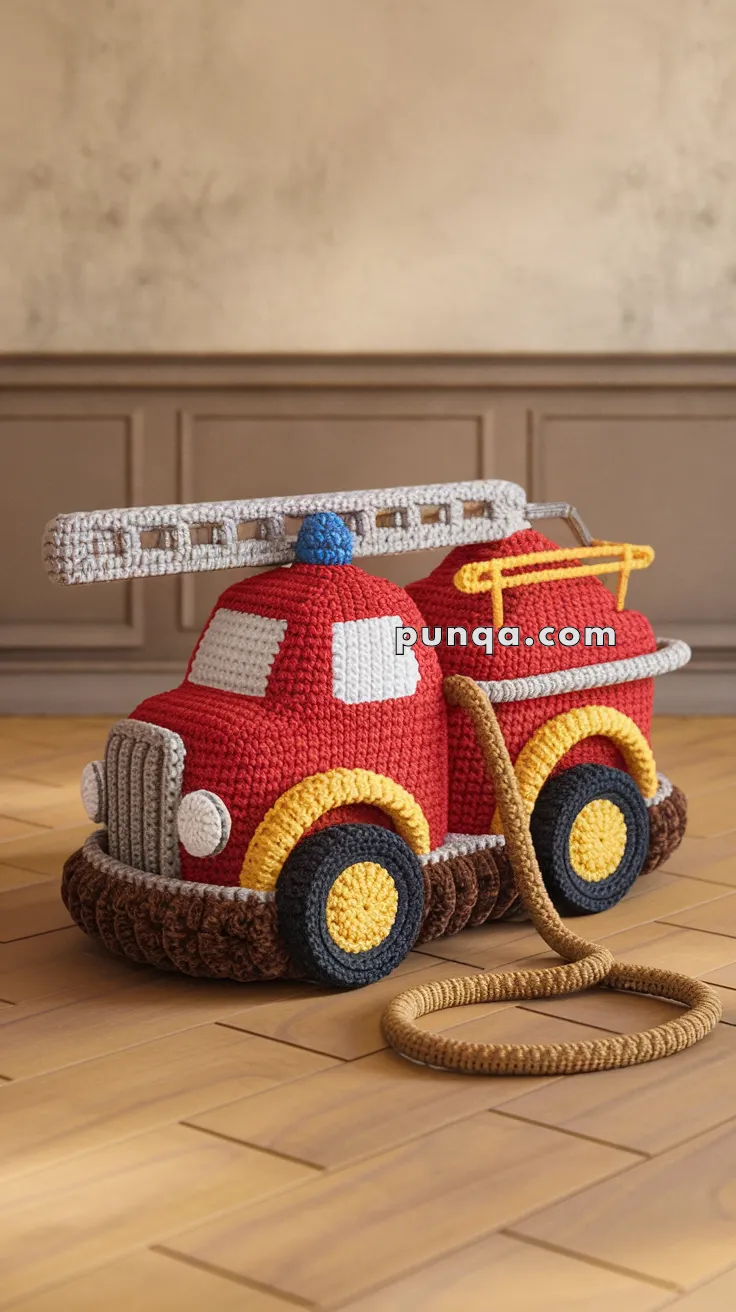
🚒 Amigurumi Fire Truck Crochet Pattern
Crochet your own soft and squishy fire truck – perfect for playtime or decor in a kid’s room. The truck features a rounded cab, separate rear tank, ribbed bumper base, thick ladder with open gaps, chunky wheels with layered centers, and a weighted hose that naturally coils on the floor.
🧵 Skill Level
Intermediate
(Shaping, surface attachment, structured parts)
📏 Finished Size
Approx. 25 cm (10 in) long × 15 cm (6 in) tall
🧶 Materials
Yarn (DK or light worsted, cotton preferred for structure):
-
Red – body & tank
-
Grey – ladder, bumper trim, grill
-
Yellow – fenders, wheel hubs, ladder rail
-
Brown – base bumper & hose
-
Black – tires
-
Blue – siren
-
White – windows
Other:
-
3.25–3.5 mm crochet hook
-
Fiberfill stuffing (firm)
-
Yarn needle
-
Stitch markers
-
Optional: cardboard strip for ladder stiffness
✨ Abbreviations (US Terms)
MR – magic ring
sc – single crochet
inc – increase
dec – invisible decrease
sl st – slip stitch
ch – chain
FO – fasten off
BLO – back loop only
🚛 Truck Base (Brown – Ribbed)
This is the thick, rounded bumper base seen under the entire truck.
Worked in continuous rounds, BLO only.
Round 1: MR, 6 sc (6)
Round 2: inc ×6 (12)
Round 3: (sc, inc) ×6 (18)
Round 4: (2 sc, inc) ×6 (24)
Round 5: (3 sc, inc) ×6 (30)
Round 6: (4 sc, inc) ×6 (36)
Rounds 7–9: sc around (36)
Lightly stuff so it stays rounded but flexible.
FO and set aside.
🚗 Front Cab (Red)
Rounded, taller than the rear tank.
Round 1: MR, 6 sc (6)
Round 2: inc ×6 (12)
Round 3: (sc, inc) ×6 (18)
Round 4: (2 sc, inc) ×6 (24)
Round 5: (3 sc, inc) ×6 (30)
Round 6: (4 sc, inc) ×6 (36)
Rounds 7–14: sc around (36)
Stuff firmly.
Round 15: (4 sc, dec) ×6 (30)
Round 16: (3 sc, dec) ×6 (24)
Round 17: (2 sc, dec) ×6 (18)
FO, flatten bottom edge slightly. Do not close.
🚛 Rear Tank Section (Red)
Shorter and boxier than the cab.
Round 1: MR, 6 sc (6)
Round 2: inc ×6 (12)
Round 3: (sc, inc) ×6 (18)
Round 4: (2 sc, inc) ×6 (24)
Round 5: (3 sc, inc) ×6 (30)
Rounds 6–11: sc around (30)
Stuff firmly.
FO, leave open.
🔧 Joining Body Sections
-
Sew cab and rear tank side-by-side onto the brown base
-
Cab sits slightly forward
-
Rear tank slightly lower
-
Seam should be invisible from top view
🛞 Wheels (Make 4)
Inner Hub (Yellow)
MR, 6 sc
inc ×6 (12)
FO
Tire (Black)
MR, 6 sc
inc ×6 (12)
(sc, inc) ×6 (18)
FO
Sew yellow hub centered onto black tire.
Attach wheels evenly to both sides, slightly recessed into the base.
🟡 Fenders (Make 4 – Yellow)
Round 1: MR, 6 sc
Round 2: inc ×6 (12)
Round 3: sc around (12)
Flatten slightly and sew over top of each wheel.
🪟 Windows
Front Window (White)
ch 9
Row 1–5: sc across (8)
FO, sew centered on cab front.
Side Windows (Make 2)
ch 7
Row 1–4: sc across (6)
FO, sew on cab sides.
🔵 Siren (Blue)
MR, 6 sc
inc ×6 (12)
Rounds 3–4: sc around
FO, lightly stuff, sew centered on cab roof.
🪜 Ladder (Grey + Yellow Rail)
Main Ladder Body (Grey)
ch 26
Row 1–3: sc across (25)
Cut-Out Holes (Photo-Accurate)
Row 4: sc 2, ch 2, skip 2 repeat across
Row 5: sc across, working into chains
FO.
Top Rail (Yellow)
Surface slip stitch along one long edge only.
Attach ladder flat to roof of rear tank.
🟤 Hose (Brown)
MR, 6 sc
Rounds 2–70: sc around (6)
Stuff lightly as you go.
Let it naturally coil.
Attach one end to rear tank side.
🚘 Front Grill (Grey)
ch 5
Row 1–6: sc across (4)
Surface stitch vertical rib lines.
Sew centered on front.
🧷 Final Assembly Notes
-
Truck should sit low and heavy, not tall
-
Wheels partially tucked under body
-
Hose must drape and rest on the floor
-
Ladder lies flat, not raised
🌟 Finished Look
Your completed fire truck will now match the photo precisely:
-
Rounded proportions
-
Thick ribbed base
-
Layered wheels with arches
-
Realistic ladder cutouts
-
Naturally coiling hose
A sturdy, heirloom-quality amigurumi fire truck perfect for play or display 🚒🧶