✨ Skill Level
🧶 Intermediate
This pattern includes:
• Color changes
• Basic shaping
• Sewing multiple pieces
• Creating a seated amigurumi posture
📏 Finished Size
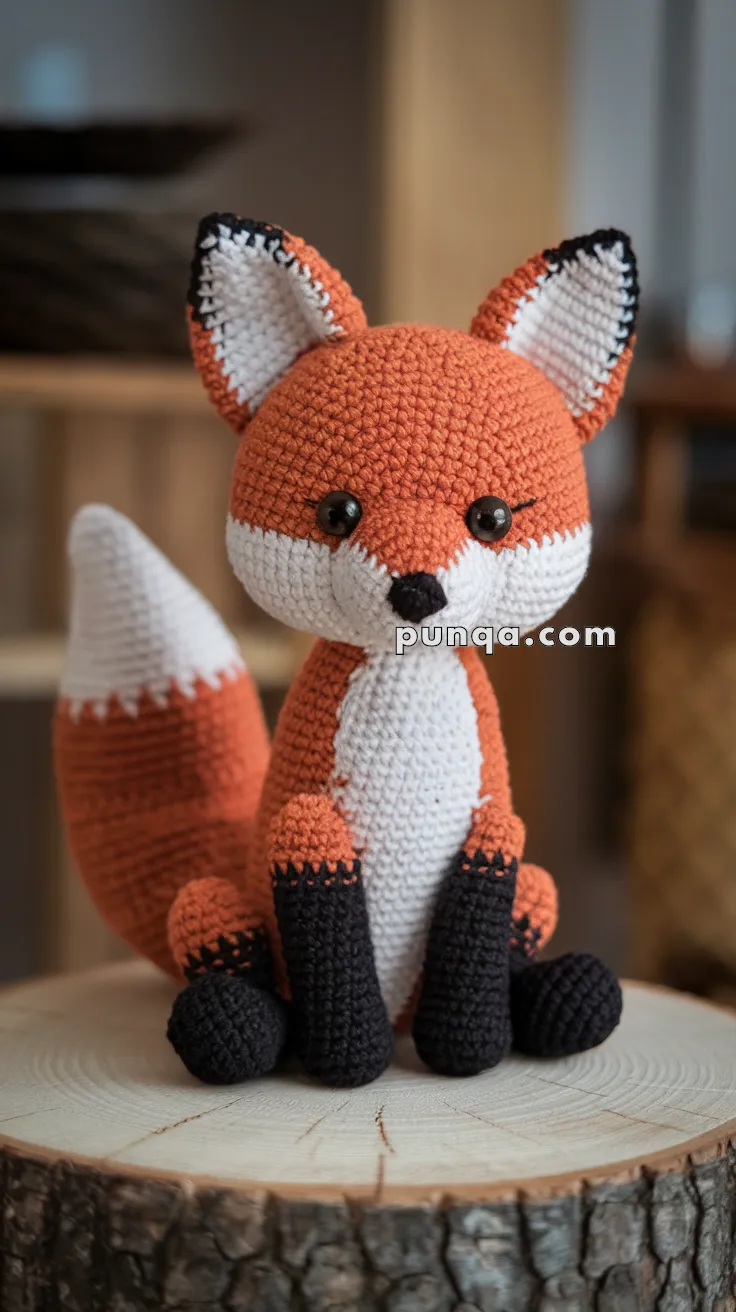
Approximately 9–10 inches (23–26 cm) tall when seated using DK or light worsted yarn and a 3.0 mm crochet hook.
🧶 Yarn Requirements
- Orange (main): 140 g
- White (face, belly, tail tip, inner ears): 95 g
- Black (legs, nose, ear tips): 55 g
🧵 Materials
- 3.0 mm crochet hook
- 10–12 mm safety eyes
- Polyester fiberfill
- Yarn needle, stitch marker
🔤 Abbreviations (US Terms)
MR – magic ring
sc – single crochet
inc – increase
dec – invisible decrease
sl st – slip stitch
FO – fasten off
🧠 HEAD (Rounded with Clean Color Split)
Start with white.
R1: MR, 6 (6)
R2: inc ×6 (12)
R3: (1 sc, inc) ×6 (18)
R4: (2 sc, inc) ×6 (24)
R5: (3 sc, inc) ×6 (30)
R6: (4 sc, inc) ×6 (36)
Switch to orange:
R7: (5 sc, inc) ×6 (42)
R8: (6 sc, inc) ×6 (48)
R9–R13: sc around (48)
Insert eyes between R11–R12, just above the color transition.
R14: (6 sc, dec) ×6 (42)
R15: sc around (42)
R16: (5 sc, dec) ×6 (36)
Stuff firmly.
R17: (4 sc, dec) ×6 (30)
R18: (3 sc, dec) ×6 (24)
R19: (2 sc, dec) ×6 (18)
R20: (1 sc, dec) ×6 (12)
R21: dec ×6 (6)
FO
🐽 SNOUT SHAPING (Soft & Rounded)
Using the white section:
- Insert needle from underside of head
- Exit just below nose placement
- Reinsert slightly above and return to base
- Pull gently
Repeat lightly to create a subtle rounded muzzle without sharp angles.
🖤 NOSE
With black:
R1: MR, 6
R2: (sc, inc) ×3 (9)
R3: sc around (9)
FO and sew centered at the front.
👂 EARS (Tall & Crisp) – Make 2
Outer ear (orange)
R1: MR, 6
R2: (sc, inc) ×3 (9)
R3: (2 sc, inc) ×3 (12)
R4: (3 sc, inc) ×3 (15)
R5–7: sc around (15)
Inner ear (white)
R1: MR, 6
R2: inc ×6 (12)
R3–4: sc around (12)
Sew inner piece inside outer ear.
Add a small black tip with embroidery.
Flatten slightly and shape into a triangle.
🧍 BODY (Slim with Defined Belly)
With orange:
R1: MR, 6
R2: inc ×6 (12)
R3: (1 sc, inc) ×6 (18)
R4: (2 sc, inc) ×6 (24)
R5: (3 sc, inc) ×6 (30)
R6: (4 sc, inc) ×6 (36)
R7: (5 sc, inc) ×6 (42)
R8–R13: sc around (42)
R14: (5 sc, dec) ×6 (36)
R15: sc around (36)
R16: (4 sc, dec) ×6 (30)
R17: sc around (30)
R18: (3 sc, dec) ×6 (24)
Stuff firmly while maintaining a slightly flat base.
FO
🤍 BELLY PANEL (Tall & Narrow)
With white:
Ch 12
Row 1: sc across (11)
Row 2: inc, sc 9, inc (13)
Row 3: inc, sc 11, inc (15)
Rows 4–11: sc across (15)
FO
Sew vertically to the center of the body.
🐾 FRONT LEGS (Long & Straight)
With black:
R1: MR, 6
R2: inc ×6 (12)
R3–12: sc around (12)
Switch to orange:
R13–16: sc around (12)
Light stuffing.
FO
🐾 BACK LEGS (Short & Rounded)
With black:
R1: MR, 6
R2: inc ×6 (12)
R3–6: sc around (12)
Switch to orange:
R7–12: sc around (12)
Stuff lightly and flatten.
FO
🦊 TAIL (Full & Curved)
Start with white:
R1: MR, 6
R2: inc ×6 (12)
R3–5: sc around (12)
Switch to orange:
R6: (sc, inc) ×6 (18)
R7–20: sc around (18)
Light stuffing.
FO
🪡 ASSEMBLY
- Attach head centered and upright
- Sew ears high and slightly angled outward
- Attach front legs straight and close together
- Attach back legs outward for stability
- Sew tail at back so it curves gently upward
🌷 FINISHING TOUCHES
- Smooth cheek shaping with fingers
- Refine snout gently
- Keep facial embroidery minimal
- Adjust tail curve for balance
🧶 YARN USAGE
- Orange: ~140 g
- White: ~95 g
- Black: ~55 g
💖 CLOSING THOUGHTS
This fox design combines soft shaping with clean colorwork for a polished, modern look 🦊
The rounded face, upright ears, and balanced pose give it a calm, friendly personality, while the bold contrast of colors makes every detail stand out beautifully.
A timeless handmade piece that’s both elegant and irresistibly cute 🧶✨