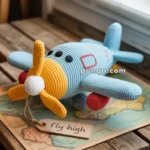
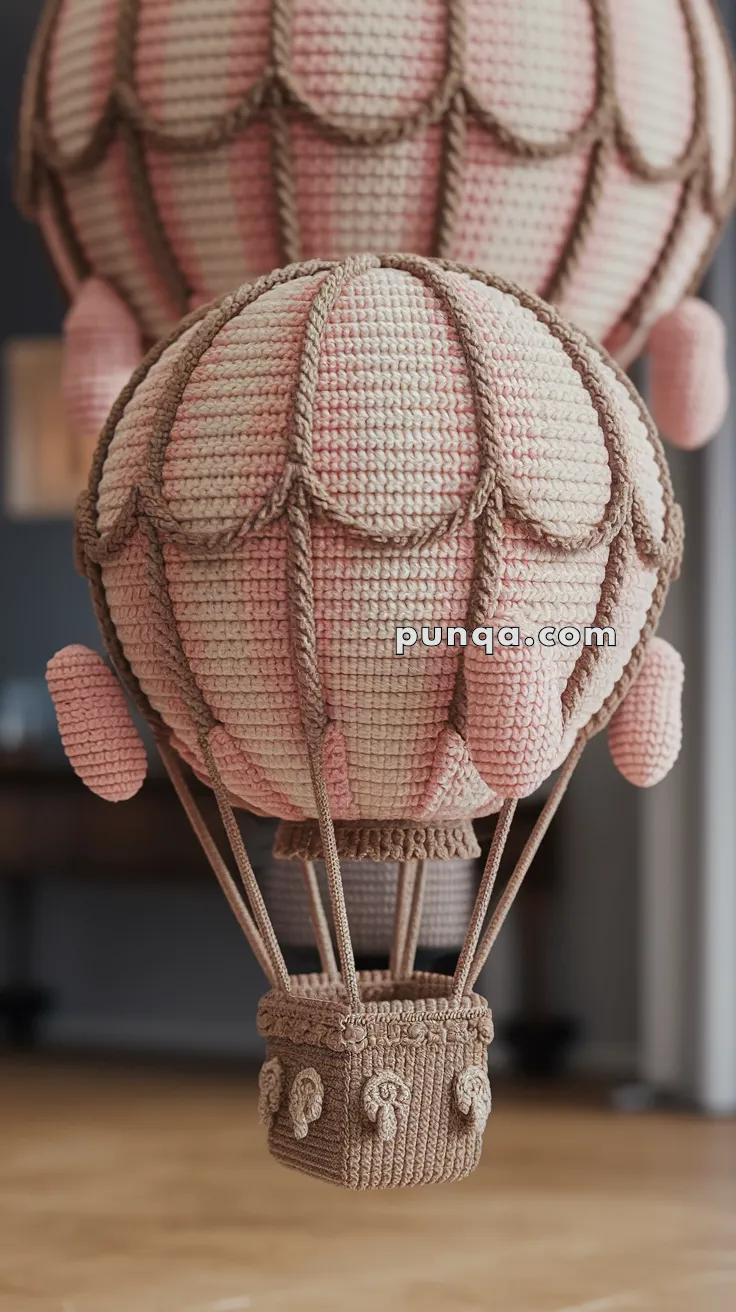
Float into whimsy with the Amigurumi Hot Air Balloon, a charming crochet project that’s full of adventure and sky-high sweetness! 🎈🧶 With its rounded balloon shape, cozy basket, and endless color possibilities, this delightful design is perfect for nursery décor, playful mobiles, or just adding a touch of dreamy magic to your space. Whether you’re crafting for a little one or simply love imaginative themes, this balloon is ready to lift your spirits—one stitch at a time.
Perfect for crocheters who enjoy soft shapes and vibrant palettes, this pattern invites you to mix and match stripes, solids, and even tiny passengers if you’re feeling extra creative. Add clouds, stars, or a rainbow backdrop to create a full sky scene, or stitch up a fleet of balloons in different sizes for a floating display. Whether hung in a window or gifted with love, the Amigurumi Hot Air Balloon is a joyful way to stitch up wonder—one airy loop at a time! ☁️💛
🎈 Hot Air Balloon Amigurumi Crochet Pattern
Float into dreamland with this handmade hot air balloon! With pastel pink and cream panels, bold rope accents, decorative scallops, side pods, and a sturdy square basket, this amigurumi makes a stunning nursery mobile or whimsical décor piece.
✨ Skill Level
Intermediate
You should be comfortable with:
-
Continuous-round shaping
-
Surface crochet & appliqué
-
Working decorative cords and overlays
-
Careful assembly and symmetry
📏 Finished Size
Using sport/DK cotton yarn and a 2.5 mm hook:
-
Total height: ~26–28 cm (10–11 in)
-
Balloon height: ~18–20 cm (7–8 in)
-
Balloon diameter: ~14–15 cm (5½–6 in)
-
Basket: ~4 × 4 × 4.5 cm (1½ × 1½ × 1¾ in)
🧶 Yarn Type & Amount (Important)
Recommended Yarn
Sport or DK weight cotton yarn
(Cotton gives the crisp stitch definition and structure seen in the photo.)
Yarn Amounts (approx.)
-
Blush Pink (balloon panels + side pods): ~45 g
-
Cream / Off-White (balloon panels): ~45 g
-
Warm Taupe / Light Brown (ropes, scallops, basket, cords): ~55 g
Total yarn: ~145 g
🧵 Tools & Notions
-
2.5 mm crochet hook
-
Polyester fiberfill
-
Yarn needle
-
Stitch markers
-
Scissors
-
Optional: thin plastic canvas or craft foam (basket insert)
🧵 Abbreviations (US Terms)
MR – magic ring
sc – single crochet
inc – increase (2 sc in same st)
dec – decrease (sc2tog)
ch – chain
sl st – slip stitch
hdc – half double crochet
dc – double crochet
tr – treble crochet
BLO – back loop only
FLO – front loop only
FO – fasten off
🎈 Balloon Body
(Smooth base sphere – panels and ropes are added later for relief)
Work in one color at a time. Do not change colors during the sphere.
Main Balloon (Cream or Pink – your choice)
R1: MR, 6 sc (6)
R2: inc ×6 (12)
R3: (sc, inc) ×6 (18)
R4: (2 sc, inc) ×6 (24)
R5: (3 sc, inc) ×6 (30)
R6: (4 sc, inc) ×6 (36)
R7: (5 sc, inc) ×6 (42)
R8: (6 sc, inc) ×6 (48)
R9: (7 sc, inc) ×6 (54)
R10: (8 sc, inc) ×6 (60)
R11: (9 sc, inc) ×6 (66)
R12: (10 sc, inc) ×6 (72)
R13–R26: sc around (72)
👉 Stuff firmly as you go. The balloon should feel dense and round, not soft.
Decrease
R27: (10 sc, dec) ×6 (66)
R28: (9 sc, dec) ×6 (60)
R29: (8 sc, dec) ×6 (54)
R30: (7 sc, dec) ×6 (48)
R31: (6 sc, dec) ×6 (42)
R32: (5 sc, dec) ×6 (36)
R33: (4 sc, dec) ×6 (30)
R34: (3 sc, dec) ×6 (24)
R35: (2 sc, dec) ×6 (18)
R36: (sc, dec) ×6 (12)
R37: dec ×6 (6)
FO, close.
🎨 Raised Panel Appliqués (Make 8)
These create the distinct padded vertical panels seen in the photo.
Panels (4 Pink, 4 Cream)
Ch 7
R1: sc in 2nd ch and across (6), ch 1, turn
R2–R22: sc 6, ch 1, turn
👉 Panels should be slightly curved and softly padded.
FO.
Attach Panels
Pin panels evenly around the balloon from top to bottom.
Hand-sew only the long edges, letting the center puff outward.
🧵 Rope Ridges (Make 8)
These are thick, dimensional cords, not flat embroidery.
With taupe yarn:
Ch 55–60 (enough to run balloon height)
Sl st back along chain.
Sew one rope between each panel, anchoring at top and bottom.
☁️ Scalloped Trim (Deep & Dramatic)
Attach taupe yarn at balloon’s widest point (around R18–R19).
(sc, hdc, dc, tr, tr, dc, hdc, sc, sl st) in next st
Repeat around.
👉 These scallops should stand proud and deep, like the photo.
FO.
🎀 Side Pods (Make 4 – Pink)
R1: MR, 6 sc (6)
R2: inc ×6 (12)
R3: (sc, inc) ×6 (18)
R4–R8: sc around (18)
R9: (sc, dec) ×6 (12)
R10: sc around (12)
Stuff firmly.
FO.
Sew evenly between ropes, slightly above the scallop line.
🧺 Basket
Base (Square)
With taupe yarn:
Ch 9
R1: sc in 2nd ch and across (8), ch 1, turn
R2–R8: sc 8, ch 1, turn
Do not turn.
Sc evenly around square → 32 sts
Basket Walls
R1: BLO sc around (32)
R2–R12: sc around (32)
FO.
👉 Insert plastic canvas or stiff cardboard if you want extra firmness.
Basket Decorative Swirls (Make 8)
Ch 7
Sc back across.
Curve slightly and sew in arched shapes on basket sides.
🪢 Suspension Cords
With taupe yarn:
Make 6 cords:
Ch 28–30
Sl st back along chain.
Attach evenly to basket rim and balloon base (just above scallops).
Keep tension equal so basket hangs straight.
🧵 Final Assembly
-
Finish balloon body and stuff firmly
-
Sew padded panels
-
Attach rope ridges
-
Add scalloped trim
-
Sew side pods
-
Make and decorate basket
-
Attach suspension cords evenly
-
Adjust symmetry carefully
🌸 Finishing Touches
-
Light steam blocking helps smooth panels
-
Optional fabric stiffener on basket only
-
Hang with clear thread for a floating effect
🌟 Final Thoughts
This hot air balloon amigurumi is designed to be visually rich, balanced, and sculptural—a true statement piece rather than a simplified toy. The layered panels, raised ropework, and detailed basket give it a timeless, heirloom quality that looks beautiful in nurseries, studios, or styled shelves.
Take your time with the assembly and enjoy watching it come together—it’s a project that rewards patience and precision.
Happy crocheting, and may your stitches always lift you sky-high 🎈🧶