✨ Skill Level
Intermediate – includes colorwork, shaping, and structured assembly.
📏 Finished Size
Approx. 25–30 cm (10–12 in) tall (sitting)
🧶 Materials & Yarn Amount
- Dark gray yarn (head top, sides, body, ears, tail): 100–120 g
- White yarn (face mask, chest, legs, inner ears): 90–110 g
- Black yarn (nose, embroidery): small amount
Supplies:
- 2.5–3.5 mm crochet hook
- 10–12 mm safety eyes
- Polyester stuffing (~120–150 g)
- Yarn needle, stitch marker
🧵 Abbreviations (US Terms)
MR – magic ring
sc – single crochet
inc – increase
dec – invisible decrease
FO – fasten off
BLO – back loop only
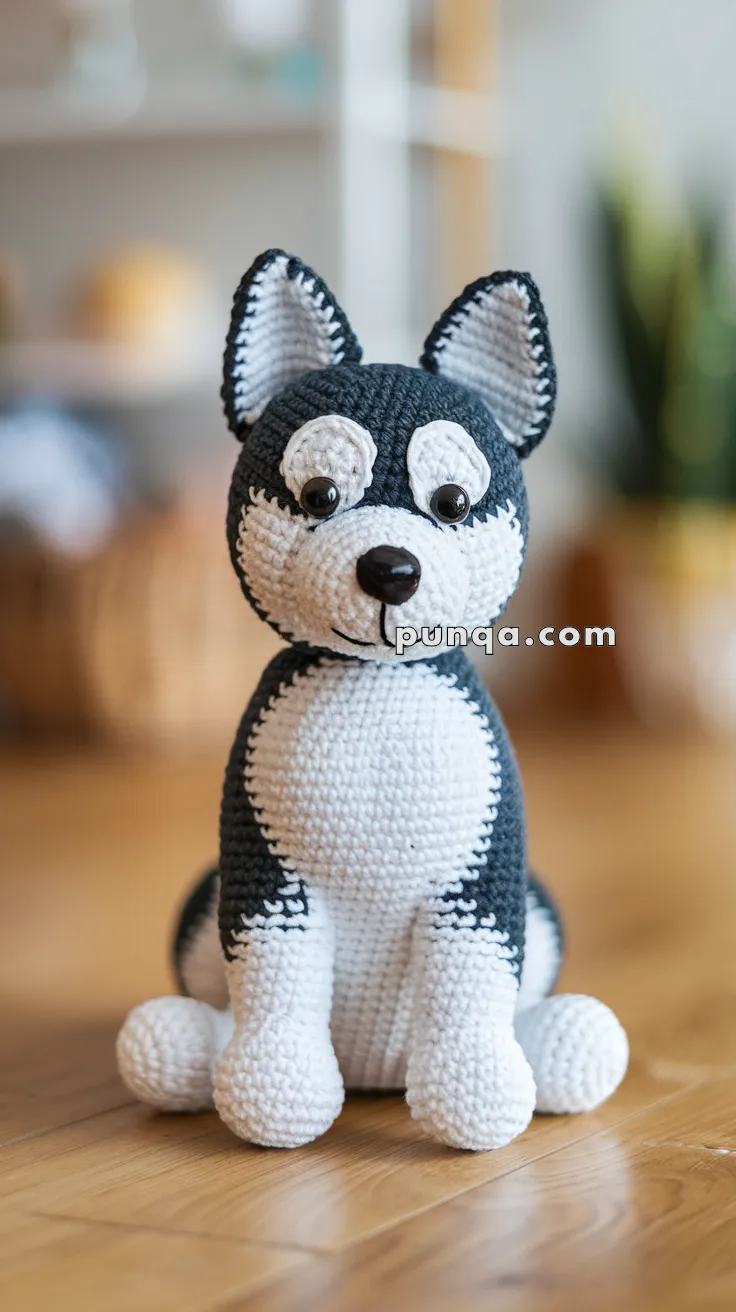
🐶 Head (Rounded with Defined Mask)
Start with white yarn:
R1: MR 6 (6)
R2: inc ×6 (12)
R3: (1 sc, inc) ×6 (18)
R4: (2 sc, inc) ×6 (24)
R5: (3 sc, inc) ×6 (30)
R6: sc around (30)
➡️ Begin color shaping (switch to gray for outer sides and top, keep front center white oval)
R7: (4 sc, inc) ×6 (36)
R8–13: sc around (36)
Insert eyes between R10–11, spaced 6–7 sts apart
R14: (4 sc, dec) ×6 (30)
R15: (3 sc, dec) ×6 (24)
R16: (2 sc, dec) ×6 (18)
Stuff firmly and shape slightly flatter at the front
R17: (1 sc, dec) ×6 (12)
R18: dec ×6 (6)
FO
🐕 Muzzle (Prominent Snout)
With white:
R1: MR 6
R2: inc ×6 (12)
R3: (1 sc, inc) ×6 (18)
R4–6: sc around (18)
Lightly stuff
👉 Sew centered below eyes to create a slightly protruding snout
👃 Nose & Expression
- Use black yarn to form a rounded oval nose
- Add a short vertical stitch and a soft curved smile
- Keep expression minimal and balanced
👂 Ears (Firm, Upright – Make 2)
Inner Ear (white)
MR 6
(1 sc, inc) ×3 (9)
R3: sc around (9)
Outer Ear (gray)
MR 6
(1 sc, inc) ×3 (9)
(2 sc, inc) ×3 (12)
R4–6: sc around (12)
Do not stuff
👉 Place white inside gray
👉 Crochet or stitch a thin gray edging around the inner piece
👉 Flatten slightly and sew upright
🧍 Body (Compact Sitting Shape)
Start with white:
R1: MR 6
R2: inc ×6 (12)
R3: (1 sc, inc) ×6 (18)
R4: (2 sc, inc) ×6 (24)
R5: (3 sc, inc) ×6 (30)
R6–7: sc around (30)
➡️ Switch to gray on sides and back, keep front chest white oval
R8–16: sc around (30)
R17: (3 sc, dec) ×6 (24)
R18–19: sc around (24)
Stuff firmly
R20: (2 sc, dec) ×6 (18)
R21: (1 sc, dec) ×6 (12)
R22: dec ×6 (6)
FO
🐾 Front Legs (Straight Support – Make 2)
With white:
R1: MR 6
R2: inc ×6 (12)
R3–6: sc around (12)
Switch to gray:
R7–12: sc around (12)
Light stuffing
👉 Legs should be straight and slightly firm
👉 Sew evenly at front base
🐾 Back Legs (Rounded Sitting Base – Make 2)
With white:
R1: MR 6
R2: inc ×6 (12)
R3: (1 sc, inc) ×6 (18)
R4–6: sc around (18)
R7: (1 sc, dec) ×6 (12)
R8–10: sc around (12)
Stuff well
👉 Flatten top slightly
👉 Attach angled outward for stable sitting pose
🐕 Tail (Soft Curve)
With gray:
R1: MR 6
R2: (1 sc, inc) ×3 (9)
R3–14: sc around (9)
Light stuffing
👉 Curve gently
👉 Attach low and slightly to the side
🧩 Assembly
- Sew muzzle to face
- Attach ears high and symmetrical
- Sew head to body securely
- Attach front legs straight down
- Attach back legs outward for balance
- Sew tail in relaxed curve
✨ Final Shaping Tips
- Keep face mask smooth and centered
- Slightly flatten front of head for expression
- Ensure legs create a stable seated pose
- Adjust stuffing for a rounded but structured body
❤️ Final Thoughts
This husky captures a calm, seated posture with clean color contrast and a gentle expression. The defined facial mask, upright ears, and balanced proportions give it a lifelike yet cozy charm—perfect as a display piece or a heartfelt handmade gift. 🐾💙