Welcome to the charming and nostalgic world of amigurumi! 🎀✨ Today, I’m excited to share my free crochet pattern for a Matryoshka Doll—a beautifully crafted piece inspired by the traditional Russian nesting dolls, perfect for collectors, cultural enthusiasts, or anyone who loves crafting intricate and symbolic plush figures! 🧵 Whether you enjoy stitching up timeless designs, creating expressive and detailed characters, or simply want to add a delightful Matryoshka to your handmade lineup, this pattern will guide you through crafting a sculpted plush with vibrant colors, delicate floral accents, and a touch of folk-art magic! 💖
This design embraces rich hues, flowing shapes, and intricate embroidery to bring a sense of heritage and artistry to your crochet projects! 🧶🌸 I’ve carefully outlined each step to ensure your Amigurumi Matryoshka turns out just right—ready to brighten up your collection or become a treasured handmade gift! 🎁 So grab your hooks, pick out deep reds, soft blues, or elegant golds, and let’s stitch up a stunning Matryoshka doll! ✨
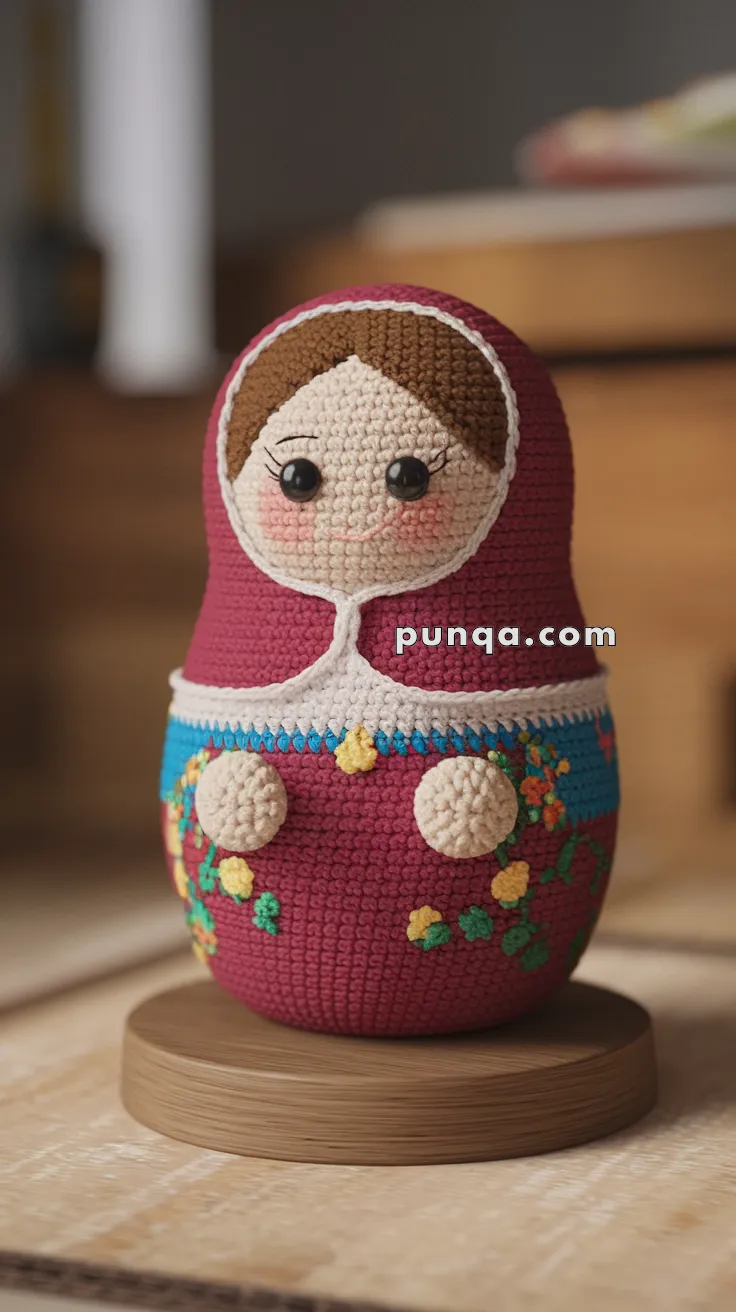
🎀 Amigurumi Matryoshka Doll Crochet Pattern
Celebrate traditional Russian charm with this adorable amigurumi Matryoshka doll! With a classic rounded body, delicate facial features, and floral embroidery, it’s a perfect decorative piece or heartfelt gift.
✨ Skill Level
Intermediate – Involves basic shaping, color changes, and embroidery.
📏 Finished Size
Approx. 6.5 inches (16–17 cm) tall using DK or worsted weight yarn and a 2.5–3.5 mm hook.
🧶 Materials
Yarn (DK or Worsted weight):
-
Skin tone (face, hands)
-
Brown (hair)
-
Burgundy or Red (outer scarf and base)
-
Blue (dress area)
-
White (scarf trim and front accent)
-
Yellow, green, pink (flowers and details)
Notions:
-
Crochet hook (2.5–3.5 mm)
-
9 mm safety eyes
-
Polyfill stuffing
-
Tapestry needle
-
Stitch marker
-
Embroidery needle and thread (black, white, pink)
🧵 Abbreviations (US Terms)
MR – Magic Ring
sc – Single Crochet
inc – Increase
dec – Decrease
ch – Chain
sl st – Slip Stitch
FO – Fasten Off
BLO – Back Loop Only
FLO – Front Loop Only
🧸 Head & Body (worked from top to bottom in one piece)
With skin tone:
-
MR, 6 sc
-
inc x6 (12)
-
(sc, inc) x6 (18)
-
(2 sc, inc) x6 (24)
-
(3 sc, inc) x6 (30)
-
(4 sc, inc) x6 (36)
7–10. sc around (36)
Insert safety eyes between R7–8, 6 sts apart -
(4 sc, dec) x6 (30)
-
(3 sc, dec) x6 (24)
-
(2 sc, dec) x6 (18)
-
(1 sc, dec) x6 (12)
-
sc around (12) – Start stuffing
Switch to burgundy (scarf):
-
(1 sc, inc) x6 (18)
-
(2 sc, inc) x6 (24)
-
(3 sc, inc) x6 (30)
-
(4 sc, inc) x6 (36)
-
sc around
-
Switch to blue (dress), sc around
-
(5 sc, inc) x6 (42)
23–27. sc around (42) -
(5 sc, dec) x6 (36)
-
(4 sc, dec) x6 (30)
-
(3 sc, dec) x6 (24)
Stuff firmly -
(2 sc, dec) x6 (18)
-
(1 sc, dec) x6 (12)
-
dec x6 (6), FO and close
🧕 Hair Cap
With brown:
-
MR, 6 sc
-
inc x6 (12)
-
(sc, inc) x6 (18)
-
(2 sc, inc) x6 (24)
-
(3 sc, inc) x6 (30)
6–8. sc (30)
FO, sew to top of head. Use white yarn to surface crochet a scarf outline around the face and down the body to shape the hood front.
✋ Hands (make 2)
With skin tone:
-
MR, 6 sc
2–3. sc (6)
Switch to red or dress color:
4–6. sc (6)
Stuff lightly, FO. Sew to sides of body over the blue area.
🌸 Embroidery Decoration (Flowers & Border)
Use embroidery thread or fine yarn:
-
Chain stitch for vines
-
French knots or small lazy daisy stitch for flowers
-
Optional: Use surface slip stitch for the blue trim border and white decorative accent lines
😍 Facial Details
-
Use black thread to embroider lashes
-
Use pink blush or embroidery for cheeks
-
Optional: Sew small line for mouth
💡 Customization Ideas
-
Make a set of decreasing-sized dolls
-
Use metallic yarns for a festive finish
-
Stitch initials or dates on the back for a keepsake
This Matryoshka doll is a timeless treasure to add elegance and warmth to any shelf or heart! 🪆💕