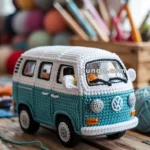
Rev up your crochet skills with this Amigurumi Mini Cooper pattern! Whether you’re crafting for car enthusiasts, adding a playful touch to your collection, or simply love detailed amigurumi designs, this free pattern lets you stitch up a charming Mini Cooper full of personality. With its sleek shape, signature headlights, and adorable wheels, this crochet car captures the essence of the beloved classic in every stitch. Perfect for gifting to auto lovers, decorating a fun display, or simply celebrating the joy of crochet, this amigurumi Mini Cooper is ready to cruise into your handmade treasures! 🚗✨
Designed for customization, this pattern allows you to experiment with different colors, embroidered details, or even tiny accessories like racing stripes or a miniature license plate for extra flair. Craft a classic red Mini, create a pastel version for a whimsical touch, or even stitch up a full fleet of tiny cars! Whether displayed as a nostalgic keepsake, gifted to a fellow crochet enthusiast, or made simply for the joy of crafting, this Amigurumi Mini Cooper is a dynamic and exciting project—perfect for bringing a touch of automotive charm to every stitch! 🧶🏁
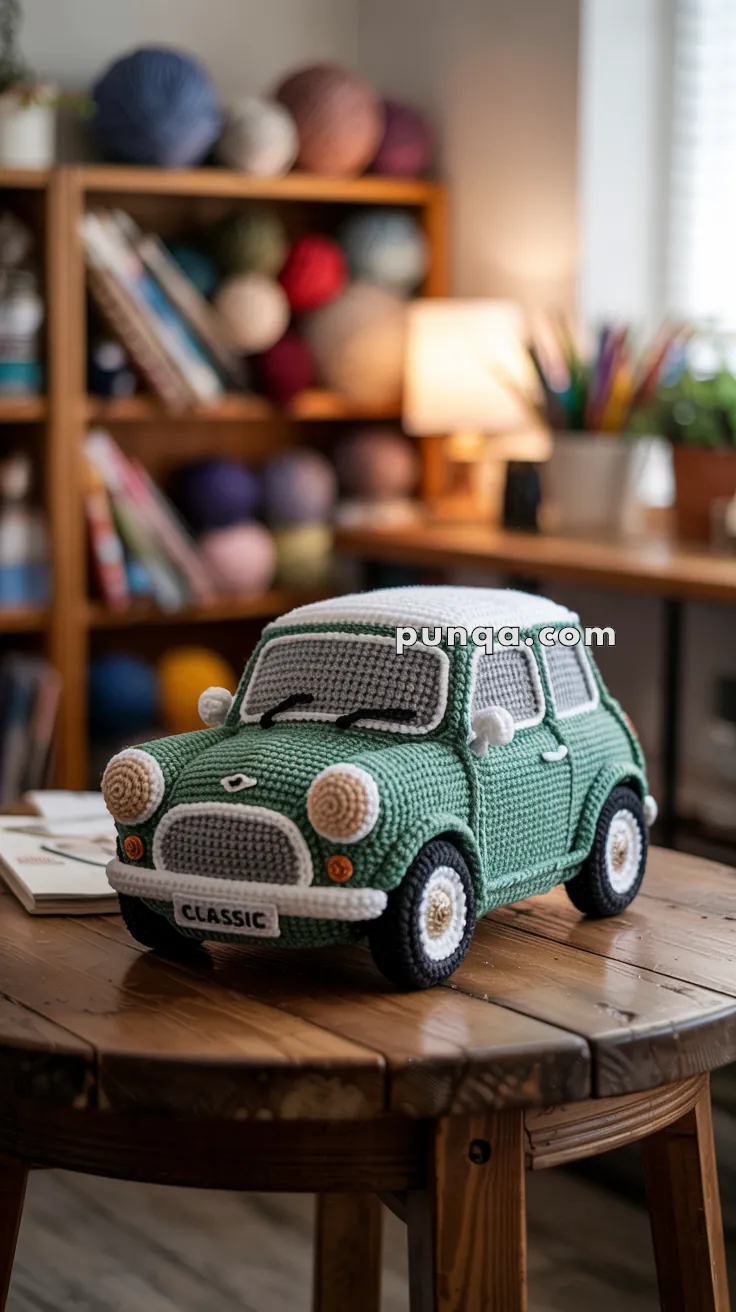
🚗 Amigurumi Classic Mini Cooper Crochet Pattern
This charming crochet Mini Cooper brings retro character and handmade style together in the cutest way. Rounded headlights, sage-green bodywork, curved windshield, and recessed wheels give this little car an irresistibly nostalgic feel. Whether you’re making it for display, gifting it to a car enthusiast, or adding it to a handmade collection, this soft, plush Mini has delightful details in every stitch.
✨ Skill Level
Intermediate to Advanced
Includes structural shaping, panel layering, recessed wheels, and detailed surface embroidery.
📏 Finished Size
Approximately 24 cm (9.5 in) long
Approximately 13 cm (5 in) tall
Using DK yarn and a 2.5 mm hook.
🧶 Yarn Amount Required (DK Weight)
- Sage Green (main body, arches, trim): 80 g
- White (roof, bumpers, window frames, mirrors, plate, whitewalls): 40 g
- Medium Grey (windows, grille center): 25 g
- Black (tires, wipers, outlines): 20 g
- Beige/Tan (headlights, wheel centers): 20 g
- Orange (indicator lights): 3 g
Polyester stuffing: 80–100 g
Optional (recommended): thin plastic canvas or craft foam for base and roof support.
🧵 Materials
- 2.5 mm crochet hook
- Fiberfill stuffing
- Tapestry needle
- Stitch marker
- Plastic canvas (optional for structure)
🔤 Abbreviations (US Terms)
MR – magic ring
sc – single crochet
inc – increase
dec – invisible decrease
sl st – slip stitch
ch – chain
BLO – back loop only
FO – fasten off
Work in continuous rounds unless stated.
🟢 Main Body Shell (Sage Green)
The body forms a softly rounded rectangular capsule with a slightly domed hood and flatter roof section.
Base
Ch 28
R1: sc in 2nd ch, sc 25, 3 sc in last ch. Working underside: sc 25, 2 sc in last st (56)
R2: (8 sc, inc) x6, 2 sc (62)
R3: (9 sc, inc) x6, 2 sc (68)
R4–R6: sc around (68)
Turn to side walls
R7 (BLO): sc around (68)
R8–R16: sc around (68)
Begin stuffing firmly.
Shape hood and cabin
R17: sc 22, dec, sc 20, dec, sc 22 (66)
R18: sc around (66)
R19: sc 21, dec, sc 20, dec, sc 21 (64)
R20–R22: sc around (64)
FO and close.
Shaping Notes
- Stuff the front third (hood) firmly and rounded.
- Keep the upper middle section flatter by pressing gently while stuffing.
- Insert a plastic canvas oval into the base before full stuffing for stability.
⬜ Roof Panel (White)
Ch 22
Row 1: sc in 2nd ch, sc 20 (21)
Rows 2–13: ch 1, turn, sc across (21)
Sc evenly around the panel, placing 3 sc in corners.
FO with long tail.
Sew centered on top of body, leaving a thin sage border visible.
For a crisp roofline, slide a thin plastic insert beneath before fully sewing.
🪟 Windshield (Grey with White Frame)
Grey Insert
Ch 18
Row 1: sc in 2nd ch, sc 16 (17)
Rows 2–5: ch 1, turn, sc across (17)
Row 6: ch 1, turn, dec, sc 13, dec (15)
FO.
White Frame
Attach white and sc evenly around insert.
Add extra stitches at corners for smooth rounding.
Sew upright at the front roof edge with slight backward tilt.
🪟 Side Windows (Make 2)
Ch 14
Row 1: sc in 2nd ch, sc 12 (13)
Rows 2–4: ch 1, turn, sc across
Row 5: ch 1, turn, dec, sc 9, dec
Edge with white sc border.
Sew aligned with windshield height.
🩶 Front Grille
Ch 15
Row 1: sc in 2nd ch, sc 13 (14)
Rows 2–4: ch 1, turn, sc across
Edge in white sc border.
Sew centered below hood.
💡 Headlights (Make 2 – Spiral Style)
Ch 2
R1: 6 sc in 2nd ch
R2: inc x6 (12)
R3: (sc, inc) x6 (18)
R4: sc around
FO.
Do not overstuff.
Sew slightly protruding on front corners.
🟠 Turn Signals (Make 2)
MR 6 sc
FO.
Sew below headlights.
⬜ Bumpers (Front & Back)
Ch 29
Row 1: sc in 2nd ch, sc 27
Rows 2–3: ch 1, turn, sc across
Sew curved along lower edges. Ends should lift slightly upward.
🛞 Wheels (Make 4)
Tire (Black)
MR 6 sc
R2 inc x6 (12)
R3 (sc, inc) x6 (18)
R4 (2 sc, inc) x6 (24)
R5–R6 sc around
FO.
Whitewall Ring (White)
MR 6 sc
R2 inc x6 (12)
R3 (sc, inc) x6 (18)
R4 sc around
FO.
Hubcap (Beige)
MR 6 sc
R2 (sc, inc) x3 (9)
R3 sc around
FO.
Sew white ring onto tire.
Sew hubcap centered.
Wheel Placement
Mark wheel centers evenly.
Sew deeply recessed so only outer half is visible.
Press stuffing inward while sewing for authentic inset look.
🟢 Wheel Arches (Make 4)
Ch 11
Row 1: sc in 2nd ch, sc 9
Rows 2–3: ch 1, turn, sc across
Curve gently and sew above each wheel.
🪞 Side Mirrors (Make 2 – White)
MR 6 sc
R2 (sc, inc) x3 (9)
Flatten slightly.
Sew beside windshield area.
✨ Surface Details
- Embroider two curved black windshield wipers.
- Stitch a thin black hood seam centered above grille.
- Add small white horizontal stitch for door handle.
- Add tiny white V-shape badge on hood.
🪪 License Plate
Ch 10
Row 1: sc in 2nd ch, sc 8
Rows 2–3: ch 1, turn, sc across
Embroider “CLASSIC” in black using backstitch.
Sew centered on front bumper.
🧩 Final Shaping & Assembly Tips
- Attach roof first.
- Install windshield and side windows before small details.
- Attach grille and headlights before bumpers.
- Install wheels deeply before arches.
- Steam lightly (without touching iron directly) to smooth panels.
- Final-shape by pressing roof flat and rounding hood gently.
🚘 Finished Look
You’ll have a compact vintage-style crochet car featuring:
- Rounded sage body
- Crisp white roof and bumpers
- Framed grey windows
- Spiral beige headlights
- Recessed whitewall tires
- Subtle stitched trim and classic license plate
A timeless handmade collectible perfect for display, gifting, or adding nostalgic charm to any craft space.