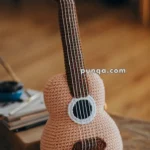
Strike the perfect chord of creativity with this Amigurumi Grand Piano Crochet Pattern. Designed with elegant lines, detailed keys, and a structured body, this project beautifully captures the sophistication of a grand piano in soft yarn form. It’s a delightful way to combine your love of music with the art of crochet, resulting in a handmade piece that’s both whimsical and refined.
Whether you’re crafting it as a gift for a music enthusiast, adding it to your amigurumi collection, or creating a unique décor accent, this pattern offers a rewarding challenge. With clear instructions and thoughtful design elements, you’ll be able to stitch a miniature piano that resonates with charm and creativity. Gather your yarn, hook, and a touch of musical inspiration—it’s time to crochet your very own grand piano masterpiece!
🎹 Cozy Miniature Crochet Piano Pattern
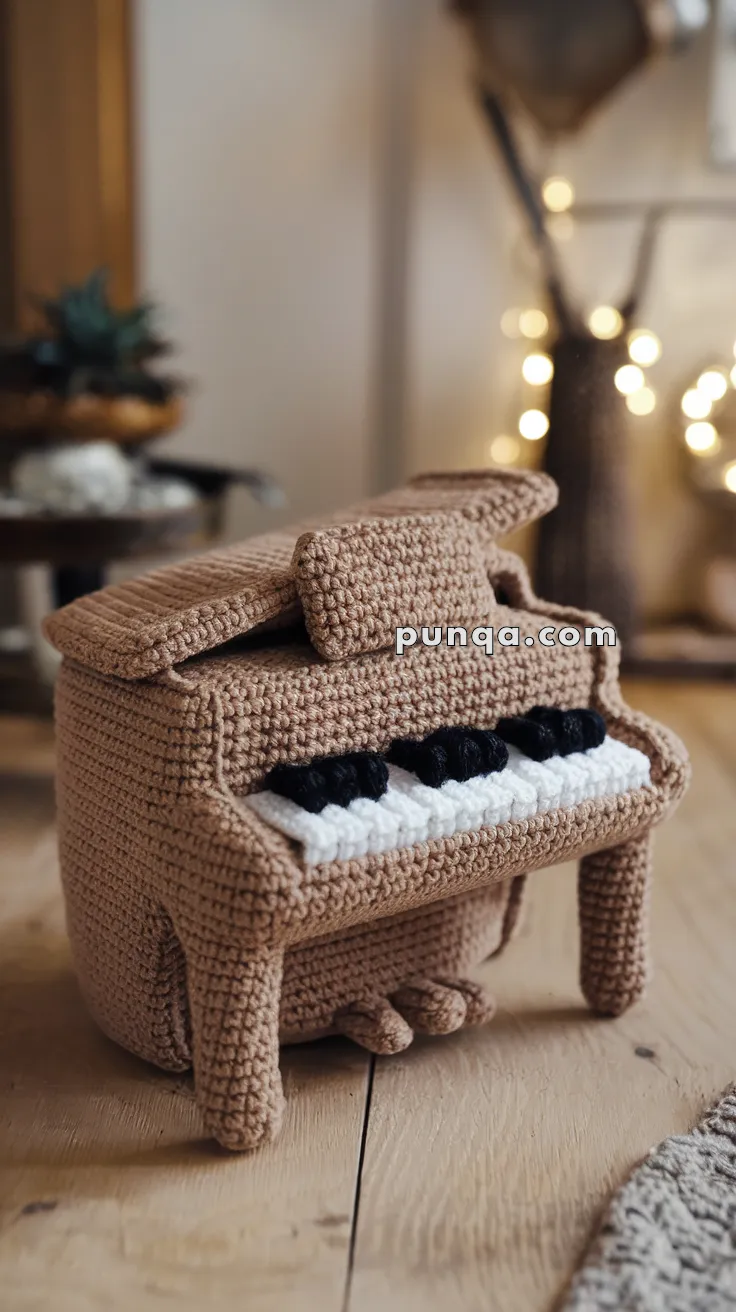
This charming miniature crochet piano features a softly sculpted upright piano silhouette with a raised open lid, dimensional keyboard, rounded body edges, thick front legs, tiny pedals, and a padded matching bench. The proportions are intentionally compact and plush-like, creating a warm handmade interpretation of a classic upright piano.
The finished piano includes:
- raised hinged top lid
- dimensional white and black keys
- curved keyboard opening
- thick rounded legs
- tiny front pedals
- softly padded bench
- cozy plush proportions
✨ Skill Level
Intermediate to Advanced
This pattern includes:
- structured panel construction
- dimensional assembly
- shaping techniques
- miniature detail work
- realistic keyboard construction
📏 Finished Size
Piano
Approximately 20–24 cm (8–9.5 inches) wide
Approximately 18–20 cm (7–8 inches) tall
Bench
Approximately 10–12 cm (4–5 inches) wide
Using DK cotton yarn and a 2.5–3 mm crochet hook.
🧶 Materials
Yarn (DK Cotton Recommended)
Warm Taupe / Walnut Beige
Approx. 220–280 g
Used for:
- piano body
- lid
- legs
- side panels
- bench
White
Approx. 30–40 g
Used for:
- white piano keys
Black
Approx. 20–30 g
Used for:
- black piano keys
🧵 Additional Supplies
- 2.5–3 mm crochet hook
- Polyester stuffing
- Plastic canvas or thin cardboard
- Yarn needle
- Stitch markers
- Fabric glue (optional)
🔤 Abbreviations (US Terms)
- MR – magic ring
- sc – single crochet
- inc – increase
- dec – invisible decrease
- sl st – slip stitch
- ch – chain
- FO – fasten off
- BLO – back loop only
🎼 Design Notes
This piano is designed with:
- thick plush-like proportions
- rounded corners
- chunky realistic keys
- deeply recessed keyboard opening
- thick sturdy legs
- softly open lid
The body should feel substantial and boxy.
The keyboard should sit deeply inside the opening rather than flush with the front.
The lid should remain slightly angled upward.
🎹 Piano Bottom Panel
Warm Taupe
Ch 37
Row 1
Sc in 2nd ch from hook and across (36)
Rows 2–28
Sc across (36)
FO.
This forms the large sturdy piano base.
🎹 Back Panel
Warm Taupe
Ch 37
Row 1
Sc across (36)
Rows 2–24
Sc across.
FO.
The back panel should be tall and rectangular.
🎹 Side Panels (Make 2)
The sides are tall with a curved keyboard cutout.
Warm Taupe
Ch 25
Row 1
Sc across (24)
Rows 2–11
Sc across.
🎼 Keyboard Opening Curve
Row 12
Sc 15, turn
Rows 13–18
Sc across (15)
FO.
This creates the lowered front keyboard opening visible on the piano.
Mirror second side panel.
🎹 Front Keyboard Frame
Warm Taupe
Ch 37
Row 1
Sc across (36)
Rows 2–6
Sc across.
FO.
This panel sits directly beneath the keyboard.
🎼 Keyboard Shelf
The keyboard is recessed deeply into the piano body.
Warm Taupe
Ch 28
Row 1
Sc across (27)
Rows 2–4
Sc across.
FO.
Sew slightly inside the front opening.
🤍 White Piano Keys
The keys are thick and plush rather than flat.
White
Make 9 keys.
Each Key
Ch 4
Row 1
Sc 3
Rows 2–6
Sc across.
FO.
The keys should protrude outward visibly.
Leave tiny gaps between keys.
🖤 Black Piano Keys
Black
Make 6 keys.
Each Key
Ch 3
Row 1
Sc 2
Rows 2–4
Sc across.
FO.
Attach raised above white keys in alternating arrangement.
The black keys should appear chunky and rounded.
🎹 Piano Lid (Top Cover)
The lid is oversized and softly padded.
Warm Taupe
Ch 39
Row 1
Sc across (38)
Rows 2–16
Sc across.
Make 2 identical panels.
Insert thin plastic canvas between layers.
Lightly stuff edges only.
Sew together.
The lid should remain firm but soft.
🎼 Lid Support Block
This small rectangular block supports the open lid.
Warm Taupe
Ch 9
Row 1
Sc across (8)
Rows 2–8
Sc across.
FO.
Stuff lightly and attach beneath raised lid edge.
🎹 Upper Piano Back Block
The raised back section gives the piano its realistic silhouette.
Warm Taupe
Ch 16
Row 1
Sc across (15)
Rows 2–10
Sc across.
Make 2 panels.
Insert light stuffing or plastic canvas between panels.
Attach at piano top rear.
🎹 Piano Legs (Make 4)
The legs are thick, rounded, and slightly oversized.
Warm Taupe
R1: MR 6
R2: inc x6 (12)
R3–R14: sc around (12)
Stuff firmly.
FO leaving long tail.
The front legs should angle slightly outward.
🎼 Piano Pedals (Make 3)
The pedals are tiny rounded shapes beneath the keyboard.
Warm Taupe
R1: MR 5
R2–R4: sc around (5)
FO.
Attach beneath front center.
🪑 Piano Bench Cushion
The bench is thick and rectangular.
Warm Taupe
Ch 18
Row 1
Sc across (17)
Rows 2–12
Sc across.
Make 2 panels.
Insert light stuffing and optional plastic canvas.
Sew together.
🪑 Bench Legs (Make 4)
Warm Taupe
R1: MR 6
R2–R9: sc around (6)
FO.
Attach beneath bench.
🪡 Piano Assembly
Step 1
Sew side panels to bottom panel.
Step 2
Attach back panel.
Step 3
Insert plastic canvas inside body walls.
This helps maintain the structured piano shape.
Step 4
Attach front keyboard frame.
Step 5
Sew keyboard shelf deeply inside front opening.
The keyboard should sit recessed rather than flush.
Step 6
Attach white keys.
Step 7
Attach black keys.
Step 8
Attach piano legs.
The front legs should angle outward slightly.
Step 9
Attach upper back block.
Step 10
Attach raised lid at slight angle.
Step 11
Add tiny pedals beneath keyboard.
🌟 Finishing Tips
- Keep body firmly structured
- Use plastic canvas inside walls
- Steam panels lightly before assembly
- Keep keys thick and rounded
- Slightly angle lid upward
- Shape front keyboard opening smoothly
- Avoid overstuffing
💛 Final Thoughts
This cozy miniature crochet piano combines musical elegance with warm handmade charm. The raised lid, dimensional keyboard, chunky piano keys, sculpted body, tiny pedals, and padded bench create a beautifully realistic miniature instrument full of softness and character. Whether displayed beside sheet music, gifted to a pianist, or added to a dollhouse or nursery collection, this adorable crochet piano brings timeless musical beauty and handcrafted warmth into any space.