Enter the whimsical world of Far Far Away with this charming Amigurumi Princess Fiona crochet pattern! Whether you’re a fan of fairy tales with a twist or simply love strong, spirited characters, this free pattern brings Fiona’s unique personality to life in yarn form. With her flowing dress, signature red hair, and confident stance, this handmade doll perfectly captures the beauty and bravery of everyone’s favorite ogre princess. It’s a delightful project for fans of the Shrek series, fantasy lovers, or anyone who enjoys adding a bit of magic to their crochet collection.
This pattern is designed for customization, giving you the chance to recreate Fiona in her royal or ogre form depending on your yarn choices and accessories. Try adding embroidered details like a crown, flower accents, or even a mini dragon companion to make your version extra special! Whether crafted for a fairytale display, a heartfelt gift, or as part of a movie-inspired amigurumi set, Princess Fiona is sure to steal the spotlight—one bold and beautiful stitch at a time! 💚🧵✨
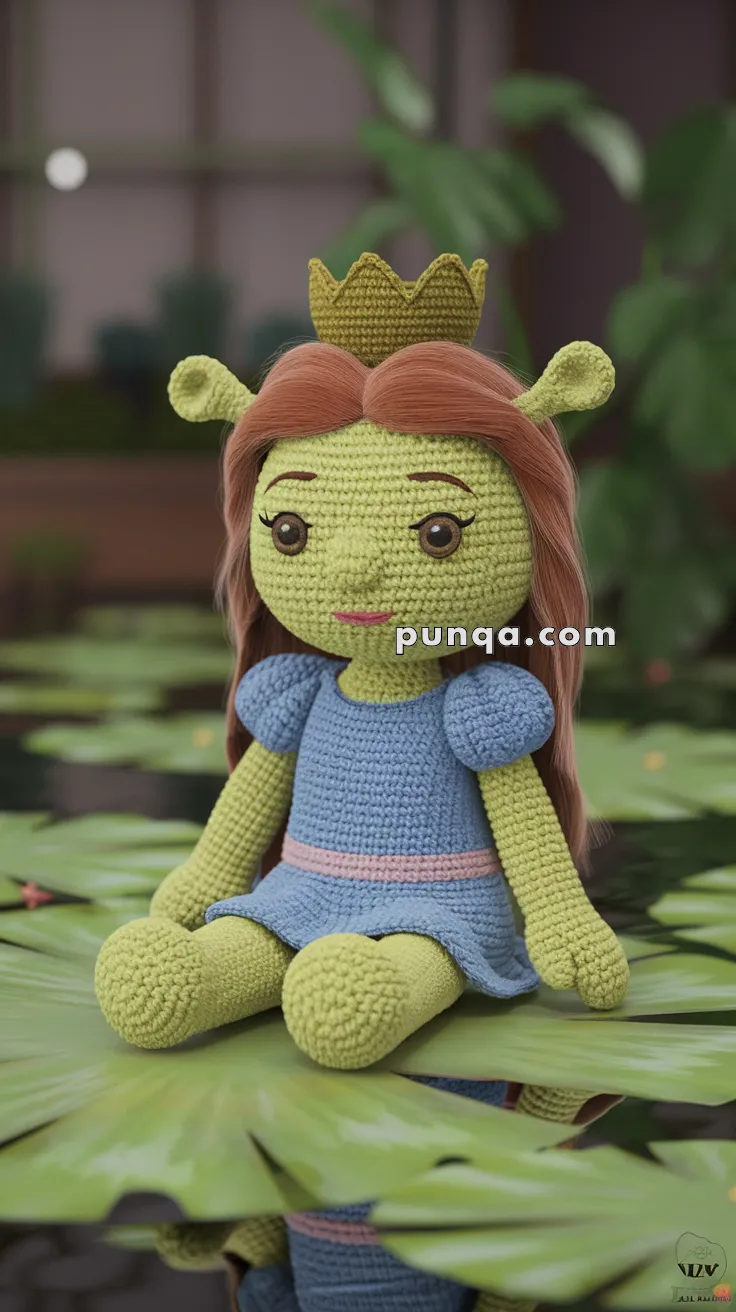
👑 Amigurumi Princess Fiona Crochet Pattern
Crochet your own Princess Fiona in her ogre form, straight from the swamp to your craft table! With her signature olive-green skin, royal dress, soft long hair, and adorable ogre ears, she’s perfect for fans of fairy tales with a twist.
✨ Skill Level
Intermediate
Includes sculpted facial shaping, separate dress construction, structured crown, hair layering, and detailed finishing.
📏 Finished Size
Approximately 30–32 cm (12–13 inches) tall when seated
Using DK yarn and a 2.75–3.0 mm hook.
🧶 Materials & Yarn Amount
DK / Light Worsted Yarn
• Olive Green – 150 g (head, ears, body, arms, legs, nose)
• Soft Sky Blue – 90 g (dress and sleeves)
• Dusty Pink – 15 g (waistband, lips)
• Chestnut Brown – 80 g (hair)
• Antique Gold / Mustard – 20 g (crown)
Notions
• 12 mm brown safety eyes
• Polyester fiberfill
• Tapestry needle
• Stitch markers
• Scissors
🧵 Abbreviations (US Terms)
MR – magic ring
sc – single crochet
inc – increase
dec – invisible decrease
sl st – slip stitch
ch – chain
hdc – half double crochet
BLO – back loop only
FO – fasten off
Work in continuous rounds unless otherwise stated.
🧠 Head (Olive Green)
R1: MR 6 (6)
R2: inc x6 (12)
R3: (1 sc, inc) x6 (18)
R4: (2 sc, inc) x6 (24)
R5: (3 sc, inc) x6 (30)
R6: (4 sc, inc) x6 (36)
R7: (5 sc, inc) x6 (42)
R8–15: sc around (42)
Insert safety eyes between R11–12, spaced 8 stitches apart.
R16: (5 sc, dec) x6 (36)
R17: (4 sc, dec) x6 (30)
R18: (3 sc, dec) x6 (24)
Stuff firmly, shaping cheeks evenly.
R19: (2 sc, dec) x6 (18)
R20: (1 sc, dec) x6 (12)
R21: dec x6 (6)
FO and close.
👃 Nose (Sculpted)
R1: MR 6
R2: (1 sc, inc) x3 (9)
R3: sc around (9)
Lightly stuff and sew centered just below eye line.
The nose should be small and rounded, not protruding sharply.
Embroider a delicate dusty-pink smile slightly curved upward.
Add thin brown brows and subtle lashes.
🧝 Ogre Ears (Make 2)
R1: MR 6
R2: (1 sc, inc) x3 (9)
R3–5: sc around (9)
R6: (2 sc, dec) x2, 1 sc (7)
Lightly stuff only the rounded tip.
Flatten slightly at base.
Sew at eye level, slightly behind the midpoint of the head and angled outward.
💇 Hair Cap (Chestnut Brown)
R1: MR 6
R2: inc x6 (12)
R3: (1 sc, inc) x6 (18)
R4: (2 sc, inc) x6 (24)
R5: (3 sc, inc) x6 (30)
R6: (4 sc, inc) x6 (36)
R7: (5 sc, inc) x6 (42)
R8–10: sc around (42)
FO and sew securely, leaving ear openings visible.
Long Hair Attachment
Cut 45–55 strands, each 28–30 cm long.
Attach along center part first.
Then fill in sides and back densely.
Hair should fall straight and smooth to mid-back length.
Trim evenly and shape with clean center part.
👑 Crown (Structured)
R1: MR 6
R2: inc x6 (12)
R3: (1 sc, inc) x6 (18)
R4–5: sc around (18)
Crown points (worked in round):
(sc 2, ch 2, sl st in next st) repeat 6 times.
FO.
Place centered behind hairline so it sits neatly atop the head without tipping.
🦵 Legs (Make 2)
R1: MR 6
R2: inc x6 (12)
R3: (1 sc, inc) x6 (18)
R4–16: sc around (18)
Stuff firmly in feet and lightly in upper leg.
FO first leg.
Make second leg and do not fasten off.
👗 Body (Olive Green)
Join legs with ch 3.
R1: sc around both legs and chain (42)
R2–5: sc around (42)
R6: (5 sc, dec) x6 (36)
R7–9: sc around (36)
R10: (4 sc, dec) x6 (30)
R11–13: sc around (30)
Stuff firmly and evenly.
FO leaving tail for attaching head.
👗 Dress (Separate Piece – Blue)
The dress is made separately to prevent stretching or distortion.
Bodice
Ch 36, join to form ring.
R1–8: sc around (36)
Skirt Shaping
R9: (5 sc, inc) x6 (42)
R10: sc around (42)
R11: (6 sc, inc) x6 (48)
R12–14: sc around (48)
Lightly steam block for smooth drape.
Slide dress onto body before sewing head.
👚 Puff Sleeves (Make 2 – Blue)
R1: MR 6
R2: inc x6 (12)
R3: (1 sc, inc) x6 (18)
R4–5: sc around (18)
R6: (2 sc, dec) x4, sc 2 (14)
Lightly stuff for rounded shape.
Attach directly to bodice shoulders.
💪 Arms (Make 2)
R1: MR 6
R2: inc x6 (12)
R3–14: sc around (12)
Lightly stuff.
Sew under sleeves, angled slightly forward.
🎀 Waistband (Pink)
Attach pink yarn at waistline.
Sc evenly around (36).
FO neatly.
🧩 Assembly
• Slide dress onto body
• Attach head securely
• Sew sleeves to shoulders
• Attach arms under sleeves
• Position ears symmetrically
• Secure crown
• Style hair smoothly
Adjust leg angle slightly forward for seated pose.
🌟 Final Thoughts
With her soft olive complexion, rounded ogre ears, long straight chestnut hair, puff-sleeved blue dress, and petite golden crown, this ogre princess radiates storybook warmth and charm. The smooth dress shaping and balanced proportions create a natural seated posture that feels both elegant and playful.
Take your time refining the hair part and crown placement — those finishing touches bring her gentle personality beautifully to life. 💚👑✨