Waddle into cuteness with the Amigurumi Puffin Chick, a heartwarming crochet project that captures the charm of one of nature’s most beloved seabirds! 🐣🧶 With its round belly, tiny wings, and signature beak, this little chick is ready to bring a splash of coastal joy to your handmade collection. Whether you’re crafting for a bird lover, decorating a nursery, or adding to your amigurumi flock, this puffin is sure to steal the show.
Perfect for crocheters who enjoy soft shaping and sweet details, this pattern invites you to explore gentle curves, playful colorwork, and a touch of arctic whimsy. Customize your chick with pastel tones, add a tiny scarf for extra flair, or pair it with a parent puffin for a cozy duo. The Amigurumi Puffin Chick is a delightful way to stitch up personality, warmth, and a little seabird snuggle—one loop at a time! 🧵🌊
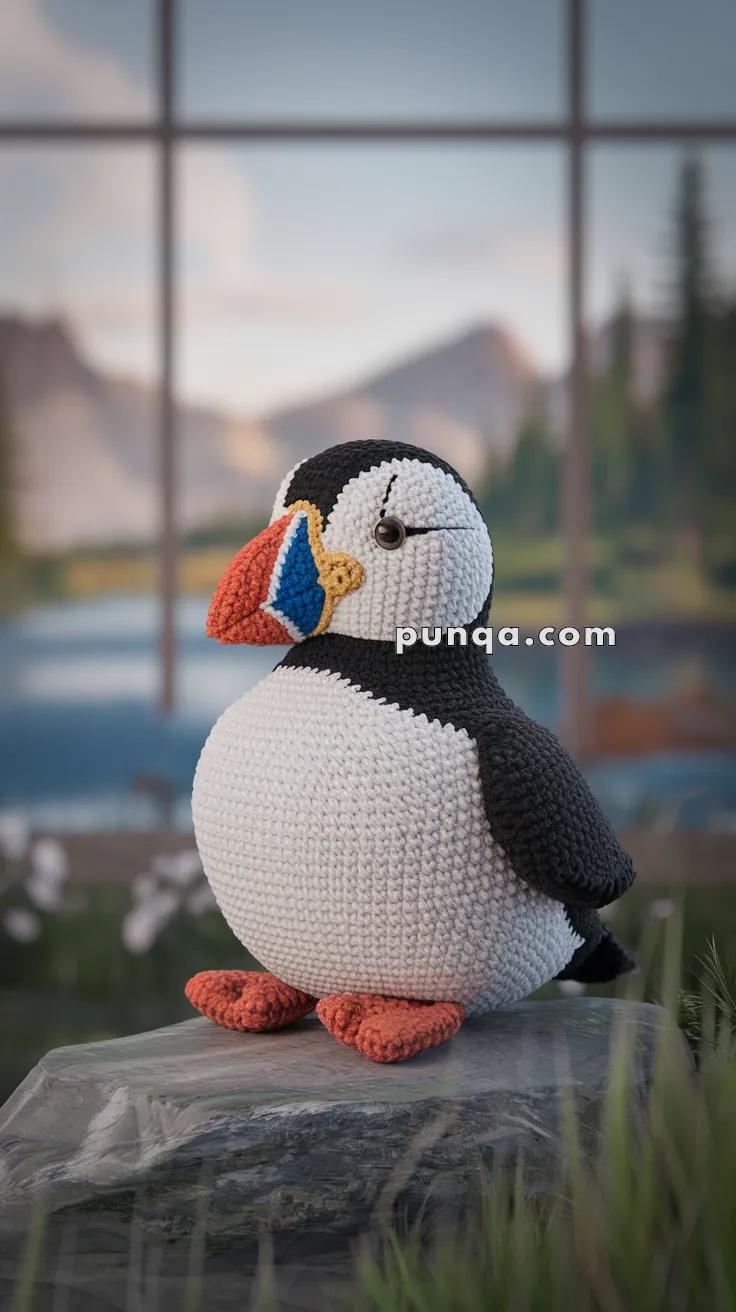
🐧 Amigurumi Puffin Crochet Pattern
Bring the charm of the North Atlantic to your crochet collection with this adorable puffin plush! With its bold black-and-white plumage, colorful beak, and bright orange feet, this design captures the playful character of the puffin. Perfect for bird lovers, coastal décor, or as a unique handmade gift.
✨ Skill Level
Intermediate – requires shaping, neat color changes, and embroidery for the beak details.
📏 Finished Size
Approx. 9–10 inches (23–25 cm) tall when using plush or velvet yarn with a 3.5–4.0 mm hook.
🧶 Materials
- Plush/velvet yarn (or worsted weight for a smaller version):
- Black (head, back, wings, tail)
- White (face, belly)
- Orange (beak base, feet)
- Blue (beak stripe)
- Yellow (beak accent)
- Crochet hook: 3.5–4.0 mm for plush yarn / 2.5–3.0 mm for cotton yarn
- 10–12 mm safety eyes (or black felt circles)
- Polyester fiberfill stuffing
- Tapestry needle
- Stitch marker
- Scissors
🧵 Abbreviations (US Terms)
- MR – Magic Ring
- sc – Single Crochet
- inc – Increase (2 sc in same st)
- dec – Decrease (sc 2 together)
- sl st – Slip Stitch
- ch – Chain
- st(s) – Stitch(es)
- FO – Fasten Off
Pattern Instructions
🐤 Body & Head (Worked as One Piece)
Start with white yarn (belly side).
- MR, 6 sc (6)
- inc ×6 (12)
- (sc, inc) ×6 (18)
- (2 sc, inc) ×6 (24)
- (3 sc, inc) ×6 (30)
- (4 sc, inc) ×6 (36)
- (5 sc, inc) ×6 (42)
8–15. sc around (42)
Color change to black on the top half of the round, keeping belly white.
16–22. Continue in sc, keeping black for back and top, white for belly (split body color).
23. (5 sc, dec) ×6 (36)
24. (4 sc, dec) ×6 (30)
25. (3 sc, dec) ×6 (24)
26. (2 sc, dec) ×6 (18)
27. (sc, dec) ×6 (12)
28. dec ×6 (6)
FO, close.
Stuff firmly before closing.
👁 Eyes
Insert safety eyes into the white face area, placed slightly high and close to the black head section. Space them 8–10 stitches apart. Optionally embroider a small brow line behind each eye.
🧡 Beak
Worked in three sections: base, shaping, and details.
Base (orange):
- MR, 6 sc (6)
- inc ×6 (12)
- (sc, inc) ×6 (18)
- sc around (18)
- (sc, dec) ×6 (12)
- sc around (12)
- (sc, dec) ×4 (8)
FO, lightly stuff.
Beak Details:
- Use yellow yarn to embroider a teardrop patch at the beak base (near the face).
- Use blue yarn to surface crochet or embroider a vertical stripe midway.
- Use black embroidery thread to outline the beak sections for definition.
Sew the beak firmly under the eyes.
🪽 Wings (Make 2 – Black)
- MR, 6 sc (6)
- inc ×6 (12)
- (sc, inc) ×6 (18)
4–6. sc around (18) - (2 sc, dec) ×4, sc 2 (14)
8–9. sc around (14)
FO, flatten, do not stuff. Sew to each side just below the black/white division.
🦶 Feet (Make 2 – Orange)
Each foot is a webbed shape made from three toes joined together.
Toe (make 3 per foot):
- ch 5, sc in 2nd ch and across (4)
- ch 1, turn, dec, sc 2 (3)
- ch 1, turn, dec, sc (2)
- ch 1, dec (1)
FO.
Sew three toes side-by-side to form a webbed foot. Make a second identical foot. Attach both to the underside of the body, angled outward.
🪶 Tail (Black)
- MR, 6 sc (6)
- (sc, inc) ×3 (9)
3–5. sc around (9)
FO, flatten, and sew at the back base.
🪡 Assembly
- Attach wings to the sides, slightly angled downward.
- Sew feet securely to the belly.
- Attach tail at the back base.
- Position beak and eyes carefully before final stitching.
- Add optional blush or embroidery to cheeks.
🌟 Finishing Touch
Your puffin is now complete—round belly, bold markings, and a vibrant beak that makes it instantly recognizable. This delightful seabird makes a perfect display piece or a thoughtful handmade gift for wildlife enthusiasts. 🐧🌊