Deliver a bundle of charm with this Amigurumi USPS Postman crochet pattern! Inspired by the hardworking heroes of the United States Postal Service, this adorable design features a cheerful mail carrier complete with uniform, cap, and trusty mailbag. Whether you’re crafting a thoughtful thank-you gift, adding a whimsical touch to your decor, or just love character-based amigurumi, this pattern lets you stitch up a friendly figure that celebrates dedication, service, and a whole lot of heart. 📬🧶💼
Designed for storytelling and detail, this pattern invites you to play with classic USPS blues, tiny accessories like envelopes or parcels, and expressive features that bring your postman to life. Add a name tag, a mustache, or even a little pup companion for extra personality. Whether perched on a shelf or gifted to someone who always delivers kindness, this Amigurumi USPS Postman is a joyful and satisfying project—perfect for bringing a touch of handmade appreciation to every stitch! 💖📮✨
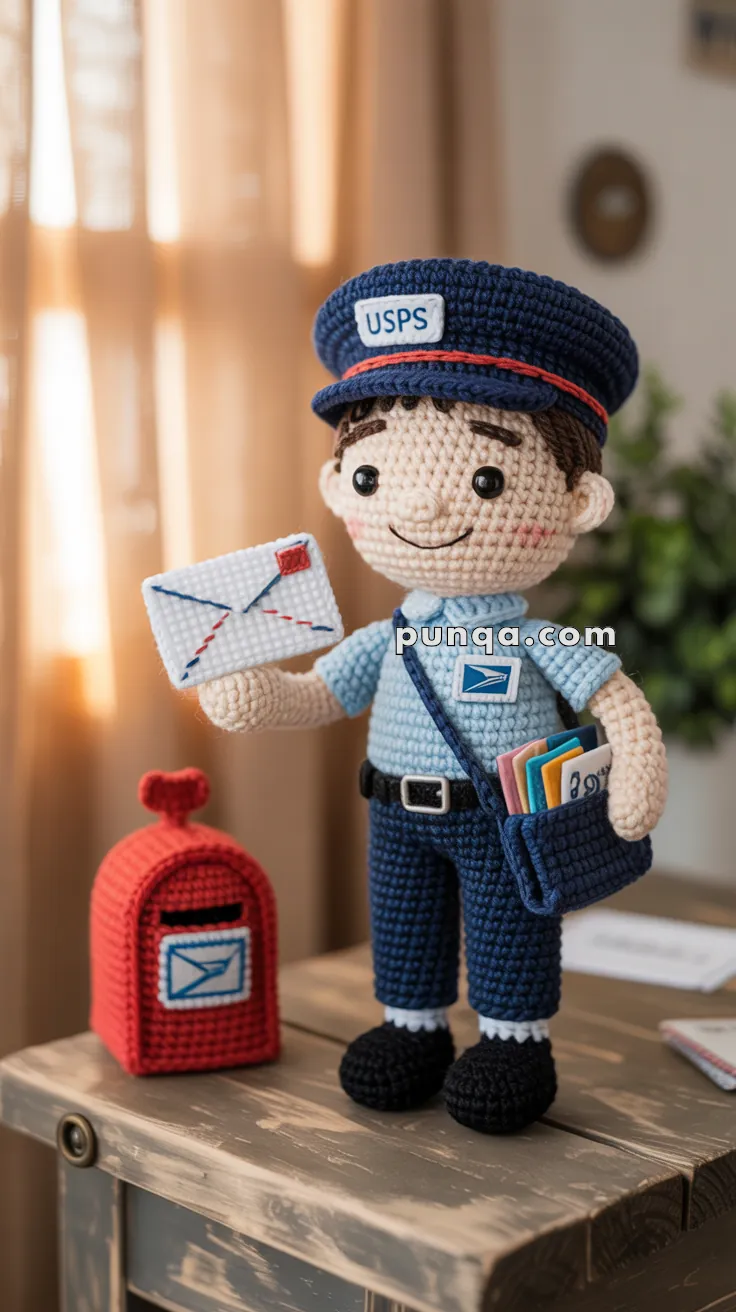
📬 Amigurumi USPS Postman with Mailbox – Free Crochet Pattern
Celebrate mail magic with this cheerful postman and his accessories. This intermediate-level pattern includes the doll (with USPS outfit), crossbody satchel, a removable envelope, and the iconic red mailbox. Great for display, storytelling, or gifting!
✨ Skill Level
Intermediate–Advanced – shaping, color changes, garment layering, and accessory construction.
📏 Finished Size
Postman: approx. 25–27 cm (10–10.5 in) tall
Mailbox: approx. 10–11 cm (4–4.5 in) tall
🧶 Yarn Requirements
DK / light worsted cotton yarn:
Skin tone — 60 g
Light blue (shirt) — 35 g
Dark navy (pants, hat, satchel) — 75 g
Black (shoes, belt) — 35 g
White (details, socks, logo base, envelope) — 30 g
Brown (hair) — 20 g
Red (mailbox, hat stripe, flag) — 35 g
Grey (letters) — 10 g
Fiberfill: ~120 g
🧵 Abbreviations (US Terms)
MR – magic ring
sc – single crochet
inc – increase
dec – invisible decrease
sl st – slip stitch
ch – chain
BLO / FLO – back/front loop only
🧍♂️ Postman Doll
🧠 Head (Rounded with Soft Cheeks)
R1: MR 6
R2: inc x6 (12)
R3: (1 sc, inc) x6 (18)
R4: (2 sc, inc) x6 (24)
R5: (3 sc, inc) x6 (30)
R6: (4 sc, inc) x6 (36)
R7: (5 sc, inc) x6 (42)
R8–15: sc around
Insert safety eyes between R11–12 (natural spacing)
R16: (5 sc, dec) x6 (36)
R17: (4 sc, dec) x6 (30)
R18: (3 sc, dec) x6 (24)
R19: (2 sc, dec) x6 (18)
Stuff firmly
R20: (1 sc, dec) x6 (12)
R21: dec x6
👃 Nose (Small, Rounded & Centered)
R1: MR 6
R2: (1 sc, inc) x3 (9)
R3–4: sc around
Lightly stuff and sew centered slightly below eye line
👂 Ears (Proportional & Slightly Rounded)
R1: MR 6
R2: (1 sc, inc) x3 (9)
Flatten slightly
Attach level with mid-eye height
💇 Hair (Short, Visible at Sides)
Work as a cap:
MR 6 → increase to 36
R7–9: sc around
Sew low at back and slightly above ears
🧢 Cap (Flat Top + Structured Brim)
Crown
MR 6 → increase to 42
R7–9: sc around
Edge Definition
Work 1 round BLO to create a crisp transition
Brim (Short, Straight)
Join yarn at front:
- sc 12
- turn, sc 12
- repeat 3–4 rows
Stripe Detail
Surface crochet one round in red above brim
Logo Patch
Ch 6
3 rows sc
Sew centered
👕 Body (Slim Torso with Shirt Detail)
Legs (Make 2)
R1: MR 6
R2: inc x6 (12)
R3–6: sc around
Switch to white (sock):
R7–8: sc around
FO first leg
Join Legs
Ch 3 between legs
R9–15: sc around
Switch to light blue (shirt):
R16–22: sc around
Stuff firmly
👖 Pants & Belt Detail
Surface stitch waistband
Add black belt across front
🦶 Shoes (Rounded & Defined Sole)
R1: MR 6
R2: inc x6 (12)
R3: (1 sc, inc) x6 (18)
R4–6: sc around
R7: (1 sc, dec) x6 (12)
Flatten slightly at front to create toe shape
💪 Arms (Natural Length & Position)
R1: MR 6
R2: (1 sc, inc) x3 (9)
R3–5: sc around (hand)
Switch to blue:
R6–14: sc around
Stuff lightly
🖐 Hands (Flat Palm with Subtle Fingers)
Flatten end slightly
Create finger shaping:
Repeat 4 times:
- ch 2
- sl st back into same base
Forms rounded finger bumps without bulk
Attach:
- one arm raised forward (holding envelope)
- one relaxed downward
🎒 Satchel (Structured & Filled)
Ch 13
Row 1–8: sc across
Fold and sew sides to form a box shape
Add depth by pinching bottom corners
Strap
Ch 60
Attach diagonally across torso
Insert small crochet “letters” inside
📩 Envelope (Flat, Crisp Shape)
Ch 10
Row 1–6: sc across
Top flap:
Decrease evenly toward center
Embroider:
- red corner stamp
- blue diagonal stitching lines
Attach to hand
📮 Mailbox
Body (Rounded Top Shape)
R1: MR 6
R2: inc x6 (12)
R3: (1 sc, inc) x6 (18)
R4: (2 sc, inc) x6 (24)
R5–11: sc around
Curved Top
R12: (2 sc, dec) x6 (18)
R13–16: sc around
Stuff lightly
Slot Opening (Functional Detail)
Create slit:
Ch 10
Sew edges inside to form opening
📫 Flag
Ch 5
Row 1–3: sc
Attach to side
📮 Base Support
Insert cardboard circle into bottom for stability
🧵 Assembly
- Attach head securely to body
- Position arms naturally (one holding envelope)
- Attach satchel across chest and hip
- Place letters inside bag
- Position mailbox beside figure
🌟 Finishing Touches
- Embroider eyebrows and soft smile
- Add light cheek blush
- Slightly tilt hat forward
- Adjust strap and arm pose for realism
💌 Final Thoughts
This amigurumi USPS postman brings cheerful charm and storytelling fun to your crochet projects! With his trusty mailbag, adorable envelope, and bright red mailbox, he’s a wonderful gift for postal workers, collectors, or anyone who loves handmade miniatures. Don’t forget to personalize the mail or uniform for that extra special touch.
Happy crocheting — and may your stitches always deliver smiles! ✨📮✂️