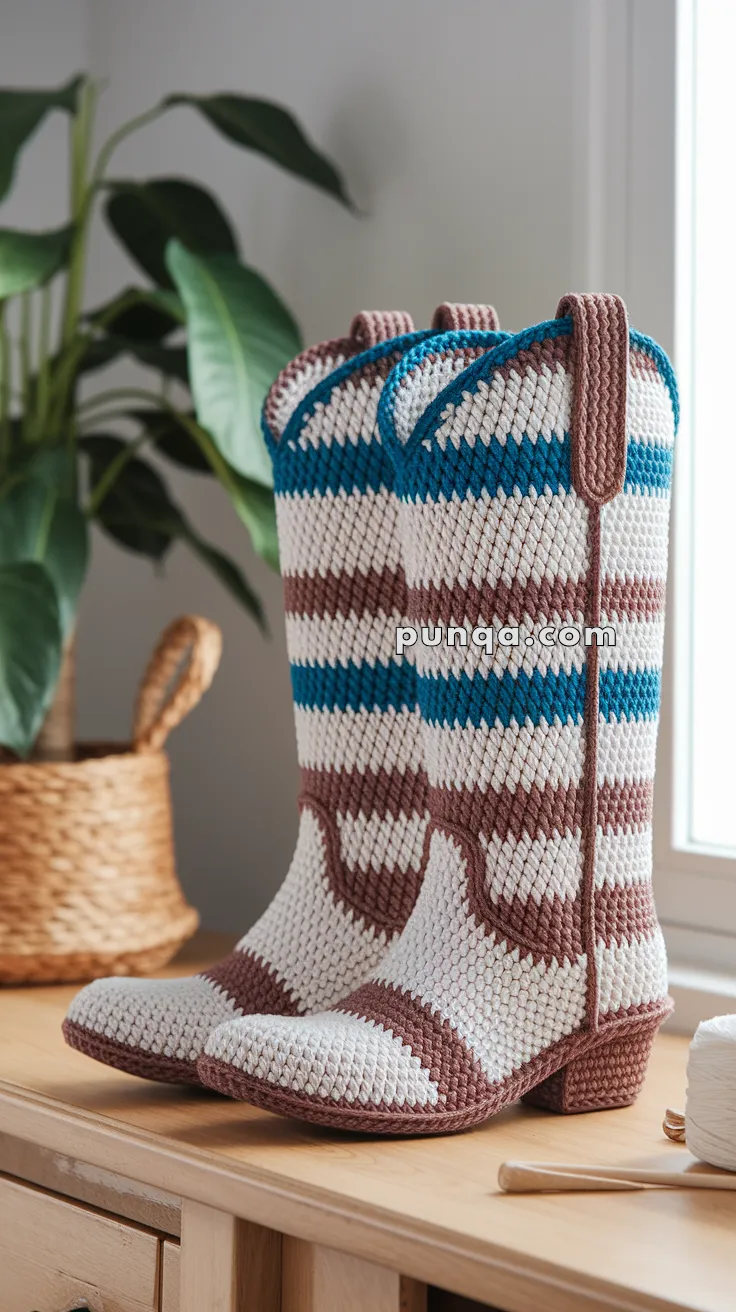
🤠 Amigurumi Cowboy Boots Crochet Pattern
These tall crochet cowboy boots feature realistic western shaping, pointed toes, structured heels, layered soles, curved overlays, pull tabs, and bold striped shafts 💙🤎 Their silhouette is tall and narrow with a slightly flared opening, matching the elegant proportions of classic western boots.
The construction uses:
- a double sole system
- a boxed heel structure
- reinforced shaft walls
- sculpted ankle shaping
This creates the clean upright form and realistic heel height seen in the finished boots.
✨ Skill Level
🧶 Intermediate–Advanced
Techniques used:
- continuous rounds
- short-row heel shaping
- structural assembly
- color changes
- overlay construction
- reinforced shaping
📏 Finished Size
Approx. 26–28 cm (10–11 in) tall
Foot length:
Approx. 15–16 cm (6–6.3 in)
🧶 Yarn & Required Amounts
Worsted weight cotton yarn:
- Cream / off-white: 100–120 g
- Medium brown: 90–110 g
- Deep teal blue: 50–60 g
Additional materials:
- 3.5 mm crochet hook
- Plastic canvas or EVA foam
- Thin craft foam or felt
- Polyester stuffing
- Floral wire or rolled plastic mesh
- Stitch markers
- Tapestry needle
🔤 Abbreviations (US Terms)
MR – magic ring
sc – single crochet
inc – increase
dec – invisible decrease
sl st – slip stitch
BLO – back loop only
FO – fasten off
👢 Inner Structural Sole (Make 2)
Using brown yarn.
This sole remains INSIDE the boot and supports the heel and toe shape.
Ch 13
Sole
R1: sc in 2nd ch from hook, sc 10, 4 sc in last ch, rotate, sc 10, 3 sc in final st (28)
R2: inc, sc 10, inc ×4, sc 10, inc ×3 (36)
R3: sc 1, inc, sc 10, (sc 1, inc) ×4, sc 10, (sc 1, inc) ×3 (44)
R4: BLO sc around (44)
FO.
Cut plastic canvas or EVA foam slightly smaller than sole shape.
Attach to wrong side of sole.
Set aside.
👢 Outer Sole (Make 2)
Using brown yarn.
Repeat Inner Sole exactly.
Do NOT fasten off after Round 4.
The outer sole becomes the visible underside of the boot.
🥾 Foot Section
Continue from outer sole.
R5–8: sc around (44)
The sole should begin curving upward naturally.
👣 Western Toe Shaping
R9: sc 14, dec ×8, sc 14 (36)
R10: sc around (36)
R11: sc 12, dec ×6, sc 12 (30)
R12: sc around (30)
Lightly stuff toe only.
Shape front into soft western point.
🟫 Sculpted Cowboy Heel
The heel is constructed separately to create the raised western boot heel.
Mark center back 12 stitches.
Heel Rows
Row 1: sc 12, turn
Row 2: dec, sc 8, dec (10), turn
Row 3: sc 10, turn
Row 4: dec, sc 6, dec (8), turn
Row 5: sc 8, turn
Row 6: dec, sc 4, dec (6)
Do not fasten off.
🧱 Heel Block
Fold heel downward.
Work evenly around heel edges:
R1: 18 sc around heel block
R2–5: sc around (18)
Stuff firmly.
Flatten bottom of heel slightly.
The heel should now visibly protrude from sole like a real cowboy boot heel.
👢 Joining the Second Sole
Place inner sole beneath boot.
Wrong sides together.
Using brown yarn:
Work sc through BOTH soles all around edge.
This creates:
- realistic sole thickness
- enclosed heel structure
- clean underside
- strong standing base
Add thin foam or felt between soles if desired.
🤎 Lower Boot Body
R13–15: sc around (30)
The ankle area should remain narrow and fitted.
⬆️ Shaft Expansion
Switch to cream yarn.
R16: (4 sc, inc) ×6 (36)
R17–22: sc around (36)
Insert rolled mesh or flexible plastic support inside shaft now.
💙 Stripe Pattern
Maintain 36 stitches throughout shaft.
Stripe Sequence
- Brown: 3 rounds
- Cream: 5 rounds
- Teal: 3 rounds
- Cream: 5 rounds
- Brown: 3 rounds
- Cream: 5 rounds
The stripes should remain perfectly level.
🤠 Western Overlay Panels
Using brown yarn.
These curved overlays create the decorative western stitching appearance.
Make 2 per boot.
Ch 18
Row 1: sc across (17)
Rows 2–8: sc across
Lower Curve
Row 9: dec, sc 13, dec
Row 10: dec, sc 11, dec
FO.
Curve gently while sewing.
Attach beginning near ankle and sweep upward in curved western shape.
🔝 Shaped Boot Opening
Using teal yarn.
R1: sc around
R2:
sc to front center,
dec,
sc to side,
dec,
sc to end
R3: sc around
This creates the curved western dip at top edge.
🔗 Pull Tabs (Make 4)
Using brown yarn.
Ch 11
Rows 1–8: sc across (10)
FO.
Fold into loops.
Attach two tabs per boot slightly inside top edge.
The tabs should stand upright naturally.
🧩 Side Seams
Using brown yarn:
Surface crochet vertical lines from heel to top edge on both outer sides.
This creates the clean boot panel seams visible in classic western boots.
✨ Final Shaping
- Shape toe into gentle point
- Slightly flare top opening outward
- Keep shaft tall and cylindrical
- Flatten sole evenly
- Angle heel slightly backward
- Steam lightly if needed
- Ensure overlays mirror each other
The finished boots should stand independently with crisp western structure 🤠💙
🌵 Finished Cowboy Boots
These crochet cowboy boots combine realistic western shaping with cozy handmade texture. The layered sole construction, sculpted heel, tall reinforced shaft, curved overlays, bold stripe pattern, and structured pull tabs create a striking decorative piece that feels both rustic and modern.
Whether displayed on a shelf, used in western-themed décor, or gifted to a crochet lover, these boots bring handcrafted country charm to any space 🤎🧶