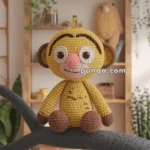
Bounce into the world of crochet with this Amigurumi Tigger pattern! 🐯✨ With his signature stripes, springy tail, and boundless energy, this design captures the playful charm of the beloved Winnie the Pooh character in yarn form. Whether you’re crafting for a Disney fan, a themed décor piece, or simply love character-inspired amigurumi, this FREE pattern is a delightful addition to your collection.
Designed for intermediate crocheters, this pattern allows for customization in stripe placement, tail length, and even tiny accessories to enhance Tigger’s personality. Choose classic orange and black hues for an authentic look or experiment with fun colors for a whimsical twist! Whether displayed alongside Pooh and friends or gifted to a fellow crochet enthusiast, this amigurumi Tigger is sure to bring smiles. Grab your hook, select your favorite yarn, and let’s bring this bouncy tiger to life—one stitch at a time! 🧶✨
🐯 Amigurumi Tigger Crochet Pattern
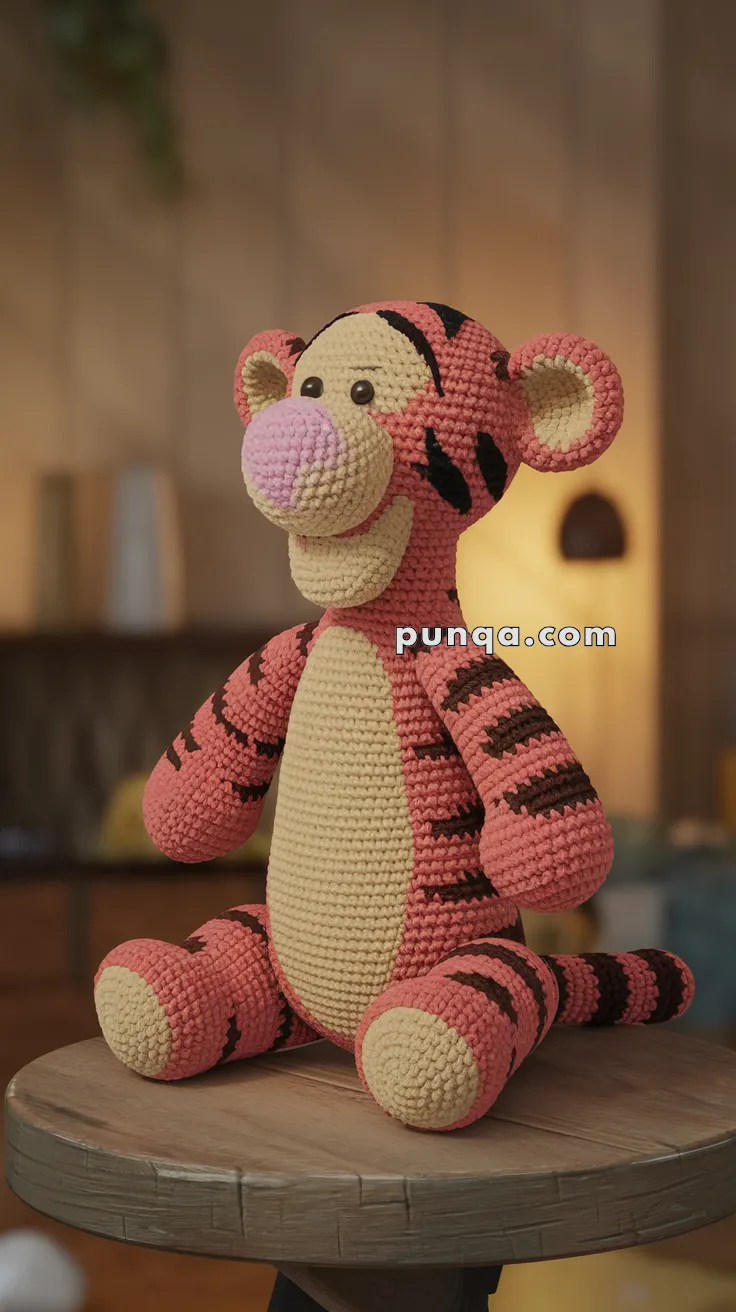
If there’s one character who’s always full of bounce and fun, it’s Tigger! With his cheerful stripes, pink snout, and curled tail, this handmade amigurumi Tigger will bring smiles to kids and adults alike. Perfect for any Winnie the Pooh fan, this project is both playful and rewarding to make. Let’s hop right in!
✨ Skill Level
Intermediate to Advanced
Techniques include:
- shaping
- surface crochet
- embroidery
- layered muzzle construction
- sculpted assembly
- stripe placement
📏 Finished Size
Approx. 35–38 cm (14–15 inches) seated
Using worsted-weight yarn and a 3.0–3.25 mm hook.
🧶 Yarn Requirements
Coral Orange Yarn
Approx. 160 g
Used for:
- head
- body
- limbs
- ears
- tail
Cream / Light Beige Yarn
Approx. 95 g
Used for:
- muzzle
- chin
- belly
- paw pads
- inner ears
Soft Pink Yarn
Approx. 30 g
Used for:
- nose
Dark Brown or Black Yarn
Approx. 25 g
Used for:
- stripes
- brows
- facial embroidery
🪡 Supplies
- 3.0–3.25 mm crochet hook
- 10–12 mm safety eyes
- Polyester stuffing
- Yarn needle
- Stitch markers
- Scissors
🔤 Abbreviations (US Terms)
- MR – magic ring
- sc – single crochet
- inc – increase
- dec – invisible decrease
- sl st – slip stitch
- ch – chain
- FO – fasten off
Work in continuous rounds unless noted.
🧠 Head
The head is tall and oval with full cheeks and a narrower forehead.
With Coral Orange Yarn
R1
MR 6 sc (6)
R2
inc x6 (12)
R3
(sc, inc) x6 (18)
R4
(2 sc, inc) x6 (24)
R5
(3 sc, inc) x6 (30)
R6
(4 sc, inc) x6 (36)
R7
(5 sc, inc) x6 (42)
R8
(6 sc, inc) x6 (48)
R9
(7 sc, inc) x6 (54)
R10
(8 sc, inc) x6 (60)
R11–20
sc around (60)
Insert safety eyes between Rounds 12–13 with 7 stitches between them.
The eyes should sit low and close to the muzzle area.
Head Shaping
R21
(8 sc, dec) x6 (54)
R22
(7 sc, dec) x6 (48)
R23
(6 sc, dec) x6 (42)
Stuff very firmly.
R24
(5 sc, dec) x6 (36)
R25
(4 sc, dec) x6 (30)
R26
(3 sc, dec) x6 (24)
R27
(2 sc, dec) x6 (18)
R28
(sc, dec) x6 (12)
R29
dec x6 (6)
FO and close.
Shape cheeks outward gently.
🐽 Large Lower Muzzle
The muzzle is oversized, vertically long, and extends prominently from the face.
With Cream Yarn
R1
MR 6
R2
inc x6 (12)
R3
(sc, inc) x6 (18)
R4
(2 sc, inc) x6 (24)
R5
(3 sc, inc) x6 (30)
R6
(4 sc, inc) x6 (36)
R7–10
sc around (36)
R11
(4 sc, dec) x6 (30)
Stuff firmly through center.
FO leaving long tail.
Attach low on face so the lower edge forms the chin area.
The muzzle should project outward significantly.
🩷 Oversized Nose
The nose is large, rounded, and heavily protruding.
With Pink Yarn
R1
MR 6
R2
inc x6 (12)
R3
(sc, inc) x6 (18)
R4
(2 sc, inc) x6 (24)
R5
(3 sc, inc) x6 (30)
R6
(4 sc, inc) x6 (36)
R7–9
sc around (36)
R10
(4 sc, dec) x6 (30)
Stuff very firmly.
FO leaving long tail.
Sew centered onto upper muzzle.
The nose should extend far outward for the classic plush appearance.
👂 Ears (Make 2)
The ears are large, deeply rounded, and heavily cupped.
Outer Ear — Coral Orange
R1
MR 6
R2
inc x6 (12)
R3
(sc, inc) x6 (18)
R4
(2 sc, inc) x6 (24)
R5
(3 sc, inc) x6 (30)
R6
(4 sc, inc) x6 (36)
R7–8
sc around (36)
FO.
Inner Ear — Cream
R1
MR 6
R2
inc x6 (12)
R3
(sc, inc) x6 (18)
R4
(2 sc, inc) x6 (24)
R5
(3 sc, inc) x6 (30)
FO.
Sew cream insert inside orange ear.
Pinch lower base tightly before attaching.
Attach high on head angled outward.
😊 Face Details
Brows
Using dark brown yarn:
embroider thick curved brows above eyes.
Keep them short and soft.
Mouth
Using dark brown or black yarn:
embroider a thin curved smile beneath muzzle.
Keep the smile subtle.
🧍 Body
The torso is tall, narrow, and cylindrical.
With Coral Orange Yarn
R1
MR 6
R2
inc x6 (12)
R3
(sc, inc) x6 (18)
R4
(2 sc, inc) x6 (24)
R5
(3 sc, inc) x6 (30)
R6
(4 sc, inc) x6 (36)
R7
(5 sc, inc) x6 (42)
R8–26
sc around (42)
Stuff firmly.
The body should stay vertically elongated rather than round.
FO leaving tail.
🟨 Belly Panel
The belly panel is long, narrow, and softly rounded at both ends.
With Cream Yarn
Row 1
ch 14
Row 2
sc across (13)
Rows 3–34
ch 1, turn, sc across
FO.
Round corners while sewing.
Attach centered vertically from chest to lower belly.
💪 Arms (Make 2)
The arms are long, floppy, and slightly oversized near the paws.
Start With Cream Yarn
R1
MR 6
R2
inc x6 (12)
R3
(sc, inc) x6 (18)
R4–6
sc around (18)
Stuff paws firmly.
Switch to Coral Orange.
R7–30
sc around (18)
Stuff lightly above paw area.
Flatten top slightly before attaching.
The arms should hang naturally.
🦵 Legs (Make 2)
The legs are long with oversized rounded feet.
Start With Cream Yarn
R1
MR 6
R2
inc x6 (12)
R3
(sc, inc) x6 (18)
R4
(2 sc, inc) x6 (24)
R5
(3 sc, inc) x6 (30)
R6–8
sc around (30)
Stuff feet firmly.
Switch to Coral Orange.
R9–30
sc around (30)
Stuff lightly above ankle.
Flatten tops before attaching.
The legs should extend outward in seated pose.
🐾 Paw Shaping
To create oversized plush paws:
- stuff toe area firmly
- flatten sole slightly
- curve front upward gently
The feet should appear chunky and rounded.
🐅 Tail
The tail is thick, long, and softly curved.
With Coral Orange Yarn
R1
MR 6
R2
(sc, inc) x3 (9)
R3
(sc, inc) x4, sc 1 (13)
R4
(2 sc, inc) x4, sc 1 (17)
R5–34
sc around (17)
Stuff lightly.
FO leaving long tail.
Attach low on back and curve outward.
⚫ Stripe Placement
The stripes are soft rounded plush-style markings.
Using dark brown or black yarn:
surface crochet or embroider stripes.
Forehead
- 2 thick curved forehead stripes
Cheeks
- 2 stripes per side
Arms
- 3 rounded stripes per arm
Legs
- 3 rounded stripes per leg
Body
- 4 rounded side stripes
Tail
- alternating ring stripes
Avoid sharp pointed stripe ends.
🪡 Assembly
Step 1
Attach muzzle low on face.
Step 2
Attach oversized pink nose centered on muzzle.
Step 3
Attach ears high on head angled outward.
Step 4
Embroider brows and smile.
Step 5
Attach head firmly to body.
Step 6
Attach belly panel vertically centered.
Step 7
Sew arms slightly forward on body sides.
Step 8
Attach legs low and wide apart for seated pose.
Step 9
Attach tail low on back and curve gently outward.
✨ Final Shaping Tips
- Keep nose heavily stuffed
- Shape cheeks outward gently
- Allow arms to hang naturally
- Flatten foot bottoms slightly
- Keep torso tall and slim
- Curve tail outward softly
- Keep stripe edges rounded and plush-like
🌟 Finished Tiger Plush
Your finished tiger plush features:
- oversized protruding pink nose
- rounded cream muzzle and chin
- tall seated torso
- floppy elongated limbs
- chunky oversized paws
- large cupped ears
- thick striped tail
- rounded plush-style stripes
- cheerful cartoon-inspired expression
This cuddly striped tiger makes a wonderful handmade collectible, nursery decoration, or cozy gift for fans of playful woodland and storybook characters. 🐯🧶