✨ Skill Level
Intermediate
Includes cylindrical shaping, spike construction, separate eye spheres, structural neck shaping, and large shoe construction.
📏 Finished Size
Approx. 26–30 cm (10–12 in) tall
Using worsted weight yarn and a 3.0–3.5 mm hook.
🧶 Materials
Worsted weight yarn
-
Yellow – head, ears, nose, neck, arms
-
Red – shirt
-
Blue – shorts and shoes
-
White – eyes and sock trim
-
Black – embroidery
Supplies
🟡 Head (Tall Cylinder with Structured Spikes)
The head is straight and tall — not rounded at the top.
R1: MR 6 (6)
R2: inc ×6 (12)
R3: (1 sc, inc) ×6 (18)
R4: (2 sc, inc) ×6 (24)
R5: (3 sc, inc) ×6 (30)
R6: (4 sc, inc) ×6 (36)
R7: (5 sc, inc) ×6 (42)
R8–32: sc around (42)
Stuff very firmly to keep the sides straight and cylindrical.
🔺 Crown Spikes
Work directly into the open top edge.
(sc 3, ch 4, sl st in 2nd ch from hook, sc in next 2 ch, sl st into same base stitch) repeat around.
This creates taller, more defined spikes that resemble blocky crown points.
🔒 Closing the Top Under the Spikes
After completing all spikes:
-
Thread yarn tail onto needle.
-
Insert needle through the inner loops just below spike bases.
-
Pull tightly to gather closed.
-
Secure firmly and weave inside.
The spikes remain upright while the center closes flat beneath them.
👀 Eyes (Make 2 – Large Spheres)
The eyes are full round domes that protrude strongly.
R1: MR 6 (6)
R2: inc ×6 (12)
R3: (1 sc, inc) ×6 (18)
R4: (2 sc, inc) ×6 (24)
R5: (3 sc, inc) ×6 (30)
R6–8: sc around (30)
Insert safety eye between R5–6.
Lightly stuff.
R9: (3 sc, dec) ×6 (24)
R10: (2 sc, dec) ×6 (18)
R11: (1 sc, dec) ×6 (12)
R12: dec ×6 (6)
FO with long tail.
Sew eyes touching each other slightly, positioned mid-head.
👃 Nose (Long Cylindrical Shape)
The nose is longer than round.
R1: MR 6 (6)
R2: inc ×6 (12)
R3–7: sc around (12)
R8: (1 sc, dec) ×4 (8)
Lightly stuff.
FO and sew centered between eyes, extending outward prominently.
👂 Ears (Make 2)
Small and flat.
R1: MR 6 (6)
R2: (1 sc, inc) ×3 (9)
R3–4: sc around (9)
Flatten slightly and sew low on head sides, aligned with eye center.
🟡 Neck (Distinct and Structured)
The neck is visible and narrower than the head.
Attach yellow yarn to bottom of head.
R1: BLO sc around (42)
R2: (5 sc, dec) ×6 (36)
R3: (4 sc, dec) ×6 (30)
R4: (3 sc, dec) ×6 (24)
R5–8: sc around (24)
Stuff very firmly to prevent wobbling.
This creates a short but noticeable neck cylinder.
👕 Upper Body (Red Shirt)
Change to red.
R9–16: sc around (24)
Keep body straight — do not increase.
👖 Shorts (Blue)
Change to blue.
R17–21: sc around (24)
R22: (2 sc, dec) ×6 (18)
R23: (1 sc, dec) ×6 (12)
Stuff firmly.
FO.
💪 Arms (Make 2)
Hand (Yellow)
R1: MR 6 (6)
R2: inc ×6 (12)
R3–5: sc around (12)
Sleeve (Red)
Change to red.
R6–9: sc around (12)
Lightly stuff.
R10: (1 sc, dec) ×4 (8)
FO leaving tail.
Sew slightly forward and slightly angled outward.
👟 Legs (Make 2)
The shoes are large and rounded.
Shoe (Blue)
R1: MR 6 (6)
R2: inc ×6 (12)
R3: (1 sc, inc) ×6 (18)
R4: (2 sc, inc) ×6 (24)
R5: (3 sc, inc) ×6 (30)
R6–11: sc around (30)
Stuff very firmly to maintain round front.
Sock (White)
R12–13: sc around (30)
Leg (Yellow)
R14–20: sc around (30)
FO and stuff.
Sew at slight outward angle so feet point forward when sitting.
😀 Facial Embroidery
Keep expression minimal and flat.
🪡 Assembly Order
-
Sew eyes
-
Attach nose
-
Attach ears
-
Form and shape spikes
-
Sew head to neck
-
Attach arms
-
Attach legs
Ensure the doll sits naturally with legs extended forward.
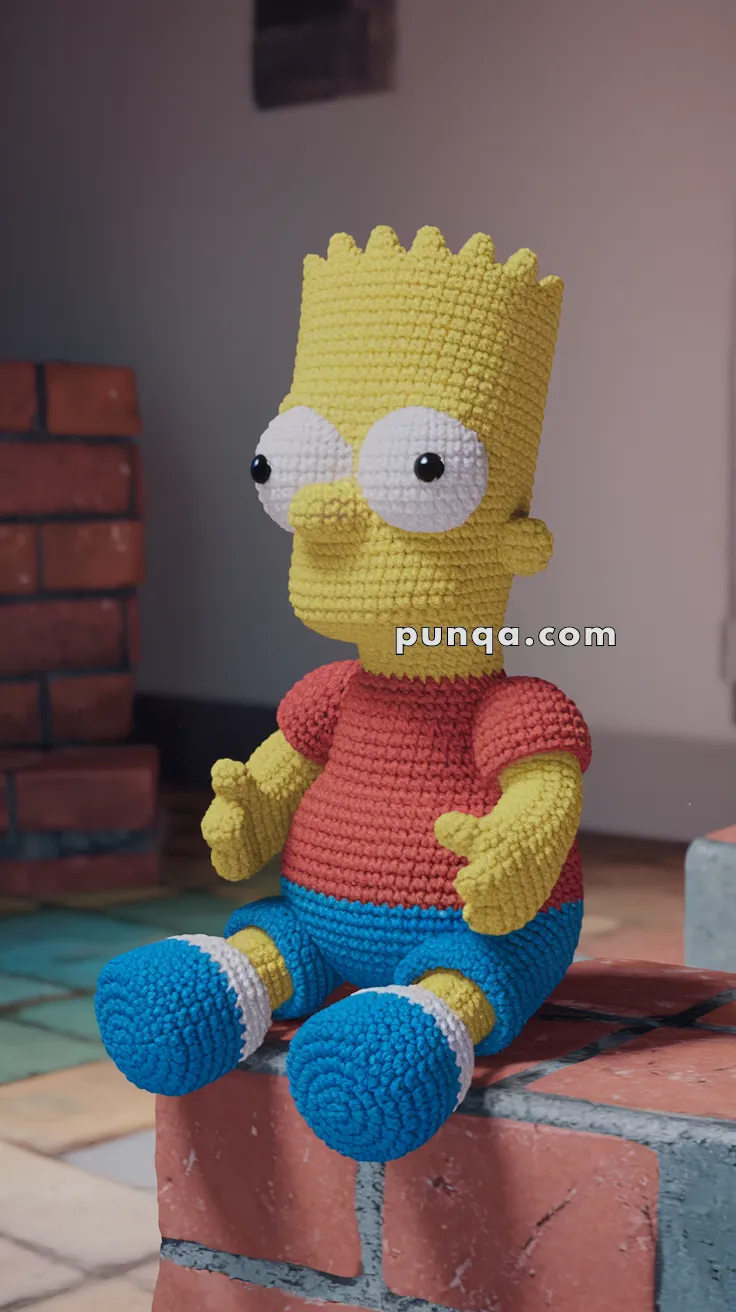
🎯 Final Shaping Notes
-
Head must remain tall and straight
-
Spikes should stand evenly spaced
-
Eyes must protrude prominently
-
Neck must be firm and visible
-
Shoes should appear oversized and rounded
With the corrected spike structure, properly closed crown, distinct neck shaping, extended cylindrical nose, and fuller rounded shoes, this pattern now reflects the accurate proportions and character silhouette.