✨ Skill Level
Intermediate
You’ll use:
- shaping with increases and decreases
- flat and 3D elements
- wire-supported legs
- structured assembly
📏 Finished Size
Approx. 18–20 cm (7–8 inches) tall
🧶 Yarn & Materials
- Charcoal / black yarn — 95–110 g (≈190–220 m)
- Light grey yarn — 18–22 g (≈35–45 m)
- Burgundy yarn — 2–3 g
Tools:
- 2.75–3 mm crochet hook
- 10–12 mm safety eyes or buttons
- Fiberfill stuffing
- Yarn needle & stitch marker
- Thin craft wire (for legs support)
🧵 Abbreviations (US Terms)
MR – magic ring
sc – single crochet
inc – increase
dec – invisible decrease
ch – chain
sl st – slip stitch
FO – fasten off
🖤 Body & Head (One Piece – Tall Shape)
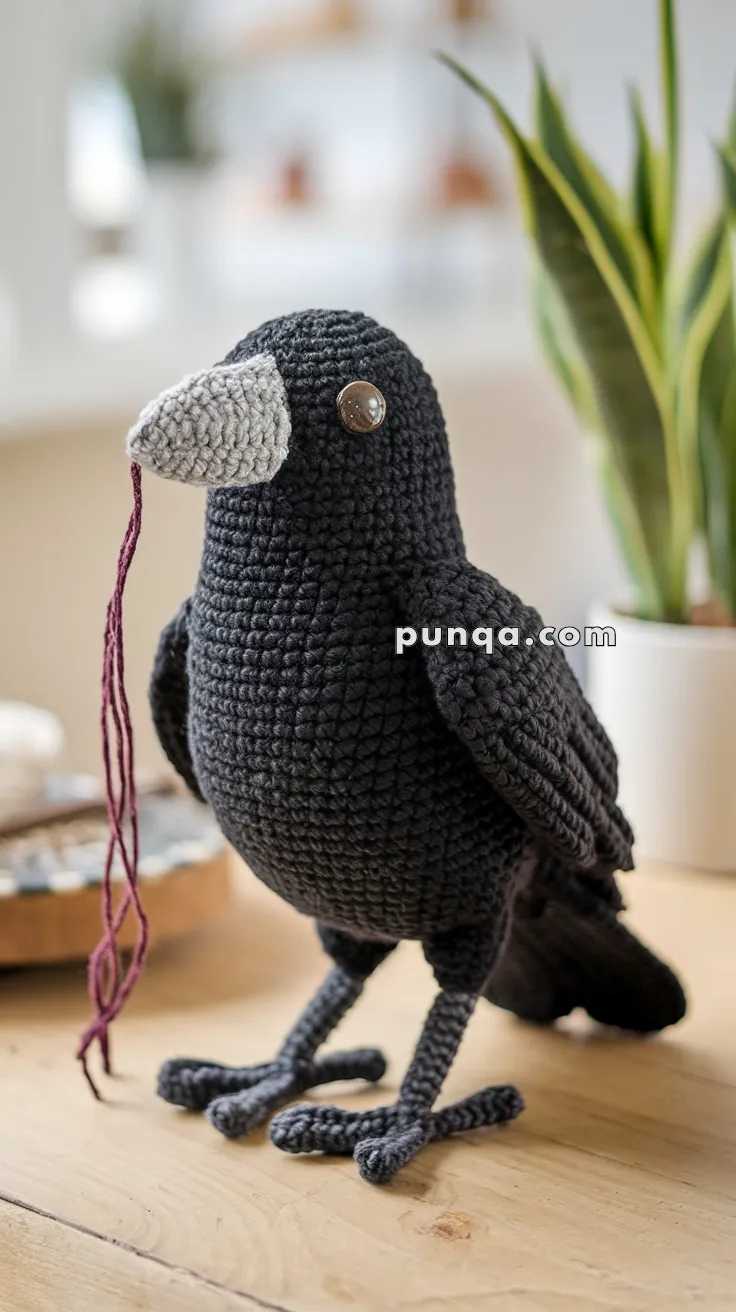
The crow’s form is elongated and slightly forward-leaning, not spherical.
R1: MR, 6 sc (6)
R2: inc ×6 (12)
R3: (1 sc, inc) ×6 (18)
R4: (2 sc, inc) ×6 (24)
R5: (3 sc, inc) ×6 (30)
R6: (4 sc, inc) ×6 (36)
R7–17: sc around (36)
👉 This creates a tall, smooth torso with a rounded chest
Insert eyes between R9–10, spaced moderately apart.
R18: (4 sc, dec) ×6 (30)
R19–20: sc around (30)
Begin stuffing firmly, shaping a full belly and upright posture
R21: (3 sc, dec) ×6 (24)
R22: (2 sc, dec) ×6 (18)
R23: (1 sc, dec) ×6 (12)
R24: dec ×6 (6)
FO and close neatly.
👃 Beak (Compact & Slightly Curved)
With light grey yarn:
R1: MR, 4 sc (4)
R2: (1 sc, inc) ×2 (6)
R3–4: sc around (6)
R5: (2 sc, inc) ×2 (8)
R6: sc around (8)
Lightly stuff base only.
👉 Shape gently downward when sewing to create a natural beak curve.
🪶 Wings (Layered & Folded Look)
Make 2
Ch 18
Row 1: sc across (17)
Row 2: ch 1, turn, sc across
Row 3: dec, sc 13, dec (15)
Row 4: sc across
Row 5: dec, sc 11, dec (13)
Row 6: sc across
Row 7: dec, sc 9, dec (11)
Row 8: sc across
Row 9: dec, sc 7, dec (9)
FO.
👉 Fold slightly before sewing to create a layered feather effect
🪶 Tail (Short & Full)
With charcoal yarn:
Ch 12
Row 1: sc across (11)
Row 2–6: sc across
FO.
👉 Fold lightly and attach low on the back for a compact tail shape
🦵 Legs (Firm & Slightly Angled)
Make 2
Ch 13
Sl st back along chain.
Insert thin wire.
👉 Legs should be slightly forward-leaning, not straight down.
🐾 Feet (Correct Structure & Thickness)
Each foot has 3 front toes and 1 rear toe, thicker and well-spread.
Front Toes (Make 6)
Ch 7
Sl st back
Back Toes (Make 2)
Ch 6
Sl st back
Foot Assembly
- Arrange 3 toes in a forward fan shape
- Attach 1 toe at the back
- Wrap yarn tightly at base to secure
- Insert leg wire through center
👉 Create a wide, flat base so the crow stands steadily
🧵 Assembly
- Sew beak centered slightly forward
- Attach wings high on sides, angled back
- Sew tail low at back
- Insert legs deep into body for stability
- Adjust toes to balance evenly
✨ Finishing Touches
🖤 Shape the chest slightly forward
🪶 Curve wings naturally along body
🦶 Adjust toes for stable standing
🌿 Tilt head slightly for personality
Optional:
- Attach burgundy yarn strands to the beak for a whimsical detail
🌲 Finished Crow
This elegant crow features a clean silhouette, sturdy stance, and softly sculpted details, making it a standout handmade piece. 🖤
Perfect for rustic décor, seasonal displays, or gifting, this charming bird brings quiet character and a hint of woodland magic to any space. 🪶