✨ Skill Level
🧶 Intermediate
This pattern includes:
• Color changes
• Basic shaping
• Sewing multiple pieces
• Creating a seated amigurumi posture
📏 Finished Size
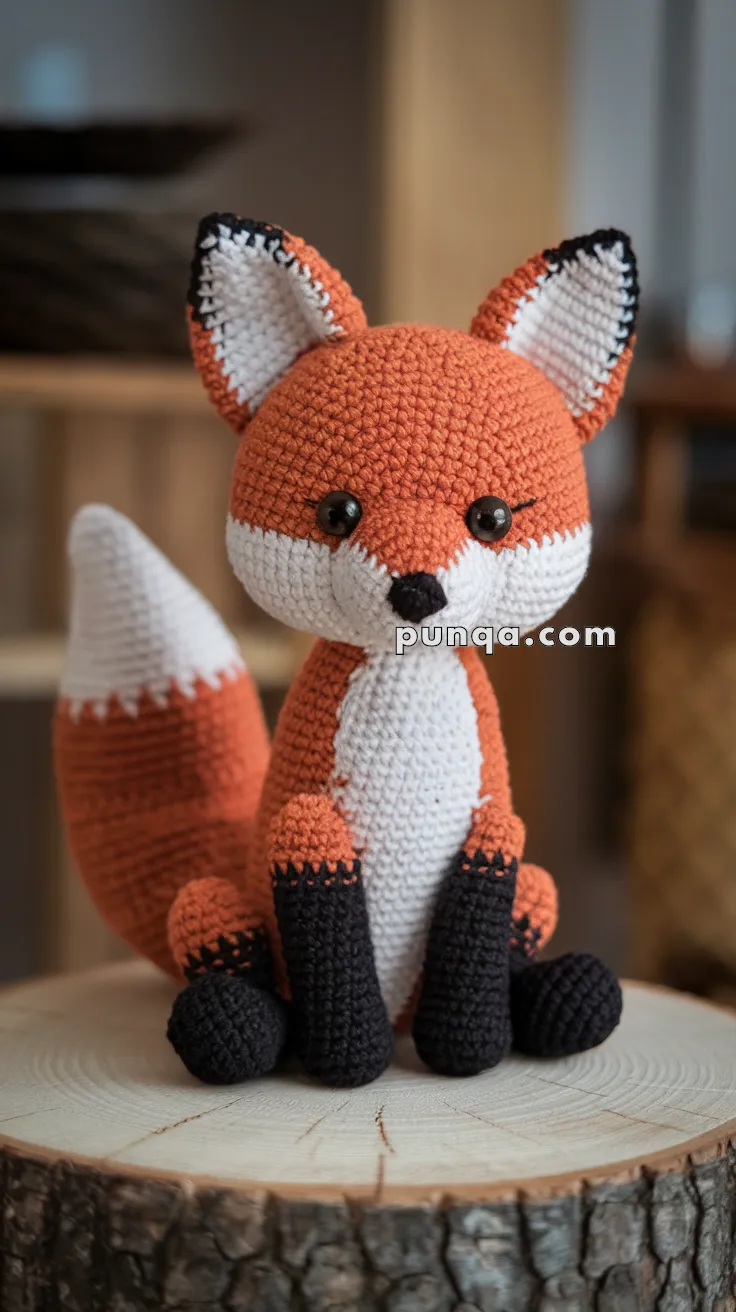
Approximately 9–10 inches (23–26 cm) tall when seated using DK or light worsted yarn and a 3.0 mm crochet hook.
🧵 Materials & Yarn Amount
🧡 Rusty orange yarn — approx. 140 g
Used for head crown, body, outer ears, upper legs, and most of the tail.
🤍 White yarn — approx. 95 g
Used for the large cheek mask, muzzle underside, belly panel, inner ears, and tail tip.
🖤 Black yarn — approx. 55 g
Used for nose, ear tips, and the fox’s long front and back paws.
Tools
🪝 3.0 mm crochet hook
👀 10–12 mm safety eyes
🧸 Polyester fiberfill stuffing
🪡 Yarn needle
📍 Stitch markers
✂️ Scissors
Crochet tightly so the stuffing does not show.
🔤 Abbreviations (US Terms)
MR – magic ring
sc – single crochet
inc – increase
dec – invisible decrease
sl st – slip stitch
ch – chain
FO – fasten off
Work in continuous rounds unless noted.
🧶 Pattern Instructions
🧠 Head (Large White Cheek Mask)
The fox’s face includes large white cheeks that rise halfway up the head and curve beneath the eyes.
Start with white yarn.
Rnd 1: MR 6 (6)
Rnd 2: inc ×6 (12)
Rnd 3: (1 sc, inc) ×6 (18)
Rnd 4: (2 sc, inc) ×6 (24)
Rnd 5: (3 sc, inc) ×6 (30)
Rnd 6: (4 sc, inc) ×6 (36)
At this stage the white section forms the large cheek mask.
Switch to orange yarn for the upper head.
Rnd 7: (5 sc, inc) ×6 (42)
Rnd 8: (6 sc, inc) ×6 (48)
Rnd 9–14: sc around (48)
Insert safety eyes between Rounds 11–12, about 8 stitches apart, sitting just above the white cheek line.
Rnd 15: (6 sc, dec) ×6 (42)
Rnd 16: sc around (42)
Rnd 17: (5 sc, dec) ×6 (36)
Begin stuffing firmly.
Rnd 18: (4 sc, dec) ×6 (30)
Rnd 19: (3 sc, dec) ×6 (24)
Rnd 20: (2 sc, dec) ×6 (18)
Rnd 21: (1 sc, dec) ×6 (12)
Rnd 22: dec ×6 (6)
FO and close.
🖤 Nose
Using black yarn
Rnd 1: MR 6
Rnd 2: (sc, inc) ×3 (9)
Rnd 3: sc around (9)
FO.
Sew to the center where the two white cheek sections meet.
🤍 Belly Panel
Using white yarn
Ch 14
Row 1: sc across (13), ch 1 turn
Row 2: inc, sc 11, inc (15)
Row 3: inc, sc 13, inc (17)
Rows 4–10: sc across (17)
FO.
This creates the fox’s tall chest patch.
🦊 Body
Using orange yarn
Rnd 1: MR 6 (6)
Rnd 2: inc ×6 (12)
Rnd 3: (1 sc, inc) ×6 (18)
Rnd 4: (2 sc, inc) ×6 (24)
Rnd 5: (3 sc, inc) ×6 (30)
Rnd 6: (4 sc, inc) ×6 (36)
Rnd 7: (5 sc, inc) ×6 (42)
Rnd 8–15: sc around (42)
Rnd 16: (5 sc, dec) ×6 (36)
Rnd 17: sc around (36)
Rnd 18: (4 sc, dec) ×6 (30)
Rnd 19: sc around (30)
Rnd 20: (3 sc, dec) ×6 (24)
Stuff firmly but keep the base slightly soft.
FO leaving a long tail.
Sew the white belly panel to the front of the body.
🐾 Front Legs (Long Black Stockings)
Using black yarn
Rnd 1: MR 6
Rnd 2: inc ×6 (12)
Rnd 3–10: sc around (12)
Switch to orange yarn
Rnd 11–14: sc around (12)
Light stuffing.
FO leaving tail for sewing.
🐾 Back Legs
Using black yarn
Rnd 1: MR 6
Rnd 2: inc ×6 (12)
Rnd 3–6: sc around (12)
Switch to orange yarn
Rnd 7–12: sc around (12)
Stuff lightly and flatten slightly.
FO.
🦊 Tail
Start with white yarn
Rnd 1: MR 6
Rnd 2: inc ×6 (12)
Rnd 3–5: sc around (12)
Switch to orange yarn
Rnd 6: (sc, inc) ×6 (18)
Rnd 7–18: sc around (18)
Lightly stuff.
FO.
The tail should curve naturally behind the fox.
👂 Ears (Make 2)
Outer Ear
Using orange yarn
Rnd 1: MR 6
Rnd 2: (sc, inc) ×3 (9)
Rnd 3: (2 sc, inc) ×3 (12)
Rnd 4: (3 sc, inc) ×3 (15)
Rnd 5–7: sc around (15)
FO.
Inner Ear
Using white yarn
Rnd 1: MR 6
Rnd 2: inc ×6 (12)
Rnd 3–4: sc around (12)
FO.
Sew inner ear inside the outer ear.
Add a small black tip stitch at the ear point.
🧩 Assembly
Attach the head to the body.
Sew the ears on top of the head angled slightly outward.
Attach front legs beneath the head seam so they extend downward.
Attach back legs slightly outward to stabilize the sitting position.
Sew the tail to the lower back so it curves beside the body.
✨ Finishing Touches
🧸 Adjust stuffing so the fox sits upright.
🦊 Gently shape the cheeks so the white mask appears rounded.
👀 Add small embroidered eyelashes for extra character.
🪶 Curve the tail slightly along the body.
🌲 A Cozy Woodland Friend
With its bright orange coat, large snowy cheeks, tall ears, and fluffy white-tipped tail, this fox captures the gentle charm of woodland animals. Its balanced seated pose and sweet expression make it perfect for nursery décor, woodland-themed displays, or thoughtful handmade gifts.
Whether perched on a shelf or gifted to a fox lover, this little fox brings warmth, personality, and a touch of forest magic to every stitch. 🦊🧶